Morningstar MC6 MkII User Manual Download Page 7

2.  

c.  

3.  

a.  
b.  

4.  

a.  
b.  

Press ‘ToggName’ to edit your Switch’s short name in toggle position 2

Input your desired name

Use the Left and Right switches to move through the name’s characters
Use the Up and Down switches to scroll through characters and select your desired character

Save the name

Press switch E to save and exit
Press switch D to exit without saving

Toggle Mode

Toggle Mode allows each switch on your Morningstar MIDI controller to send different MIDI messages with each alternate press. This allows you 
to control your pedals and devices in useful and creative ways.

Toggle Mode lets you separate your MIDI messages into 2 different groups – Position 1 and Position 2.

Messages in Position 1 will be sent the first time you press the switch, and messages in position 2 will be sent the second time you press the 
switch. With each press you will alternate between sending messages in Position 1 and Position 2.

Using the Device Editor

On the top left of the Device Editor interface, there is a button labelled Toggle Mode On/Off (just below the Short name field). Switch it on to 
enable Toggle Mode.

Each message on the Editor also has a Position setting – Pos 1, Pos 2 or Both.

When Pos 1 is selected, the message will only be sent when the preset is in toggle position 1. When Pos 2 is selected, the message will only be 
sent when the preset is in toggle position 2. When set to Both, the message will be sent regardless of which toggle position the preset is in.

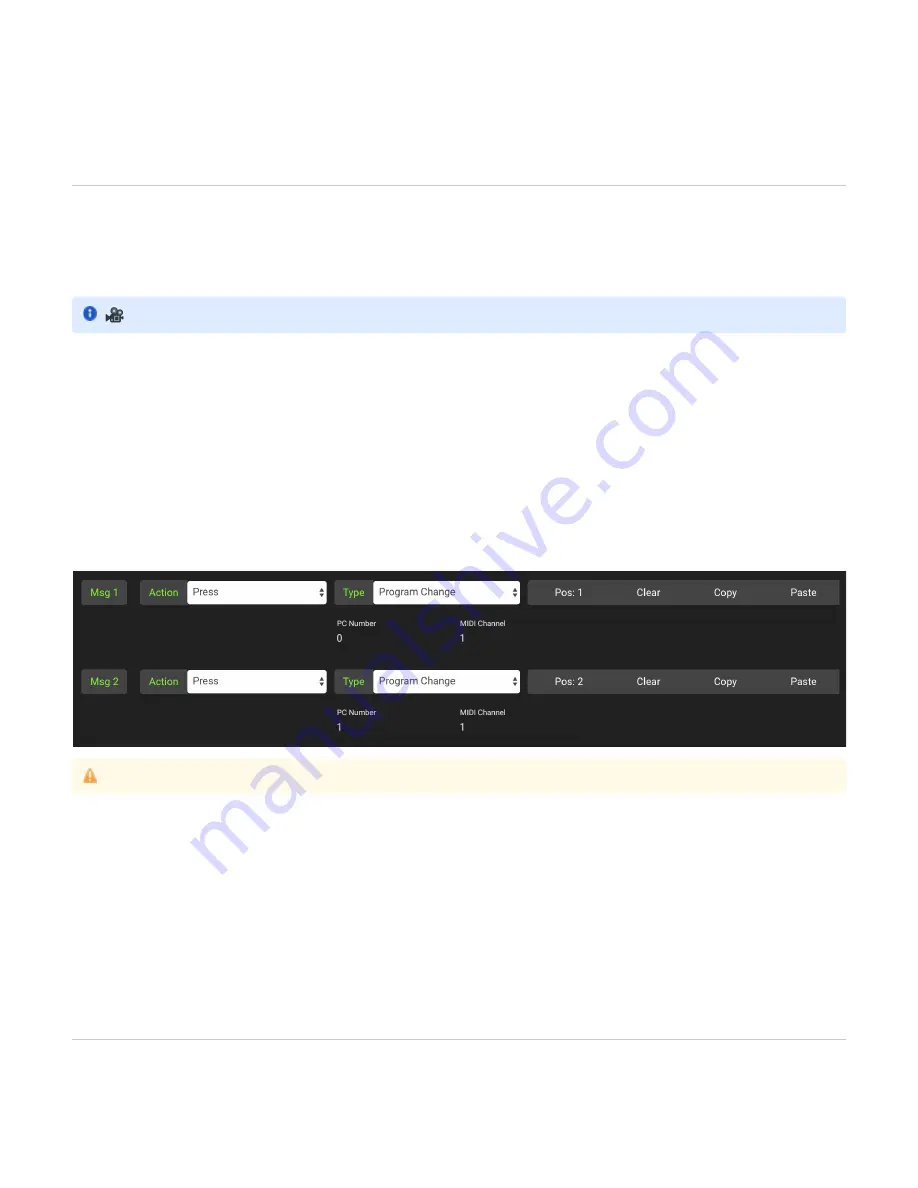
In the example below, we have programmed Msg1 to be a PC message (PC#0) in Pos 1, and Msg2 to be a PC Message (PC#1) in Pos 2. With 
each alternate press, PC#0 and PC#1 will be sent.

Toggle Name
The Toggle Name is the switch name shown when a preset is in toggle position 2. 
With each alternate press, the Short Name and Toggle Name will be displayed.

Enabling Toggle Mode on the Controller Itself
Press [D+F] > Select Preset > Press [NextPg] till you see ‘TglMode’ > Press to enable/disable Toggle Mode

When editing individual messages, there will be an option to select the toggle position for the message you are editing. Choose Position 1, 2 or 
Both.

Name Blink
To show that a preset is in position 2, you can also make a switch name blink. if the Blink option is enabled, the Toggle Name will blink when the 
preset is in position 2.

Bank Settings

 Watch 

 for a demo and tutorial on how to use Toggle Mode

https://youtu.be/VEr0TB58EgA

If you have not enabled Toggle Mode for a particular switch, leave toggle position at 'Both' for all MIDI messages.

Summary of Contents for MC6 MkII

Page 1: ...s 11 Expression Pedals 11 1 Connecting an Expression Pedal 11 2 Programming an Expression Pedal Preset 11 3 Select Expression Messages to Send or Omit 12 External Aux Switches 13 TRS MIDI Outputs 1 4...

Page 2: ...owing ways 9V DC centre negative Power Supply Connect a 9VDC centre negative power supply to the power input of the MC6 Phantom Power 9 12v AC or DC Connect a 7 pin MIDI cable to the MIDI Out port of...

Page 3: ...ve MIDI messages only PC CC Note and MIDI Clock via USB and relay them out through its 5 pin and 1 4 inch MIDI outputs 9VDC Where the MC6 receives 9v DC centre negative power EXP 1 and 2 Omniports Omn...

Page 4: ...witches B C And to bank down press A B Holding down either of these switch combinations will continuously scroll up down through the banks Each bank has 2 pages The first 6 switch presets A to F are a...

Page 5: ...n perform multiple functions For example you can map a message to a Press action and a message to a Release action When the switch is pressed a CC 1 CC 2 CC 1 message will be sent and when the switch...

Page 6: ...e sent with the first press of a switch and messages in Position 2 will be sent upon the second press of a switch Messages that get sent will alternate between positions 1 and 2 with each press Messag...

Page 7: ...osition setting Pos 1 Pos 2 or Both When Pos 1 is selected the message will only be sent when the preset is in toggle position 1 When Pos 2 is selected the message will only be sent when the preset is...

Page 8: ...ion pedal check to make sure that the Exp port you are using is set to accept an expression pedal You can access this menu by going to the Press D F Global Config Menu ExpInpt Press switch A or D unti...

Page 9: ...itches for extra control Under your Global Config settings you can configure to behave as fully programmable switches or Fixed Switches to control banking up down and page toggle Press D F GblConfg Ex...

Page 10: ...IDI configurations available MIDI Out Standard Send MIDI via the Tip and the Ring is powered MIDI Out Tip Active Send MIDI via the Tip and Ring is unpowered floating MIDI Out Ring Active Send MIDI via...

Page 11: ...C6 can receive and respond to MIDI messages from other MIDI controllers Press Up or Down to select your desired MIDI receive channel Reset Factory Reset To perform a factory reset hold down for 2 seco...

Page 12: ...t out through all MIDI outputs RmbTog Remember Preset Toggle States Across Banks Determine whether preset toggle states are remembered across banks even after you have changed banks If ON your presets...

Page 13: ...puter via Your controller will automatically be recognised by the Updater USB Click on the Upload button and open the new firmware hex file from your downloads folder The firmware update will begin au...

Page 14: ...Function CC Value Bank Up 0 any Bank Down 1 any Set Toggle All 2 127 Set Toggle Individual 2 0 Preset A 1 Preset B 2 Preset C 11 Preset L Clear Toggle All 3 127 Clear Toggle Individual 3 0 Preset A 1...

Page 15: ...Set MIDI BPM LSB 7 bits 6 0 127 Engage Expression 1 51 0 127 Engage Expression 2 52 0 127...

Reviews: