5
4
OPERATING INSTRUCTIONS
OPERATING INSTRUCTIONS
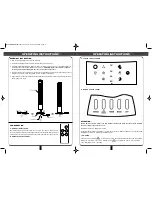
ASSEMBLY INSTRUCTION
1. Remove all packaging items from the tower fan.
2. Install the front support base and rear support base as a whole unit.
3. Follow the installation diagram: guide the power cord through the inner hole of the support base (2).
Install the base to the bottom spindle of the product.
CAUTIoN: Ensure the spindle is aligned
vertically and secured tightly into the inner hole of the support base.
4. Insert the two pieces of butterfly screws into the corresponding screw holes (3) and rotate it securely
into place. The base is now assembled to the main body successfully.
5. Align the power cord to the card slot of the support base. Assembly is now complete and your tower
fan is ready to be used.
C. CoNTRoL DISPLAy PANEL
D. BUTToN CoNTRoL PANEL
ATTENTION:
Before switch to power, please read this manual carefully and make sure the voltage matches
the unit’s rating request before use it.
(Rated Electric Power: 220-240V~; 50Hz)
Connect Product to power
(
220-240V~
),
if the machine Issues a “Bi Bi” sound power
,
all functions and
display do not work, the machine is in standby mode.
1. oN/SPEED
At this time, press button to turn on the unit first. Then other buttons/functions can be available.
During the operation, if the unit is working, press can adjust the speed. It will work as:
:
Low
→
Mid
→
High
→
Low
,
repeating.
FAN OPERATION
A. BATTERy INSTALLATIoN
One button CR2032 3V battery has been used in our remote control. Please
insert the battery to remote control tightly based on the direction of the polarity. If
it does not use for a long time, please pull the battery out from the remote control.
B. REMoTE CoNTRoL PANEL
1H
2H
4H
8H
MFT-AC46ED(IM)(IM)270114_Layout 1 2/11/14 4:39 PM Page 3


