iTeach Spider
UPDATED AS OF: 12/09/2021
1 of 6
INSTRUCCIONES DE ENSEMBLAJE
NO LA TIRE
INSTRUCTIONS DE MONTAGE
NE PAS JETER
ASSEMBLY INSTRUCTIONS
DO NOT THROW AWAY!
Page 1: ...iTeach Spider UPDATED AS OF 12 09 2021 1 of 6 INSTRUCCIONESDEENSEMBLAJE NO LA TIRE INSTRUCTIONSDEMONTAGE NE PAS JETER ASSEMBLYINSTRUCTIONS DO NOT THROW AWAY ...
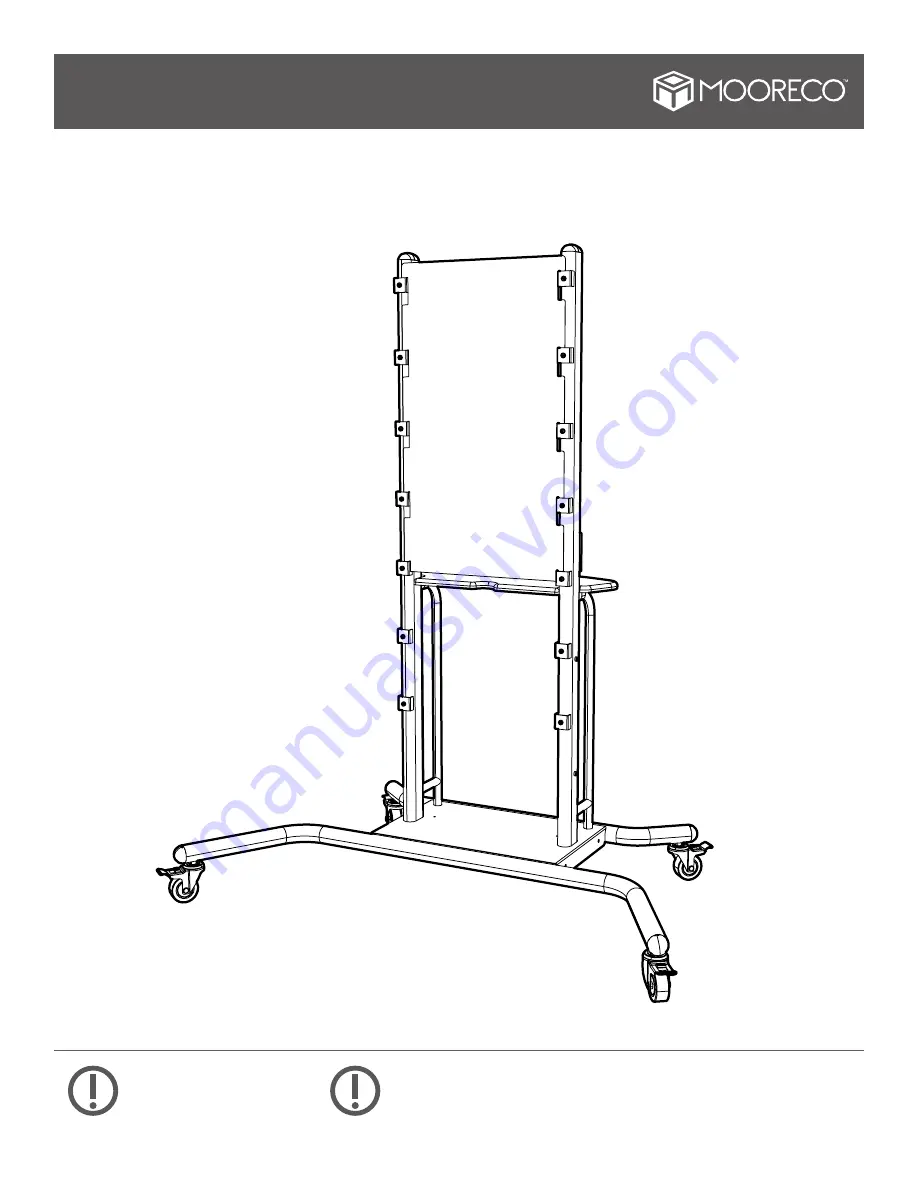
Page 2: ...Hardware P1 Base P2 Shelf P3 Upright P4 Cover Panel P5 Casters P6 Bracket x1 x1 x2 x1 x4 x2 A M8 x 25mm Screw B M6 x 15mm Screw C M6 x 35mm Screw D 3 16 Wood Screws E Washer F 4 Allen Wrench G 5 Allen Wrench H 17 Wrench x6 x6 x2 x4 x6 x1 x1 x1 ...
Page 3: ...y require multiple persons in order to properly assemble If you have questions regarding assembly contact the manufacturer before continuing Damage due to incorrect assembly may not be covered by warranty Do not use product unless all screws are tight Check all screws for tightness at least every six months If parts are broken missing damaged or worn stop use of the product until repairs are made ...
Page 4: ...09 2021 4 of 6 STEP2 Flip the base P1 upside down and screw in the four 4 casters P5 using the 17 wrench H Screw each upright P3 into the bade with six 6 A screws and 6 Washers E Tighten using the 5 Allen Wrench G P1 P5 A P3 ...
Page 5: ...STEP3 UPDATED AS OF 12 09 2021 5 of 6 Use two 2 Brackets P6 to mount the shelf P2 to the frame with four 4 D screws P2 P6 Close Up ...
Page 6: ...NSTRUCTION P4 B Slide the cover panel P4 into the notches in the uprights to hide wires based on planned TV mounting height STEP5 Tighten four 4 M6x 15mm screws B with the 4 allen wrench to secure the cover panel Use these to lock the mount in place once installed ...