Page 1 of 4: C31885 Rev B 10.03
1 Scope
These application notes are a guide to applying the G123-815
Buffer Amplifier. They tell you how to install, connect and
adjust the Buffer Amplifier. They do not tell you how to design
the closed loop system in which it is used.
2 Description
The G123-815 Buffer Amplifier interfaces between standard
PLC analogue input and output modules, on one side, and
a position transducer and a Moog valve, on the other.
It simplifies the use of a PLC in closing position loops.
The Buffer Amplifier solves the common problem of the
±10V PLC output being incompatible with the valve drive
requirements. It also provides digital noise filtering for the valve
signal and noise filtering for the position transducer signal.
For a more detailed description, see Moog brochure
G123-815E01.01.
3 Installation
3.1 Placement
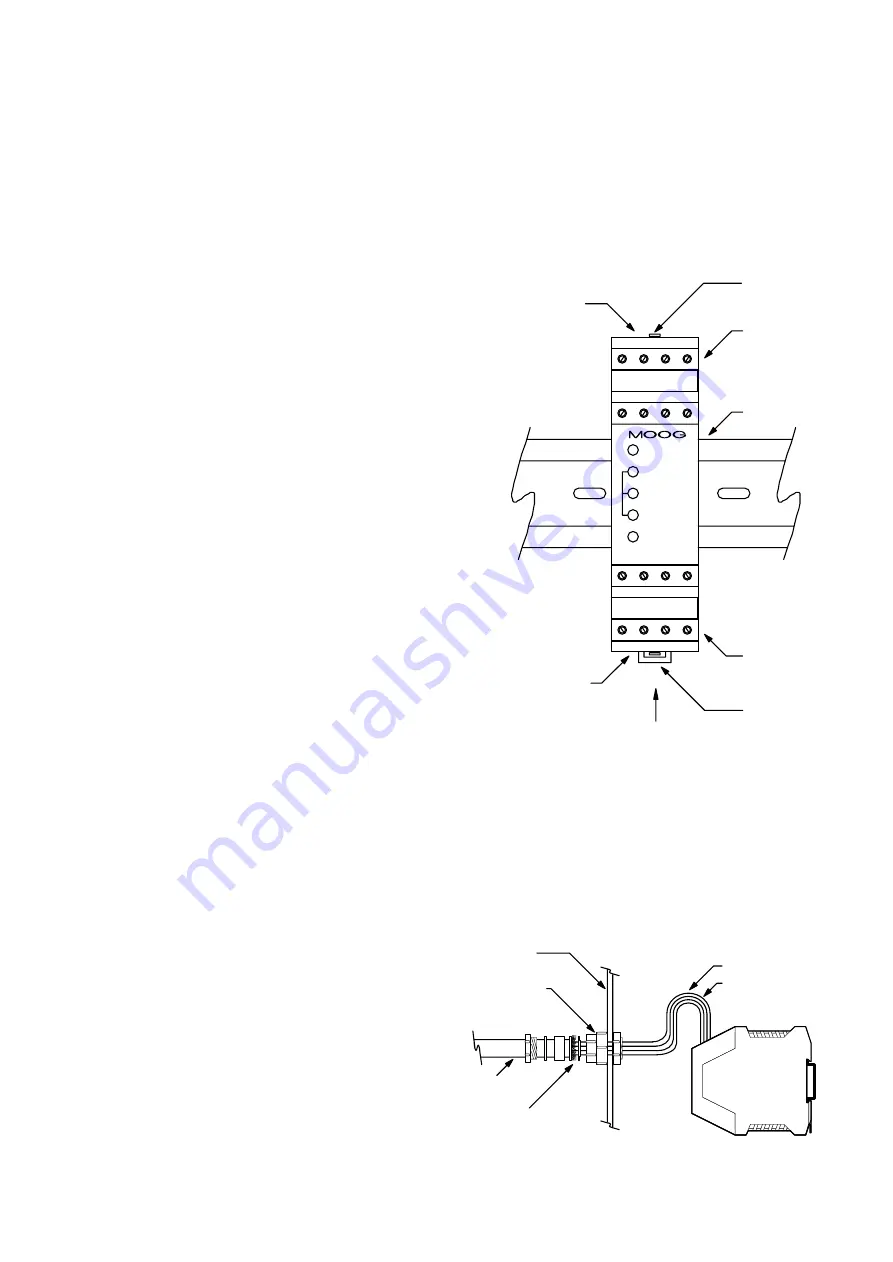
A horizontal DIN rail, mounted on the vertical rear surface of
an industrial steel enclosure, is the intended method of
mounting. The rail release clip of the G123-815 should face
down, so the front panel and terminal identifications are
readable and so the internal electronics receive a cooling
airflow. An important consideration for the placement of the
module is electro magnetic interference (EMI) from other
equipment in the enclosure. For instance, VF and AC servo
drives can produce high levels of EMI. Always check the EMC
compliance of other equipment before placing the G123-815
close by.
3.2 Cooling
Vents in the top and bottom sides of the G123-815 case
provide cooling for the electronics inside. These vents should
be left clear. It is important to ensure that equipment below
does not produce hot exhaust air that heats up the G123-815.
Buffer Amplifier
G123-815
3.3 Wiring
The use of crimp “boot lace ferrules” is recommended for the
screw terminals. Allow sufficient cable length so the circuit
card can be withdrawn from its case with the wires still
connected. This enables switch changes on the circuit card to
be made while the card is still connected and operating.
An extra 100mm, for cables going outside the enclosure,
as well as wires connecting to adjacent DIN rail units, is
adequate.
Application Notes
probe
Iv
valve
Vv
0V
BUFFER AMP
Bottom
vents
Cooling
airflow
release
Screw
terminals
Top vents
Screw
terminals
DIN rail
9 - 16
1 - 8
clip
Cover
release
tab (2)
DIN rail
1
2
3
4
9
10
11
12
5
6
7
8
13
14
15
16
cable gland
100mm Loop
Wires
Enclosure
Radial screen
termination
Cable
Grounded EMI
Preferred Wiring
m


