background image

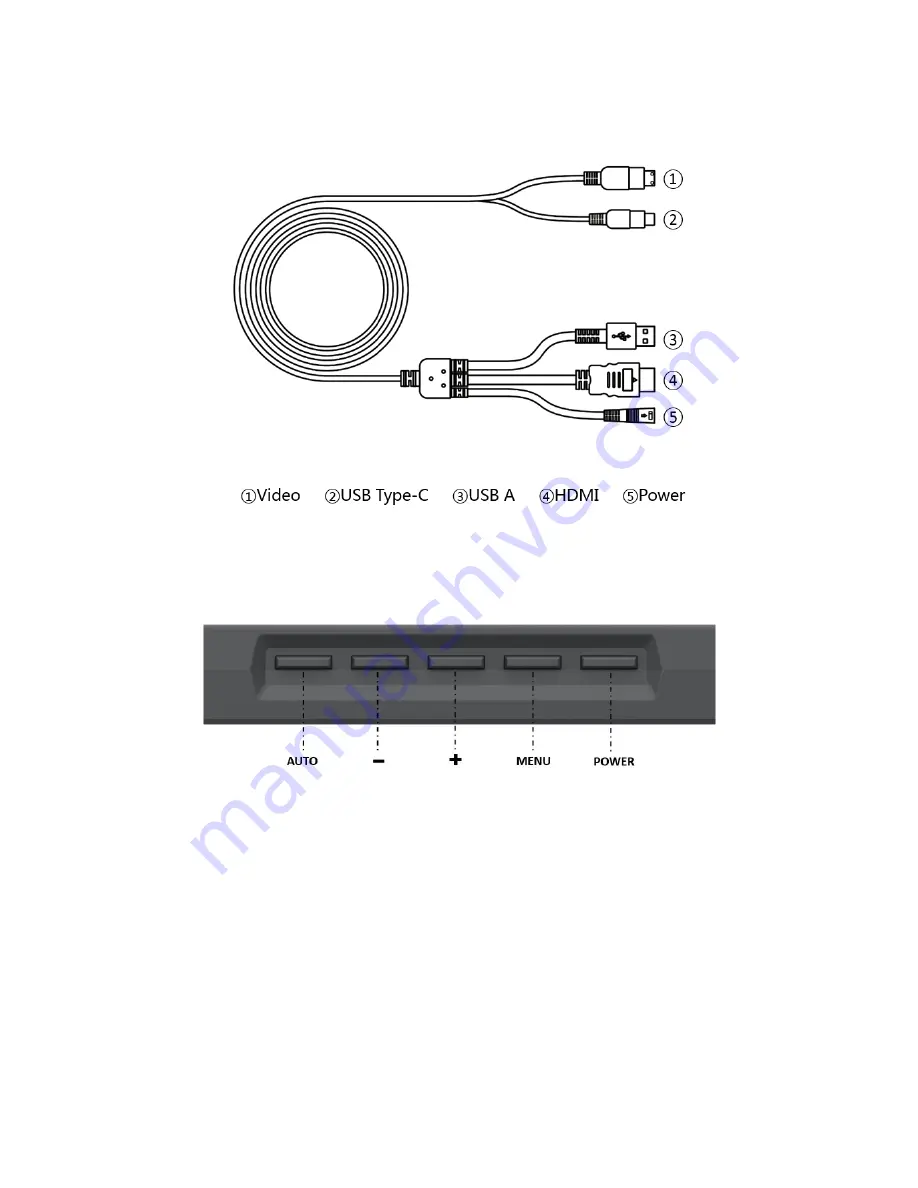
Integrated Cable 


Controls 


AUTO: When the OSD menu is not displayed, press the AUTO button to automatically 

adjust the image. When the OSD menu is displayed, press the AUTO button to back 
out one menu level or to close the OSD menu if at the top level. If editing an entry, 
press the AUTO button to cancel any changes made. 

-: 

When the OSD menu is displayed, press the - button to move the highlight to the 
left or down. When an option is being edited in the OSD menu system, press the - 
button to decrease the value. 

Summary of Contents for 21826

Page 1: ...MONOPRICE MP USB Powered 15 6 IPS FHD Graphic Pen Display Tablet P N 21826 User s Manual...

Page 2: ...ERVIEW 7 Front Panel 7 Rear and Side Panels 8 Pen 8 Integrated Cable 9 Controls 9 ASSEMBLING THE AC POWER ADAPTER 10 ATTACHING THE STAND 11 CHARGING THE PEN 11 REPLACING THE PEN NIB 12 SOFTWARE INSTAL...

Page 3: ...18 Picture Menu 19 Display Menu 19 Color Menu 20 Advance Menu 21 Input Menu 21 Audio Menu 21 Other Menu 21 TECHNICAL SUPPORT 22 SPECIFICATIONS 23 REGULATORY COMPLIANCE 24 Notice for FCC 24 Notice for...

Page 4: ...Do not place it in on or near heat sources such as a fireplace stove radiator etc Do not leave it in direct sunlight This device ventilates excessive heat through the slots and openings in the case D...

Page 5: ...ations for electronic waste Charge the battery in the pen before first use and at least once every three months When storing the pen ensure that there is no pressure on the tip Pressure on the tip wil...

Page 6: ...ive us an opportunity to make it right You can contact a Monoprice Customer Service representative through the Live Chat link on our website www monoprice com during normal business hours Mon Fri 5am...

Page 7: ...REQUIREMENTS Computer running Windows 7 or later or Mac OS X 10 11 or later Available USB port HDMI video output Optical disc drive or internet connection for driver installation PRODUCT OVERVIEW Fro...

Page 8: ...8 Rear and Side Panels Pen...

Page 9: ...ayed press the AUTO button to back out one menu level or to close the OSD menu if at the top level If editing an entry press the AUTO button to cancel any changes made When the OSD menu is displayed p...

Page 10: ...bmenu or to select an entry for editing While editing an OSD menu entry press the MENU button to save any changes made POWER Press the POWER button to the display on or off ASSEMBLING THE AC POWER ADA...

Page 11: ...ery that gives up to 350 hours of continuous operation The pen should be fully charged before first use and should be charged at least once every three months to keep the battery fresh and capable of...

Page 12: ...install the driver from the included CD or go to www monoprice com and download the latest version of the driver for installation After launching the installer follow the on screen instructions to co...

Page 13: ...ke mouse action or combination of keystrokes To set these keys open the installed software and click on the Press Keys tab Next hover the mouse over the key you want to configure then click on the key...

Page 14: ...buttons To do so click the button associated with the button you want to change to open the key assignment dialog Additionally you can set and test the pressure sensitivity of the pen tip Note that th...

Page 15: ...display by default However when using the pen display in conjunction with other monitors on your system you need to determine the location of the pen display in relation to your main display and dete...

Page 16: ...it to the full area by clicking the Full Area button Alternatively you can set it to the screen ratio by clicking the Screen Ratio button Finally you can set the active area by dragging the sides of...

Page 17: ...will be presented with a series of crosshairs around a red dot Click the red dots in order to calibrate the monitor and pen responsive area While calibration is in progress you can reset the calibrat...

Page 18: ...ENU SYSTEM This monitor features a built in On Screen Display OSD menu system which allows you to change the monitor s settings OSD Menu Operation If the OSD menu is not displayed press the MENU butto...

Page 19: ...in the OSD menu press the button to increase the displayed value Picture Menu Backlight Adjusts the amount of backlighting used on the display The adjustment range is 0 100 Brightness Adjusts the imag...

Page 20: ...Movie Photo Vivid and User When User is selected you will be presented with a submenu with R Y G C B and M entries Each entry presents another submenu that allows you to set the individual Hue and Sat...

Page 21: ...e On and Off Ultra Vivid This is another form of edge enhancement to eliminate ghosting around text on the screen The available options are Off L Low M Medium and H High Input Menu Because this monito...

Page 22: ...n resolution and refresh rate the horizontal and pixel clock frequencies and the HDCP status Factory Menu This menu is not used TECHNICAL SUPPORT Monoprice is pleased to provide free live online techn...

Page 23: ...gles 178 horizontal and vertical CR 10 1 Touch Type Electromagnetic resonance Touch Resolution 5080 lines per inch LPI Pressure Levels 2048 levels Sensing Height 10mm Report Rate 233rps Pen Type Cordl...

Page 24: ...or television communications at your own expense This equipment has been tested and found to comply with the limits for a Class B digital device pursuant to Part 15 of the FCC Rules These limits are d...

Page 25: ...igital apparatus complies with Canadian ICES 003 Cet appareil num rique de la classe B est conforme la norme NMB 003 du Canada HDMI the HDMI Logo and High Definition Multimedia Interface are trademark...

Reviews: