Installation Instructions
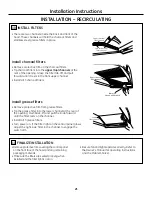
INSTALLATION – RECIRCULATING
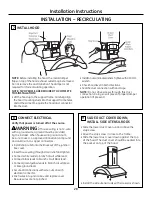
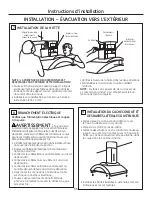
CONNECT ELECTRICAL
Verify that power is turned off at the source.
WARNING:
If house wiring is not 2-wire
with a ground wire, a ground must be provided
by the installer. When house wiring is aluminum,
be sure to use U.L.-approved antioxidant compound
and aluminum-to-copper connectors.
•
Install strain relief onto the knockout of the junction
box cover.
•
Insert house wiring through strain relief and tighten.
•
Connect white leads to branch circuit white lead.
•
Connect black leads to branch circuit black lead.
•
Connect green/yellow leads to branch circuit green
or bare ground lead.
•
Secure all connections with wire nuts on each
electrical connector.
•
Push wires into junction box and replace cover.
Be sure wires are not pinched.
8
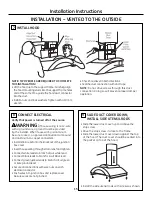
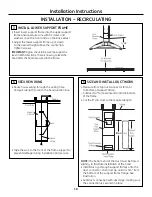
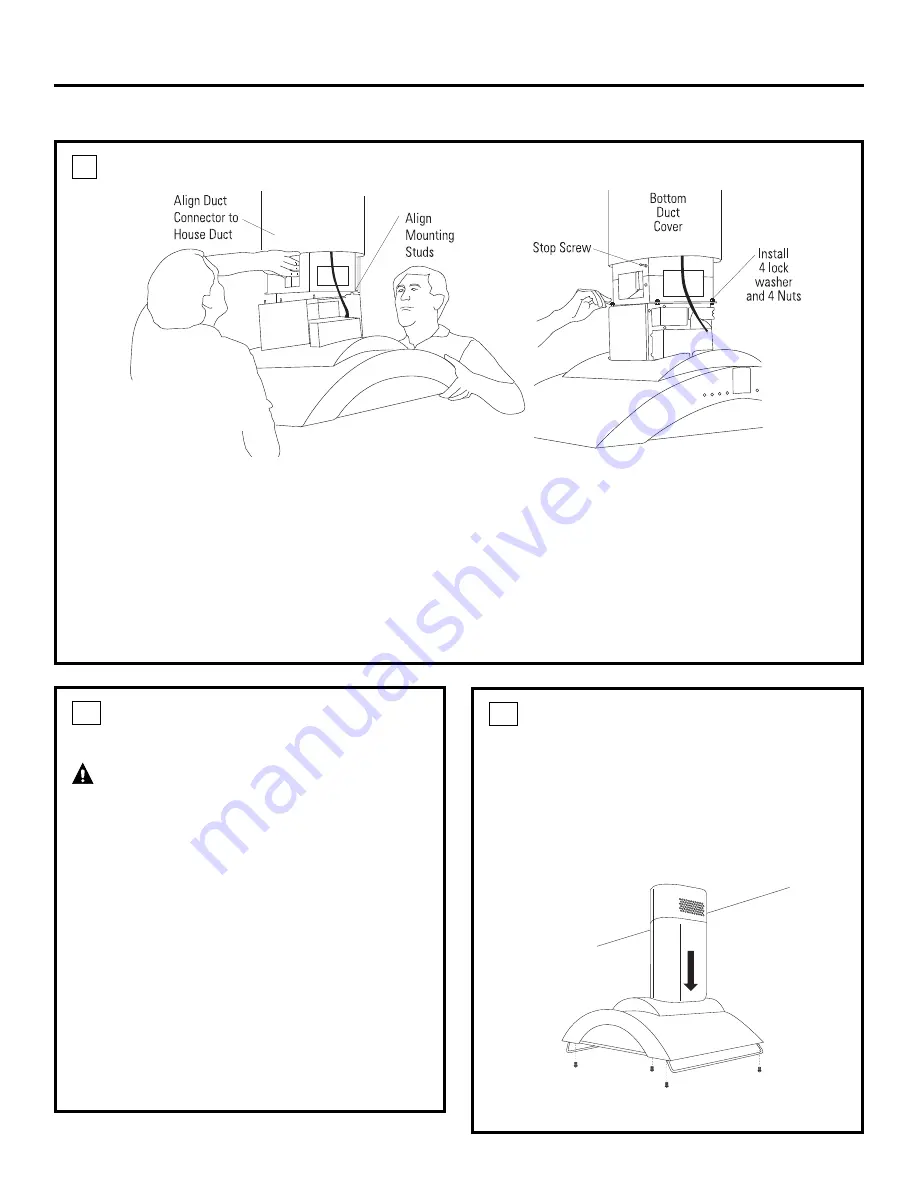
INSTALL HOOD
NOTE:
Before installing the hood, the metal damper
flaps on top of the hood exhaust outlet may be removed.
Do not remove the duct transition. The damper is not
required for this recirculating operation.
NOTE: TWO PEOPLE ARE REQUIRED TO COMPLETE
THIS INSTALLATION!
•
Lift the hood up to the support frame. Carefully align
the hood mounting studs into the support frame holes,
and at the same time, guide the hood duct connector
into the duct.
•
Install 4 nuts and lock washers. Tighten with a 10 mm
wrench.
•
Check hood level in both directions.
•
Seal the duct connection with duct tape.
NOTE:
Do not drive screws through this duct
connection. Doing so will prevent proper damper
operation (if present).
7
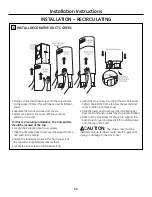
SLIDE DUCT COVER DOWN,
INSTALL SIDE UTENSIL RODS
•
Slide the lower duct cover up and above the
stop screw.
•
Drive the stop screw in close to the frame.
•
Slide the lower duct cover down against the top
of the hood. The duct cover should be seated into
the pocket on top of the hood.
•
Install the side utensil rods with screws as shown.
9
20
Summary of Contents for ZV850
Page 42: ...Notes 42 ...
Page 63: ...63 Notas ...


