49
English
7.9 Deleting data / Formatting the hard disk
If you want to dispose of the recorder or plan to give (e. g.
sell or lend) it to a third party, make sure to delete all record-
ings and passwords: Reset the recorder to its factory settings
(chapter 6.6.11) and format the hard disk. Otherwise, you will
pass on your recordings, personal data and passwords with
the recorder.
1) Use the right mouse button to show the toolbar; in the
toolbar, click the first symbol to the left
HD
SD
i
15/09/2019 14:27:38
to call up the
start menu and then, in the start menu, click “Setup” to
call up the tile menu.
2) In the tile “Device”, click the menu item “Disk”.
WDC WD20PURX-64P6Y0 WD-WCC4M7FXADU 80.00A80
1*
1810G/1863G
Auto
Default
Apply
Disk
No.
Model
Serial No.
Firmware
Statue
Free/Total Time
Free/Total
Normal
Format HDD
Overwrite
411Hour/423Hour
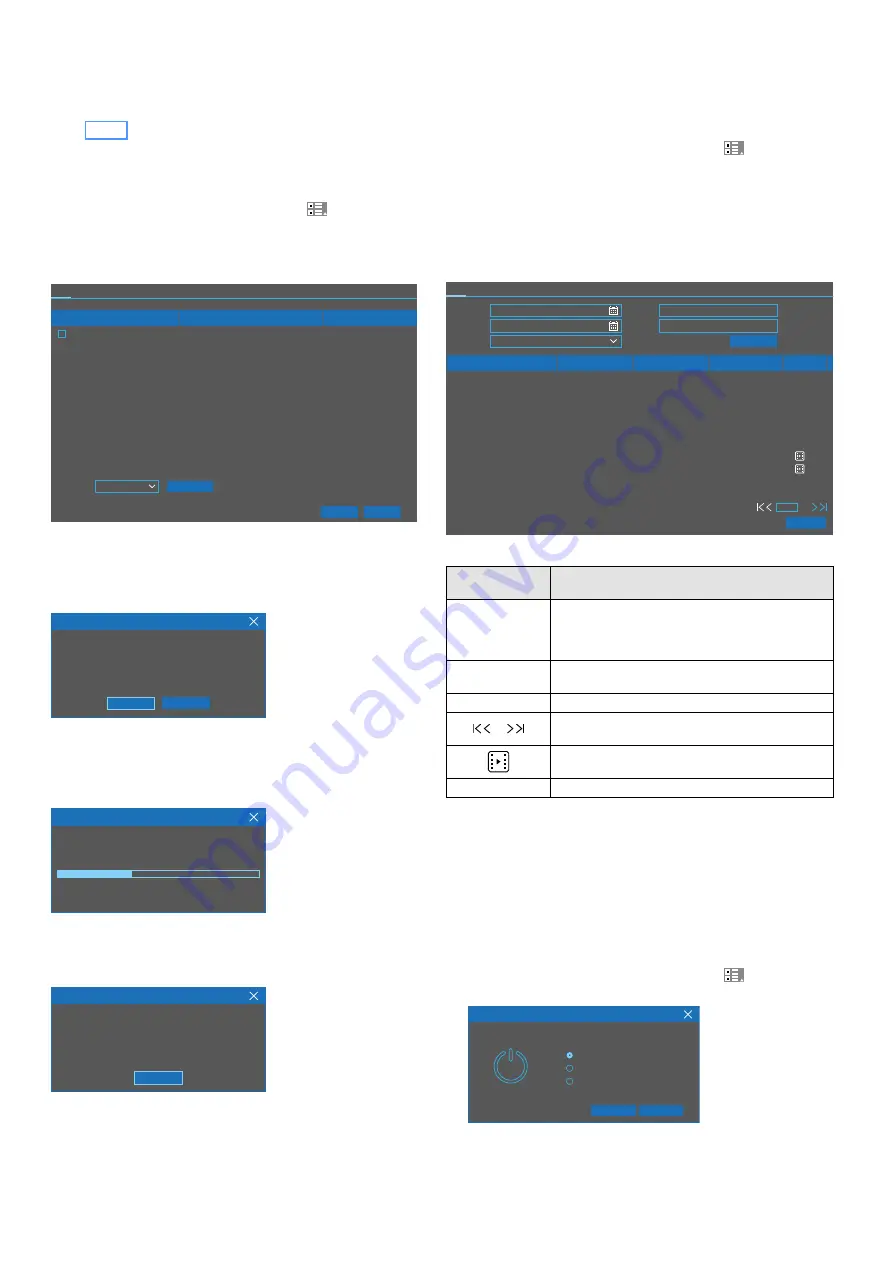
Fig. 7-16
Disk Manager
3) In the column “No.”, select the hard disk to be formatted
and then click the button “Format HDD”. The following
warning will appear:
Notice
Entire data will be erased, do you want to continue?
Cancel
OK
Fig. 7-17
Warning and confirmation window
4) Click “Cancel” to cancel the procedure. To format the hard
disk, click “OK”: A status bar will indicate the progress of
the formatting process.
37%
Notice
No. 1 Formatting...37%
Fig. 7-18
Formatting process
5) When formatting has been completed, the following mes-
sage will be shown:
Notice
Format completed !
OK
Fig. 7-19
Hard disk formatted
6) Click “OK” and then click
×
to close the disk manager.
7.10 Calling up the event list
The recorder logs all events such as switch-on and switch-off
of the recorder, change of user, manual recording, replay of a
recording, changes to settings, etc.
1) Use the right mouse button to show the toolbar. In the
toolbar, click the first symbol to the left
HD
SD
i
15/09/2019 14:27:38
to call up the
start menu and then, in the start menu, click “Setup” to
call up the tile menu.
2) In the tile “System”, click the menu item “Maintenance”.
3) The submenus “Log” … “Auto Reboot” are available.
The submenu “Log” must be selected as shown in the
following figure.
00:00:00
23:59:59
CH4
CH4
1 /3
Backup
Search
Channel
Type
TIME
CON.
RECORD
Log
Load Default Upgrade Parameter Management Auto Reboot
Playback
Accout
admin Login
10/13/2019 05:43:27
System
System Startup
10/13/2019 05:43:28
Alarm
IO Alarm Start
No
Yes
Yes
10/13/2019 05:43:31
Accout
Unlock
10/13/2019 05:43:36
Congfiguration
Multi-User
10/13/2019 06:11:54
Congfiguration
Add User
10/13/2019 06:11:54
Accout
admin Logout
10/13/2019 14:14:09
Accout
user1 Login
10/13/2019 14:15:12
Alarm
Motion Start
10/13/2019 07:52:47
Alarm
Motion End
10/13/2019 07:53:16
10/13/2019
Start Date
10/13/2019
End Date
All
Log Typ
Start Time
End Time
Fig. 7-20
Event list after a search request
Menu item
Symbol
Function
Start Date
End Date
Start Time
End Time
Time range of the events
to be shown
Log Typ
Selection of an event group: All, System, Configura-
tion, Alarm, Account, Record, Storage
Search
Click to list the events with the parameters selected
To browse the list:
First page / previous page / next page / last page
When a recording has been made of an event, click
the symbol to view the recording
Backup
To save the list to a USB flash drive, for example
To make sure that any operation at the recorder is shown in the
log, the log entries will not be deleted when the hard disk is
formatted or when the recorder is reset to its factory settings.
7.11 Switching off or restarting the recorder
Prior to using the POWER switch, shut down the recorder
properly. Otherwise, settings or current recordings may be lost.
1) Use the right mouse button to show the toolbar; in the
toolbar, click the first symbol to the left
HD
SD
i
15/09/2019 14:27:38
to call up the
start menu, and then, in the start menu, click “Shutdown”.
Shutdown
What do you want the computer to do?
Shutdown
Reboot
Logout
Cancel
OK
Fig. 7-21
Selection window for switch-off, restart and user change


