B
A
C
D
E
F
G
SER
VICE
28
Step 8: Adjusting the electronic controller for gas type
Ensuring the gas is still OFF, Turn the power ON.
Insert “AA” size batteries into the remote control. You should now see the
time on the display showing 0:00.
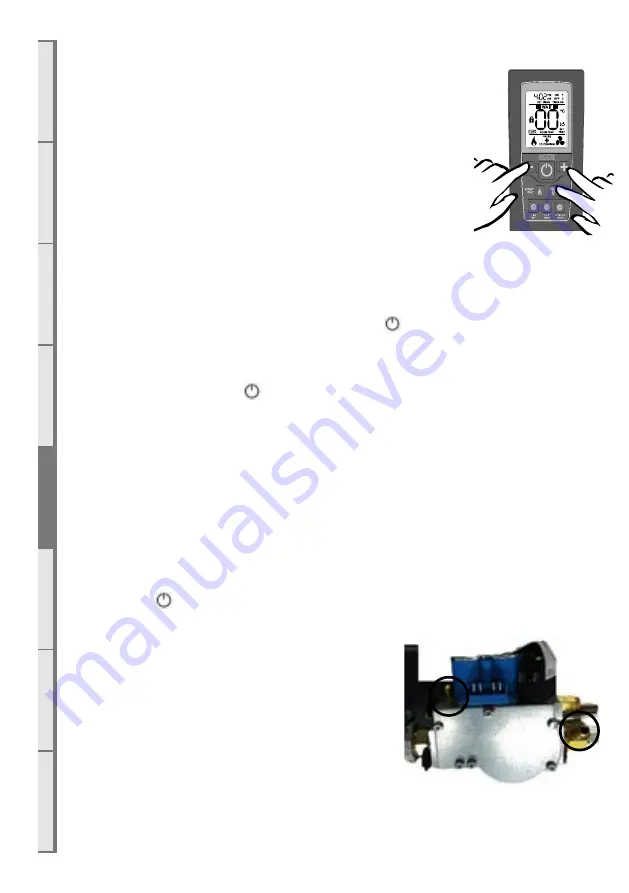
Press the MINUS, PLUS and FAN BOOST buttons simultaneously (as
shown right) until the characters “03” light up on the display. Release the
buttons and the remote will count down and display “GO”. The screen will
then display all characters. This will put the remote into test mode and the
two big temperature digits should begin counting from 0 to 99 repeatedly.
Now hold down the ‘EDIT TIMER’ and ‘ACTIVATE TIMER’ buttons
simultaneously; the remote display will show the current configuration of
either ‘NG’ for Natural Gas or ‘LP’ for ULPG/Propane. To change this configuration, hold down the
‘EDIT TIMER’ and ‘ACTIVATE TIMER’ buttons simultaneously for 5 seconds. This will now have
toggled between gas types.
Once you are have chosen the correct gas mode, press the ‘ ’ button once to exit this diagnostics
mode.
E6 Operating the Appliance
Turn on the fire by pressing the “ ” power button on the remote. Within a few seconds the appliance
will begin its startup sequence with a 15 second purge of the flue fan. After the purge it will attempt
ignition. It may take a few attempts to light the first time due to air in the gas line. You may wish to
purge the gas line at the valve by bleeding the first test point. This requires a small blade screwdriver.
Once the fire has lit the pilot and main burner you will be able to measure the operating pressure. Set
the remote temperature to 40deg by pressing the “+” button and ensure the remote is kept in a cool
environment. This will allow maximum gas flow into the appliance.
Ensure all other gas appliances within the house are also operating at maximum.
If the operating pressure does not read within 5% of the table (shown on the next page) then remove
the cap from the gas pressure regulator within the appliance and adjust the threaded spring stop. Press
the “ ” power button again to shut down the fire.
E7 Checking the Gas Operating Pressure
Note: Ensure the thermostat control within the remote does not
cause the flame to modulate down by increasing the set
temperature and keeping the remote in a cool environment.
Turn on the gas. Turn the power on. Check the inlet pressure
upstream of the appliance using the test point installed earlier.
Note: The regulator that is supplied with the fire MUST NOT BE
REMOVED. Removal of the regulator, or replacing it with one not
intended for use with an Escea fire, will void the limited appliance warranty and may be dangerous.
The gas valve (shown right) has manometer test points at A and B.
5
6
A
B


