


FGC100 User Manual
7
4
Setting Up The FGC100
Place the FluxGage box on a flat surface.
Place the lid over the FluxGage. Make sure the lid is placed such that the round cover is
over the spectrometer diffuser.
Remove the round cover from the lid
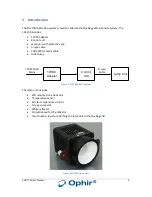
Remove the protective cover from the FGC100 lamp unit
Insert the FGC100 lamp unit into the hole in the lid and secure it using the two thumb
screws
Connect the D-type cable between the FGC100 control unit and the FGC100 lamp unit
Connect the output cable of the 12VDC adapter to the FGC100 control unit
Connect the mains cable to the 12VDC adapter and plug it into a mains socket
Summary of Contents for Ophir FluxGage FGC100
Page 1: ...Ophir Optronics Solutions Ltd FGC100 Calibration Unit FGC100 User Manual FluxGage FluxGage...
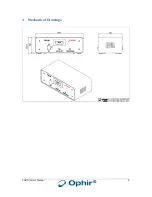
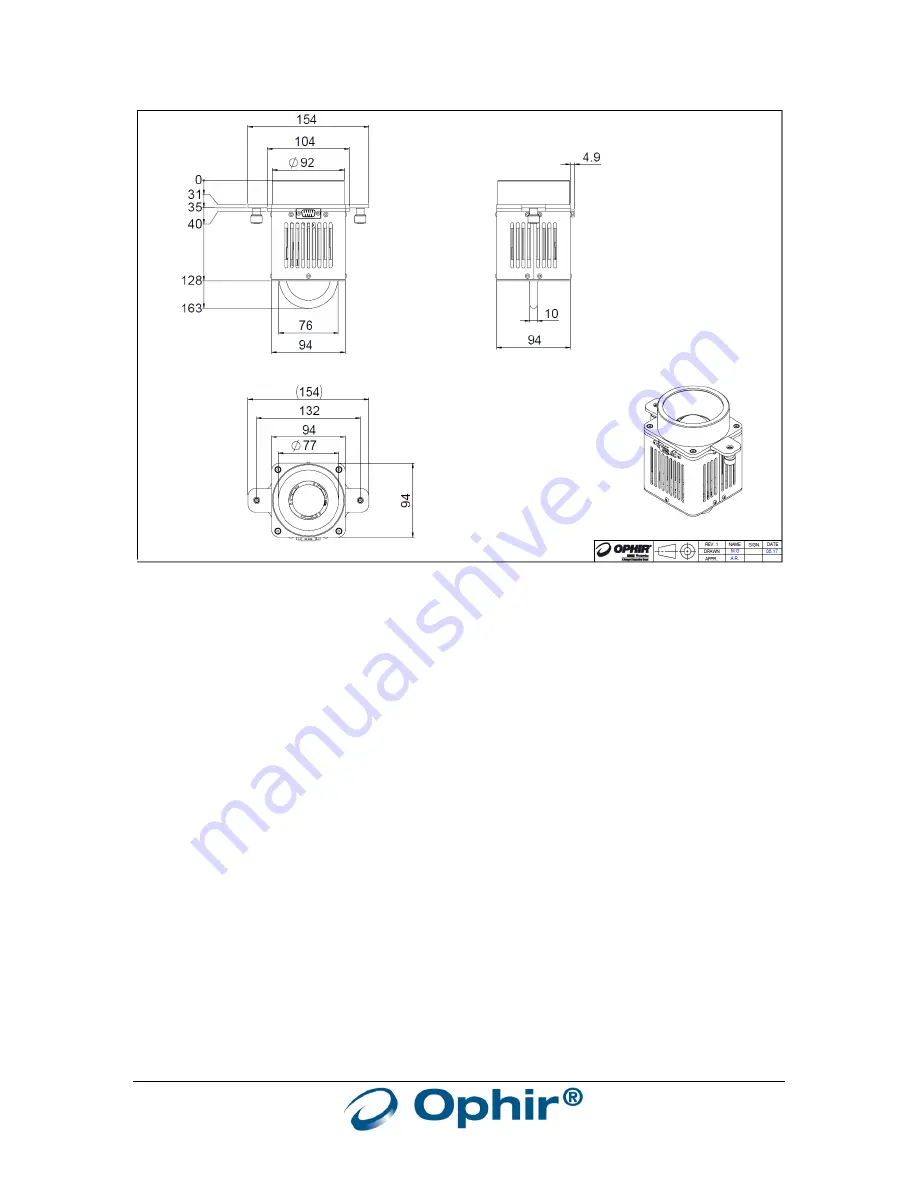
Page 6: ...FGC100 User Manual 6 3 Mechanical Drawings...
Page 8: ...FGC100 User Manual 8 Figure 5 FGC100 connected to FuxGage...
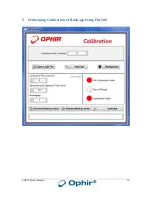
Page 10: ...FGC100 User Manual 10 5 Performing Calibration of FluxGage Using FGC100...