


Introduction
14
elite
TM
1.4
Getting
Started
Quickly
This
section
is
intended
to
provide
you
with
a
set
of
instructions
to
enable
you
to
quickly
set
up
and
start
running
your
generator.
References
to
more
detailed
information
is
provided
at
the
end
of
each
step.
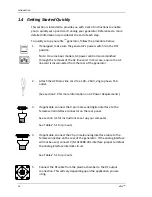
To
quickly
set
up
your
elite
TM
generator,
follow
the
procedure
below:
1.
If
equipped,
make
sure
the
generator’s
power
switch
is
in
the
OFF
position.
Note:
On
some
basic
models,
AC
power
control
is
accomplished
through
the
removal
of
the
AC
line
cord.
In
this
case,
ensure
the
AC
linecord
is
disconnected
from
the
rear
of
the
generator
2.
Attach
the
AC
Mains
line
cord
to
a
100
–
264V,
single
‐
phase,
15
A
outlet.
(See
section
2.9
for
more
information
on
AC
Power
Requirements.)
3.
If
applicable,
connect
the
9
‐
pin
male
serial
digital
interface
to
the
female
serial
interface
connector
on
the
rear
panel.
See
section
3.1
for
instructions
to
set
up
your
computer.
See
Table
2.5.1
for
pin
outs.
4.
If
applicable,
connect
the
25
‐
pin
male
analog
interface
cable
to
the
female
connectoe
on
the
rear
of
the
generator.
If
the
analog
interface
will
not
be
used,
connect
P/N
1019388
‐
001
interface
jumper
to
defeat
the
analog
interface
interlock
circuit.
See
Table
2.5.1
for
pin
outs.
5.
Connect
the
RF
cable
from
the
plasma
chamber
to
the
RF
output
connection.
This
will
vary
depending
upon
the
application
you
are
using.


