2 - 24
2. CONNECTION TO IAI ROBOT CONTROLLER
2.6 Device Range that Can Be Set
2.6 Device Range that Can Be Set
The device ranges of controller that can be used for GOT
are as follows.
Note that the device ranges in the following tables are the
maximum values that can be set in GT Designer3.
The device specifications of controllers may differ
depending on the models, even though belonging to the
same series.
Please make the setting according to the specifications of
the controller actually used.
When a non-existent device or a device number outside
the range is set, other objects with correct device settings
may not be monitored.
2.6.1
IAI robot controller
(IAI X-SELController)
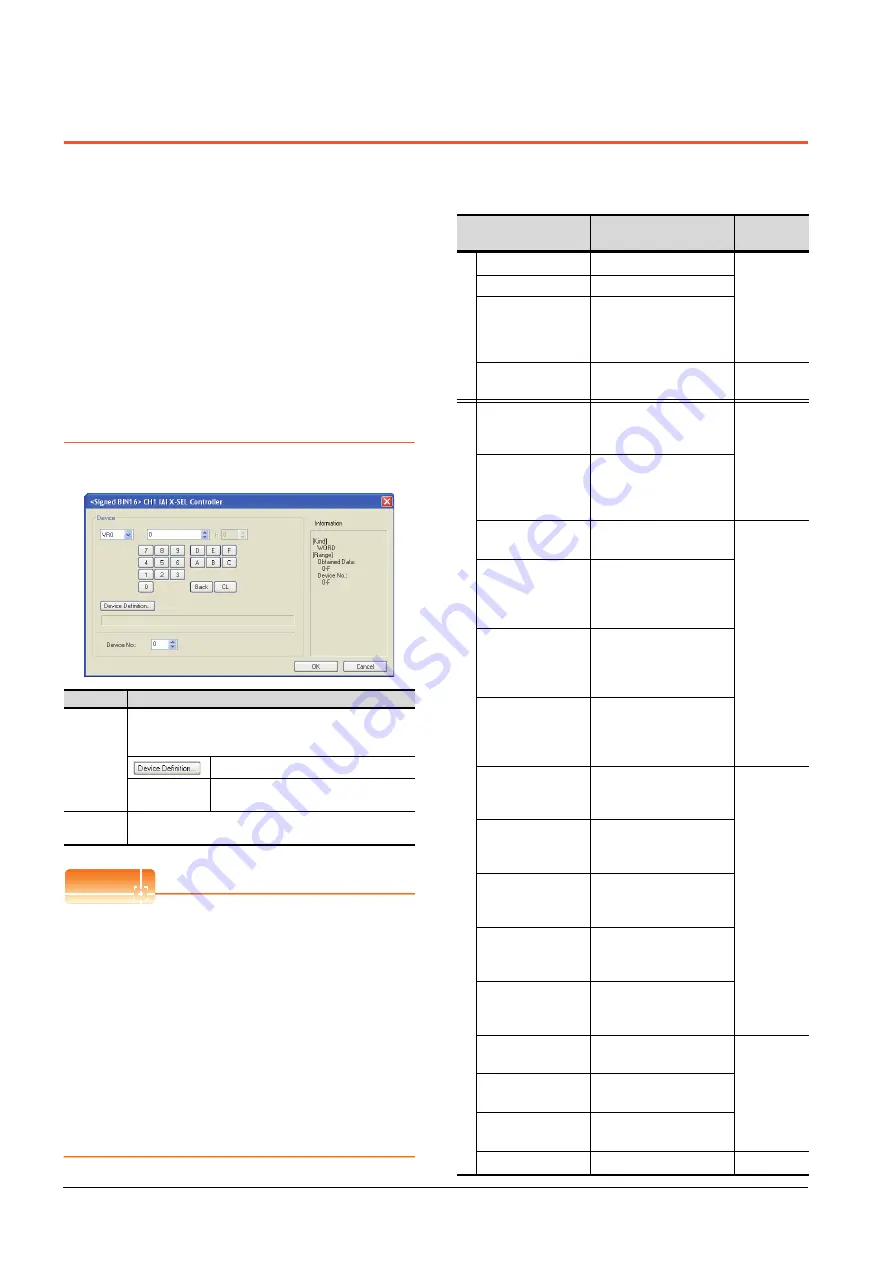
Setting item
POINT
POINT
POINT
Memory area for writing position data
Position data can be written to RAM or E
2
PROM of the
controller.
(1) When written to RAM
Remember that written position data are cleared
when power supply to the controller is turned off.
(2) When written to E
2
PROM
Written position data are not cleared even when
power supply to the controller is turned off.
However, there are limits in the number of writing
to E
2
PROM. If the data is frequently updated
(more than once in an hour), write the parameters
to the RAM. For details, refer to the manual of the
controller used.
Device
Item
Description
Device
Set the device name, device number, and bit number.
The bit number can be set only when specifying the bit of
word device.
Device definition can be checked.
Device No.
Set the number of the program for which
the device is used.
Information
Displays the device type and setting range which are
selected in [Device].
Device name
Setting Range
Device No.
representation
Bi
t device
Input Port (IP)
*1
IP000 to IP299
Decimal
Output Port (OP)
OP300 to OP599
Flag (FG)
FG000:600 to FG000899
FG001:900 to FG001:999
:
FG128:900 to FG128:999
Point Data Clear
(PCLR)
*2*6
PCLR0001 to PCLR4E20
Hexadecimal
Wo
rd
d
ev
ic
e
Point Data Total
Count
(PDT)
*1
PDT0
Decimal
String
(STR)
*3
STR000:300 to STR000:998
STR001:001 to STR001:299
:
STR128:001 to STR128:299
Axis Status
(AXST)
*1
AXST00 to AXST2F
Hexadecimal
Scara Axis Status 0
(Base coordinate sys-
tem)
(SAXS0)
*1
SAXS000 to SAXS0FF
Scara Axis Status 1
(Selected work coor-
dinate system)
(SAXS1)
*1
SAXS100 to SAXS1FF
Scara Axis Status 2
(Reserved for system
use)
(SAXS2)
*1
SAXS200 to SAXS2FF
Scara Axis Status 3
(Each axis system)
(SAXS3)
*1
SAXS300 to SAXS3FF
Hexadecimal
Version 0
(Main CPU applica-
tion/) (VR0)
*1
VR00:0 to VR00:F
:
VR0F:0 to VR0F:F
Version 1
(Main CPU core)
(VR1)
*1
VR10:0 to VR10:F
:
VR1F:0 to VR1F:F
Version 2
(Driver CPU)
(VR2)
*1
VR20:0 to VR20:F
:
VR2F:0 to VR2F:F
Version 3
(Mount SIO)
(VR3)
*1
VR30:0 to VR30:F
:
VR3F:0 to VR3F:F
Program Status
(PGST)
*1
PGST000 to PGST511
Decimal
System Status
(SYST)
*1
SYST0 to SYST6
Program Control
(PRG)
*2*4
PRG000 to PRG128
Alarm Reset (AR)
*2
AR0
Decimal
Summary of Contents for GOT 1000 Series
Page 2: ......
Page 76: ...1 46 1 PREPARATORY PROCEDURES FOR MONITORING 1 6 Checking for Normal Monitoring ...
Page 78: ......
Page 114: ...2 36 2 CONNECTION TO IAI ROBOT CONTROLLER 2 7 Precautions ...
Page 232: ...5 18 5 CONNECTION TO OMRON TEMPERATURE CONTROLLER 5 7 Precautions ...
Page 254: ...6 22 6 CONNECTION TO KEYENCE PLC 6 4 Device Range that Can Be Set ...
Page 404: ...14 14 14 CONNECTION TO PANASONIC SERVO AMPLIFIER 14 7 Precautions ...
Page 432: ...REVISIONS 3 ...
Page 435: ......


