background image

60

Operation Procedures for Functions

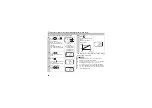
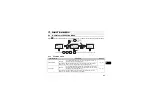
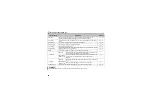
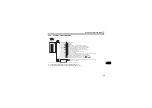
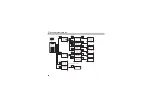
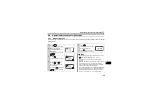
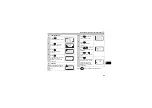
3.2.2 Selection of PU operation (direct input)

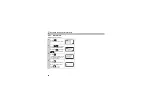
You can select the PU operation mode to set PU operation frequency.

1

Press .

The function menu is called.

2

Using 

, move the cursor 

to "2 PU Oper".

3

Press .

The menu on the right 
appears.

4

Make sure that the cursor 
is located at "1 PU: 
Directly".

If not, move the cursor with 

/

.

5

Press .

The PU operation mode is 
selected and the frequency 
setting screen appears.

 2 PU Oper
 3 Pr.List

 1 MONITOR

 4 Pr.Clear

 2 PU Oper
 3 Pr.List

 1 MONITOR

 4 Pr.Clear

 2 JOG:Jogging


 1 PU:Directly


SET    0.00Hz


    Freq Set

0~400Hz

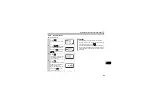
6

Enter the set frequency 

using  

to  

and 

press 

.

The frequency setting is 
complete.

7

Press 

/

 to perform 

forward or reverse rotation 
with the set frequency.

REMARKS

· Press 

 to call the frequency setting screen any 

time.

SET  

60.00Hz

60.00Hz


    Freq Set

  Completed

60.00

Hz

STF FWD PU

READ:List

Summary of Contents for FR-PU07

Page 1: ...OKYO BUILDING 2 7 3 MARUNOUCHI CHIYODA KU TOKYO 100 8310 JAPAN 1 2 3 4 6 5 FR PU07 FR PU07BB Parameter unit IB NA 0600240ENG D 0901 MEE Printed in Japan Specifications subject to change without notice PRE OPERATION INSTRUCTIONS FUNCTIONS FUNCTION MENU OPERATION SPECIFICATIONS CHECK FIRST WHEN YOU HAVE A TROUBLE ...

Page 2: ...injury Assumes that incorrect handling may cause hazardous conditions resulting in medium or slight injury or may cause physical damage only Note that the CAUTION level may lead to a serious consequence according to conditions Please follow the instructions of both levels because they are important to personnel safety WARNING CAUTION SAFETY INSTRUCTIONS WARNING Do not run the inverter with the fro...

Page 3: ...RH or less non condensing Storage temperature 20 C to 65 C Ambience Indoors free from corrosive gas flammable gas oil mist dust and dirt Altitude vibration Maximum 1000m above seal level 5 9m s2 or less at 10 to 55Hz directions of X Y Z axes WARNING Since pressing key may not stop output depending on the function setting status provide a circuit and switch separately to make an emergency stop powe...

Page 4: ... a nickel metal hydride battery and charger read the instruction manuals carefully before using them CAUTION Treat as industrial waste All illustrations given in this manual may have been drawn with covers or safety guards removed to provide in depth description Before starting operation of the product always return the covers and guards into original positions as specified and operate the equipme...

Page 5: ...erter A700 F700 series 10 1 3 3 Installation using the connection cable FR CB2 11 1 3 4 Removal when the connection cable FR CB2 is used 13 1 4 Connection and Removal of FR PU07BB 14 1 4 1 Before using FR PU07BB in the battery mode 14 1 4 2 Instructions for the FR PU07BB battery mode 17 1 4 3 Connecting to FR A700 F700 using the connection cable FR CB2 18 1 4 4 Connecting to FR E700 using the conn...

Page 6: ...p setting 31 2 2 3 Precautions for frequency setting 32 2 3 Setting and Changing the Parameter Values 33 2 3 1 Specifying the parameter number to change the set value 33 2 3 2 Selecting the parameter from functional list to change the set value 34 2 3 3 Selecting the parameter from parameter list to change the set value 36 2 3 4 Selecting the parameter from User List to change the set value 37 2 3...

Page 7: ...Menu 53 3 1 1 Function menu 53 3 1 2 Function menu transition 55 3 2 Operation Procedures for Functions 59 3 2 1 Monitor function 59 3 2 2 Selection of PU operation direct input 60 3 2 3 Selection of the PU Jog operation mode 61 3 2 4 Parameters 62 3 2 5 Parameter clear 65 3 2 6 Alarm history 67 3 2 7 Alarm clear 68 3 2 8 Inverter reset 69 3 2 9 Troubleshooting 70 3 2 10 Terminal assignment Select...

Page 8: ...4 2 2 PU Jog operation 85 4 3 Combined Operation Operation Using External Input Signals and PU 86 4 3 1 Entering the start signal from outside and setting the running frequency from the PU Pr 79 3 86 4 3 2 Entering the running frequency from outside and making start and stop from the PU Pr 79 4 87 4 3 3 Entering the start signal and multi speed signal from outside and setting multiple speeds from ...

Page 9: ...V 6 2 1 FR PU07 outline dimension drawings 93 6 2 2 FR PU07BB outline dimension drawings 94 APPENDIX 95 Appendix 1 Disposing of the equipment in the EU countries 95 ...

Page 10: ...n displays in this instruction manual are examples used with the FR A700 series REMARKS Features only for FR PU07BB Parameter check and setting change are available without connecting a power supply to the inverter Since the shape is specially designed for portable use it is easy to work with FR PU07BB in hand CAUTION To use a parameter unit with battery pack FR PU07BB outside Japan order a FR PU0...

Page 11: ...LITY ERROR appears on the liquid crystal display screen and it is inoperative regardless of ON OFF of the inverter power 3 Some parameter names displayed are different from those of the FR PU07 4 The FR PU07 can not be directly connected to the inverter Model FR PU07 FR PU07BB 4 A700 series Products assembled in and after January 2008 1 The FR A700 EC CHT have not been compatible yet but will be c...

Page 12: ...e inverter manual for the location of the rating plate Rating plate example SERIAL Serial No Symbol Year Month Control number TC A G TC number The SERIAL consists of 1 version symbol 2 numeric characters or 1 numeric character and 1 alphabet letter indicating year and month and 6 numeric characters indicating control number Month is indicated as 1 to 9 X October Y November and Z December ...

Page 13: ...the unit name and confirm that the product is as you ordered and intact 1 2 1 Unpacking confirmation Check the enclosed items FR PU07 FR PU07BB common FR PU07BB only Batteries are not enclosed Please prepare them separately Parameter unit 1 Instruction manual 1 FR PU07 FR PU07BB Connection cable FR CB203 1 INSTRUCTION MANUAL ...

Page 14: ...ay 16 characters 4 lines with backlight Interactive parameter setting Help function Trouble shooting guidance Monitor frequency current power etc Operation keys Connector for inverter directly Connector to the inverter Connect directly to PU connector of the inverter Connector for PU cable Connect using the connection cable FR CB2 POWER lamp Lit when the power turns ON ALARM lamp Lit to indicate a...

Page 15: ...r for PU cable Connect using the connection cable FR CB2 Connector for AC adapter Pull out the protective cover toward you to remove and then connect the AC adapter sold separately Battery exhaustion warning lamp When a battery is low the lamp color changes from green to orange Monitor Liquid crystal display 16 characters 4 lines with backlight Interactive parameter setting Help function Trouble s...

Page 16: ...ift to the next item in the setting or monitoring mode to Used to enter a frequency parameter number or set value Used to select the External operation mode Used to select the PU operation mode to display the frequency setting screen Used to keep on increasing or decreasing the running frequency Hold down to change the frequency Press either of these keys on the parameter setting mode screen to ch...

Page 17: ...tory clear mode Used as a decimal point when entering numerical value Used as a parameter number read key in the setting mode Used as an item select key on the menu screen such as parameter list or monitoring list Used as an alarm definition display key in the alarm history display mode Used as a command voltage read key in the calibration mode CAUTION Do not use a sharp pointed tool to push the k...

Page 18: ...of the inverter OFF FR PU07 cannot be directly installed to the FR E700 D700 inverter 1 3 1 Direct installation to the inverter A700 F700 series 1 Remove the operation panel FR DU07 2 Insert the parameter unit straight and fit it securely 3 Tighten the two screws on the parameter unit to fix the unit to the inverter STF FWD PU STF FWD PU Fixed screw ...

Page 19: ... of FR PU07 1 3 2 Removal from the inverter A700 F700 series Loosen the fixed screws hold down the right and left hooks of the FR PU07 and then pull the parameter unit toward you STF FWD PU Press the hooks STF FWD PU Fixed screw ...

Page 20: ...operation panel FR DU07 2 Securely insert one end of connection cable into the PU connector of the inverter and the other end into the connection connector of FR PU07 along the guides until the stoppers are fixed CAUTION Do not connect the connection cable when the front cover is removed STF FWD PU Stopper FR PU07 Connection cable ...

Page 21: ...verter and the other end into the connection connector of FR PU07 along the guides until the stoppers are fixed CAUTION Do not connect the connection cable when the front cover is removed REMARKS For details of the connection cable FR CB2 refer to the connection cable FR CB2 instruction manual Stopper FR PU07 PU connector Stopper STF FWD PU Connection cable ...

Page 22: ...nto the connection connector of FR PU07 along the guides until the stoppers are fixed 1 3 4 Removal when the connection cable FR CB2 is used Hold down the tab stopper at the cable end and gently pull the plug CAUTION Do not connect the connection cable when the front cover is removed REMARKS For details of the connection cable FR CB2 refer to the connection cable FR CB2 instruction manual STF FWD ...

Page 23: ...lable 1 When using a battery 1 Loosen the screw of the FR PU07BB rear side 3 Place batteries as shown below 2 Pushing the hook slide the cover in the direction of arrow to open 4 Close the cover and tighten the screw 㧗 ٤ ٤ 㧗 ٤ 㧗 ٤ ٤ ٤ 㧗 ٤ 㧗 ٤ ٤ ٤ Hook REMARKS Use commercially available AA nickel metal hydride batteries or AA alkaline batteries four pieces Batteries are not enclosed Please prepare ...

Page 24: ...AC adapter 1 Pull out the protective cover toward you to remove and then insert the output plug of an AC adapter sold separately into the AC adapter connector 2 Connect the AC adapter sold separately to a AC power supply Connector Protective cover STF FWD PU ...

Page 25: ... in Japan Use the following adapter to use the FR PU07BB with single phase 100V power supply AC adapter cable length General specifications Refer to the specifications below for an adapter to use the FR PU07BB with AC power supply If batteries are left in the FR PU07BB when using an AC adapter batteries may become discharged Product name Model Manufacturer AC adapter TAS2900 PUA Mitsubishi Electri...

Page 26: ... in option can be done in battery mode independently of whether the plug in option is mounted or not Functions of the function menu For monitor only frequency setting monitor is available PU Operation Only switching between PU PU Jog modes is available not operational Parameter list initial value changed value read Parameter clear Read clear of the faults history Inverter reset Troubleshooting Rea...

Page 27: ...toppers are fixed 3 When using in the battery mode turn ON the power supply switch of FR PU07BB ALARM lamp of the inverter flickers in the battery mode A connection cable FR CB203 wiring length is 3m is enclosed The cable length when using a connection cable other than the enclosed should be 3m maximum CAUTION Connect the connection cable only when the front cover is installed Do not subject the c...

Page 28: ...mode turn ON the power supply switch of FR PU07BB A connection cable FR CB203 wiring length is 3m is enclosed The cable length when using a connection cable other than the enclosed should be 3m maximum 1 4 5 Removal when the connection cable FR CB2 is used Hold down the tab stopper at the cable end and gently pull the plug CAUTION Connect the connection cable only when the front cover is installed...

Page 29: ... displayed on the parameter unit When the inverter is NA or EC model the initial value is 1 English 1 5 2 PU buzzer control Pr 990 By setting the Pr 990 PU buzzer control value you can select to either generate or mute the beep which sounds when you press any of the parameter unit keys Pr 145 Setting Display Language 0 initial value Japanese 1 English 2 German 3 French 4 Spanish 5 Italian 6 Swedis...

Page 30: ...First 1 5 3 PU contrast adjustment Pr 991 By setting the Pr 991 PU contrast adjustment value you can adjust the contrast for the display panel of the parameter unit Pr 991 Setting Description 0 to 63 0 63 Light Dark 58 Initial value ...

Page 31: ...age 28 2 Rotation direction indication Display the direction forward rotation reverse rotation of the start command STF Forward rotation STR Reverse rotation No command or both STF and STR ON 3 Operating status indication Display the running status of the inverter STOP During stop FWD During forward rotation REV During reverse rotation JOGf During Jog forward rotation JOGr During Jog reverse rotat...

Page 32: ...warning The warning type varies with the inverter model Refer to the inverter instruction manual for details OL Overcurrent stall prevention oL Overvoltage stall prevention RB Regenerative brake pre alarm TH Electronic thermal relay function pre alarm ZC Zero current detection PS PU stop FN Fan fault MT Maintenance signal output SL Speed limit CF SSCNET communication error CP Parameter copy Nothin...

Page 33: ...ns lit Switching conditions When the FR PU07BB is left in the power ON status for one minute without connecting to the inverter When FR PU07BB is connected to the inverter and the inverter remains in the reset status for one minute Recovery conditions When FR PU07BB is connected to the inverter When the reset of the inverter connected to FR PU07BB is canceled ...

Page 34: ...are displayed in rows V When output current is the first priority monitor When output frequency is the first priority monitor Initial setting Switch power ON or press When output voltage is the first priority monitor When the first priority monitor is other than output frequency output current and output voltage When the first priority monitor is other than output frequency output current and outp...

Page 35: ...or the first priority monitor Set the monitor which appears first when power is switched ON or is pressed When you press during any monitor screen other than ALARM HISTORY being displayed that screen is set as the power ON screen and will be displayed first ...

Page 36: ...iority to another monitor screen press with that monitor screen being displayed Refer to page 26 1 Press The parameter unit is in the monitoring mode 2 Press The monitoring list appears 3 Press to move the cursor to Peak I Hold down and press or to shift one screen 4 Press 1 The output current peak is displayed 5 Press 2 The screen in step 4 is set as the first priority monitor Subsequently press ...

Page 37: ...te that setting 17 load meter 2 18 Motor excitation current 1 2 and 24 Motor load ratio change the output current monitor Output voltage monitor monitor displays from the first priority monitor using 1 Cannot be monitored for the FR F700 series 2 Cannot be monitored for the FR E700 D700 series REMARKS Refer to the instruction manual of each inverter for monitor description ...

Page 38: ...setting range of Pr 52 DU PU main display data selection differs according to the inverter Refer to the inverter instruction manual for details First priority monitor Output frequency monitor Output current monitor Output voltage monitor First Second Third Second monitor Third monitor 2 1 0 00Hz STOP EXT READ List 0 00A STOP EXT READ List 0 00V STOP EXT READ List Output frequency monitor First pri...

Page 39: ...tting If you entered an incorrect value press to return to the pre entry state REMARKS When changing the operation mode from External operation mode to PU operation mode operation mode can not be changed if the external starting signal STF or STR is ON 1 Press The frequency setting screen appears 2 Press and Enter 60Hz 3 Press The 60Hz setting is complete Freq Set SET 0 00Hz 0 400Hz Freq Set SET 0...

Page 40: ...alue between the maximum frequency Pr 1 and minimum frequency Pr 2 3 Press The 60Hz setting is complete Freq Set SET 0 00Hz 0 400Hz Freq Set SET 0 00Hz 60 00Hz 0 400Hz 60 00Hz 60 00Hz Freq Set SET Completed REMARKS Change of frequency can be made during operation by the step setting However pressing at monitor mode may cause actual set frequency to be higher lower from the indicated frequency on t...

Page 41: ...on manual for details of Pr 79 2 In the monitor mode you cannot make the direct setting Refer to page 30 to set the running frequency Perform the step setting Refer to page 31 and press or press to display the frequency setting screen before frequency setting Frequency setting screen Deselect monitor mode Monitor mode 30 00Hz STF FWD PU READ List Freq Set SET 0 00Hz 0 400Hz ...

Page 42: ...ate 1 Press The frequency setting screen appears and operation mode changes to PU operation mode You need not press when the parameter unit is already in the PU operation mode 2 Press The parameter unit is in the parameter setting mode 3 Press Enter the desired parameter number 4 Press The present setting appears Freq Set SET 0 00Hz 0 400Hz SETTING MODE 0 9 Ser Pr NO Select Oper SETTING MODE Pr NO...

Page 43: ...ursor to Acc Dec using Freq Set SET 0 00Hz 0 400Hz SETTING MODE 0 9 Ser Pr NO Select Oper 2 Pr List 3 User List 1 Appl Grp 4 Param Copy 2 F Command 3 Acc Dec 1 Basic Func 4 V F pattern 2 F Command 3 Acc Dec 1 Basic Func 4 V F pattern 6 Press A function list regarding acceleration deceleration is displayed 7 Select a function Using point the cursor to Accl Decl T 8 Press A parameter list regarding ...

Page 44: ...ing value is input the display returns to the list display 8 10 1 Direct setting Press Enter the desired value Or 2 Step setting Press Display 180 using 11 Press The set value is changed 12 Press to display the next parameter 8 Dec T1 5 0S 0 3600 180S 180 0S 180 0S 8 Dec T1 Completed ...

Page 45: ... parameter list Using point the cursor to Pr List 5 Press Select the parameter list The list of the parameters can be read appears Freq Set SET 0 00Hz 0 400Hz SETTING MODE 0 9 Ser Pr NO Select Oper 2 Pr List 3 User List 1 Appl Grp 4 Param Copy 2 Pr List 3 User List 1 Appl Grp 4 Param Copy 1 Max F1 2 Min F1 0 Trq Bst1 3 VFbaseF1 6 Select the parameter When moving the cursor using and pressing at De...

Page 46: ...The parameter unit is in the parameter setting mode 3 Change the screen using 4 Select a User List Using point the cursor to User List 5 Press The list of the parameters registered to User List appears Freq Set SET 0 00Hz 0 400Hz SETTING MODE 0 9 Ser Pr NO Select Oper 3 User List 2 Pr List 1 Appl Grp 4 Param Copy 1 Appl Grp 3 User List 2 Pr List 4 Param Copy 75 RES Mode 8 Dec T1 6 Select the param...

Page 47: ...ration Therefore refer to the inverter manual As Pr 77 Parameter write selection 0 in the initial setting parameter can be written only during an inverter stop Read is allowed even during operation Note that some parameters can be written always Refer to the inverter manual for details of Pr 77 In addition to the above case setting write cannot be performed when 1 The parameter number selected doe...

Page 48: ...ry for setting Among all parameters maximum 16 parameters can be registered to the user group When 1 is set in Pr 160 only parameters registered in the user group can be accessed for reading and writing The parameters not registered to the user group cannot be read REMARKS FR D700 does not have the user group function ...

Page 49: ...nter a new value with the number keys and press to write When not changing the setting value press to display the setting completion screen 4 Press The selecting screen appears SETTING MODE 0 9 Ser Pr NO Select Oper 8 Dec T1 5 0S 0 3600 8 Dec T1 5 0S 0 3600 180S Add Pr User List No Cancel Yes Add 5 Register When moving the cursor to YES and pressing the registration is executed 6 The parameter set...

Page 50: ...lect Oper 1 Appl Grp 3 User List 2 Pr List 4 Param Copy 2 Min F1 1 Max F1 3 VFbaseF1 7 Acc T1 Delete Pr User List No Cancel Yes Delete 5 To continue deleting parameter repeat the operation from step 3 1 Press The parameter unit is in the parameter setting mode 2 Select User List Using point the cursor to 3 User List and press 3 Read the parameter You can confirm the parameters registered to the us...

Page 51: ...unction selection Pr 55 Frequency monitoring reference 1 Press The frequency setting screen appears and operation mode changes to PU operation mode 2 Press The parameter unit is in the parameter setting mode Freq Set SET 0 00Hz 0 400Hz SETTING MODE 0 9 Ser Pr NO Select Oper 3 Enter and press The preset frequency is displayed 4 Enter and press 60Hz is set 5 Press Forward rotation is performed at 60...

Page 52: ...ttery mode the inverter power is OFF this parameter cannot be set calibrated Completed MONITOR 900 FM Tune 60 00Hz STF FWD PU READ List Parameter Pr 901 AM terminal calibration Pr 158 AM terminal function selection Pr 55 Frequency monitoring reference Pr 56 Current monitoring reference 1 Press The frequency setting screen appears and operation mode changes to PU operation mode 2 Press The paramete...

Page 53: ...7 Press Calibration is complete 8 Press to return to the main monitor screen Run Inverter 60Hz 901 AM Tune PU MntrF 60 00Hz 901 AM Tune WRITE PU Completed MONITOR 901 AM Tune 60 00Hz STF FWD PU READ List 1 Press The frequency setting screen appears and operation mode changes to PU operation mode 2 Press The parameter unit is in the parameter setting mode 3 Enter and press The present Pr 158 settin...

Page 54: ...o not press Run Inverter 0 00Hz 901 AM Tune PU Run Inverter 60Hz 901 AM Tune PU MntrF 1000 901 AM Tune WRITE PU Completed MONITOR 901 AM Tune 10 Press The parameter unit is in the parameter setting mode 11 Enter and press The present Pr 158 setting appears 12 Enter and press The setting of output current is complete The output current for 10VDC is the setting value of Pr 56 Current monitoring refe...

Page 55: ...pplying a voltage across terminals 2 5 starting a current across terminals 4 5 Refer to page 49 3 Adjust any point without a voltage being applied across terminals 2 5 without a current being applied across terminals 4 5 Page 51 REMARKS When using FR PU07BB in the battery mode only Adjustment procedure 3 is available for the following calibration parameters Parameter Pr 902 Terminal 2 frequency se...

Page 56: ... parameter unit is in the parameter setting mode 3 Enter and press The present Pr 902 setting appears 4 Enter Voltage need not be applied across terminals 2 5 Freq Set SET 0 00Hz 0 400Hz SETTING MODE 0 9 Ser Pr NO Select Oper 0 00Hz Set WRITE 902 Ext2bias Ext READ 10Hz Set WRITE 902 Ext2bias 5 Press The bias frequency is set at 10Hz If the voltage is being applied across terminals 2 5 at this time...

Page 57: ...The bias frequency is set at 50Hz At this time set the gain on the assumption that the 5V 10V in the inverter is the set voltage 60 00Hz Set WRITE 903 Ext2gain Ext READ 50Hz Set WRITE 903 Ext2gain f 0 V 10Hz 50Hz 5V 10V 50 00Hz 50 00Hz 903 Ext2gain Completed REMARKS 1 The current input Pr 904 can also be adjusted using a similar procedure 2 The Pr 903 Terminal 2 frequency setting gain remains unch...

Page 58: ...le is 100 1 The previous setting is displayed 2 The present set voltage across terminals 2 5 is displayed in Freq Set SET 0 00Hz 0 400Hz SETTING MODE 0 9 Ser Pr NO Select Oper SETTING MODE Pr No READ 902 5 00Hz 0 5 902 Ext2bias Ext 20 0 1 2 5 Enter Set the bias frequency at 10Hz 6 Press The cursor moves to the set voltage 7 Apply a 0V voltage In this example 0V is applied as 10Hz is set for 0V Ind...

Page 59: ...ied to set 50Hz for 5V input 60 00Hz 97 1 903 Ext2gain Ext 80 0 1 2 50Hz 97 1 903 Ext2gain Ext 80 0 50 00Hz 97 1 903 Ext2gain Ext 80 0 50 00Hz 97 1 903 Ext2gain Ext 80 0 13 Press The gain frequency is set at 50Hz for 5V input Setting is completed as shown below The value displayed may not be just 100 0 in some cases REMARKS 1 The current input Pr 904 Pr 905 can also be adjusted using a similar pro...

Page 60: ...lue selected in Pr 73 5V in this example is 100 1 The previous setting is displayed 2 The present set voltage across terminals 2 5 is displayed in Freq Set SET 0 00Hz 0 400Hz SETTING MODE 0 9 Ser Pr NO Select Oper SETTING MODE Pr No READ 902 5 00Hz 0 5 902 Ext2bias Ext 0 5 1 2 5 Enter Set the bias frequency at 10Hz 6 Press The cursor moves to the set voltage Voltage need not be applied across term...

Page 61: ...ge Voltage need not be applied across terminals 2 5 12 Enter Input 5V to set gain 60 00Hz 97 1 903 Ext2gain Ext 80 0 1 2 50Hz 97 1 903 Ext2gain Ext 80 0 50 00Hz 97 1 903 Ext2gain Ext 80 0 50 00Hz 100 0 903 Ext2gain Ext 80 0 13 Press The gain frequency is set at 50Hz Setting is completed as shown below REMARKS 1 The current input Pr 904 Pr 905 can also be adjusted using a similar procedure 2 The Pr...

Page 62: ... setting monitor is displayed as 0 2 PU Oper FR PU07 You can select the PU operation mode via direct input direct setting with the number keys or select the Jog operation mode from the PU and displays how to operate the keys Page 60 FR PU07BB battery mode The PU operation mode and the PU Jog operation mode can be switched The operation is not available Menu screen page 1 Menu screen page 2 Menu sc...

Page 63: ... inverter fault Page 69 9 S W This function displays the software control number of the inverter 10 Selectop FR PU07 This function displays the signals assigned to the I O terminals of the control circuit and the ON OFF states of the signals Page 74 FR PU07BB battery mode This function displays the signals assigned to the I O terminals of the control circuit The ON OFF states of the input signal a...

Page 64: ... Regenerative brake duty Electronic thermal relay function load factor Output current peak A Converter output voltage peak maximum value of converter output voltage V Input power input side power amount currently used kW Output power output side power amount currently used kW Output signal ON OFF states of RUN FU etc ON OFF 3 4 5 6 7 8 9 10 11 12 Operation in PU operation mode at running frequency...

Page 65: ...IST 0 Trq B 6 0 1 Max F 120 00 2 Min F 0 00 15 JOG F 15 00Hz 0 400 2 1 3 Pr List 4 Pr Clear 5 Alarm His 6 AlarmClear 7 8 9 10 11 12 2 Clear All 1 Clear Pr Clear Pr Exec WRITE Cancel ESC Clear Pr Completed Completed Clear All Pr Exec WRITE Cancel ESC 1 OHT 5 OV2 2 SER 6 0V3 4 OV2 8 OV3 3 OV2 7 OV3 ALARM CLEAR Exec WRITE Cancel ESC The latest 8 faults are displayed 0 Trq Bst1 6 0 0 30 0 Trq Bst1 6 0...

Page 66: ...Run Error V f Setting See Pr 3 14 19 47 113 0 00Hz INV Output 0 00A 0 0V SHIFT 3 M A Dec Err 4 M Curr High NO I P Power M NOT RUNNING or Phase Loss Set 5 0S 0 60 00Hz Set 5 0S 60 00Hz 0 Stll Pv ON Set Too Low Load Too Big Pr 22 Error 0 00Hz INV Output 0 00A 0 0V SHIFT Motor Low Impedance Reduce TrqBst Pr 0 46 112 S W 7889 Estimated cause ...

Page 67: ... 1 Copy area 1 3 Copy area 3 1 Read VFD Copy area 1 2 Write VFD 3 Verifing 000 Overwrite area 1 WRITE Executing ESC Cancel 000 Area 1 to VFD WRITE Executing ESC Cancel 000 Verify Area 1 WRITE Executing ESC Cancel Param Copy Reading Reading Completed Param Copy Writing Completed Please Reset Param Copy Verifying Verifying Completed Terminal Name ON OFF Settings of Pr 178 to Pr 196 are displayed ...

Page 68: ...y 4 Alarm His 2 Current 3 Voltage 1 Frequency 4 Alarm His 5 Press The monitor screen selected by the cursor appears Press to give the first priority to this monitor screen REMARKS The monitoring list can be called only with pressing in the monitoring mode Refer to page 27 4 Alarm His can not be set to the first priority monitor When FR PU07BB is used in the battery mode the inverter power is OFF o...

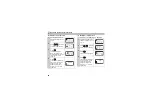
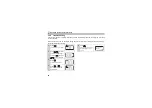
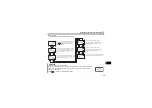
Page 69: ...not move the cursor with 5 Press The PU operation mode is selected and the frequency setting screen appears 2 PU Oper 3 Pr List 1 MONITOR 4 Pr Clear 2 PU Oper 3 Pr List 1 MONITOR 4 Pr Clear 2 JOG Jogging 1 PU Directly SET 0 00Hz Freq Set 0 400Hz 6 Enter the set frequency using to and press The frequency setting is complete 7 Press to perform forward or reverse rotation with the set frequency REMAR...

Page 70: ...ode is selected and the frequency setting screen appears 2 PU Oper 3 Pr List 1 MONITOR 4 Pr Clear 2 PU Oper 3 Pr List 1 MONITOR 4 Pr Clear 2 JOG Jogging 1 PU Directly 2 JOG Jogging 1 PU Directly SET 0 00Hz PU JOG 0 400Hz 6 Enter the set frequency using to and press The PU Jog frequency setting is complete 7 Hold down to perform forward or reverse rotation with the PU Jog set frequency REMARKS Pres...

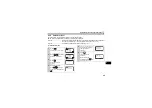
Page 71: ...mode to read and write the parameter setting 2 Pr List Displays the parameters list You can select the parameter from the list to read and write the parameter setting 3 Set Pr List Lists the parameters whose setting is changed from initial value You can select the parameter from the list to read and write the parameter setting 4 Def Pr List Displays the parameters and initial value list You can se...

Page 72: ... Oper 3 Pr List 1 MONITOR 4 Pr Clear 2 Pr List 1 Setting Mode 3 Set Pr List 4 Def Pr List SETTING MODE 0 9 Ser Pr NO Select Oper 2 Pr List 1 Setting Mode 3 Set Pr List 4 Def Pr List 2 Using move the cursor to 2 Pr List 3 Press The parameter menu appears 4 Press to move the cursor to the desired parameter Press and together to shift to the next page 5 Press The parameter indicated by the cursor is ...

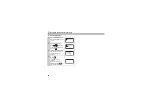
Page 73: ...age 33 to set the parameters 2 Pr List 1 Setting Mode 3 Set Pr List 4 Def Pr List 3 Set Pr List 2 Pr List 1 Setting Mode 4 Def Pr List 1 Max F1 0 00 18 Max F2 0 00 SET Pr LIST 125 2Freq 50 00 0 00Hz 1 Max F1 0 120 1 Call the parameter menu similarly to steps 1 to 3 of page 63 2 Using move the cursor to 4 Def Pr List 3 Press The initial value list appears 4 Press The parameter indicated by the curs...

Page 74: ...exception of Pr 75 1 Parameter clear 1 Press The function menu is called 2 Using move the cursor to 4 Pr Clear 3 Press The parameter menu appears 4 Select the Clear Pr Using move the cursor to 1 and press the 2 PU Oper 3 Pr List 1 MONITOR 4 Pr Clear 2 PU Oper 3 Pr List 1 MONITOR 4 Pr Clear 2 Clear All 1 Clear Pr 2 Clear All 1 Clear Pr 5 Clear Pr is selected and the confirmation screen for clearing...

Page 75: ... move the cursor to 2 Clear All and press the 3 Clear All is selected and the confirmation screen for clearing execution is displayed 4 Press The parameters are initialized When canceling the initialization press on the confirmation screen 2 Clear All 1 Clear Pr 2 Clear All 1 Clear Pr Exec WRITE Cancel ESC Clear All Pr Completed Completed Clear All Pr ...

Page 76: ...nce is displayed 5 Press The output current output voltage and cumulative energization time at fault occurrence is displayed 2 PU Oper 3 Pr List 1 MONITOR 4 Pr Clear 5 Alarm His 6 AlarmClear 7 INV Reset 8 T Shooting 2 SER 6 OV3 3 OV2 7 OV3 1 OHT 5 OV2 4 OV2 8 OV3 OH Fault LATEST ERR 0 00Hz 0 00A 0 0V LATEST ERR 7hr 6 Press when displaying the operation mode for fault occurrence in steps 4 and 5 to...

Page 77: ...wn and press to shift one screen 3 Press AlarmClear is selected and the confirmation screen for clearing is displayed 4 Press The fault history is cleared When canceling the clear press on the confirmation screen 2 PU Oper 3 Pr List 1 MONITOR 4 Pr Clear 5 Alarm His 6 AlarmClear 7 INV Reset 8 T Shooting Exec WRITE Cancel ESC ALARM CLEAR Completed Completed ALARM CLEAR ...

Page 78: ...he monitoring mode When canceling the inverter reset press on the confirmation screen 2 PU Oper 3 Pr List 1 MONITOR 4 Pr Clear 5 Alarm His 6 AlarmClear 7 INV Reset 8 T Shooting Exec WRITE Cancel ESC INV RESET 0 00Hz STOP EXT READ List REMARKS If the inverter s protective function is activated to bring the inverter to trip output shutoff execute the inverter reset only by pressing A similar reset o...

Page 79: ...ed 1 Press The function menu is called 2 Using move the cursor to 8 T Shooting Hold down and press to shift one screen 3 Press The fault menu appears 4 Press or to move the cursor to the desired item 2 PU Oper 3 Pr List 1 MONITOR 4 Pr Clear 8 T Shooting 5 Alarm His 6 AlarmClear 7 INV Reset 2 M Spd Error 3 M A Dec Err 1 M Not Run 4 M Curr High 2 M Spd Error 3 M A Dec Err 1 M Not Run 4 M Curr High 5...

Page 80: ...se rotation is inhibited as set in Pr 78 The inverter cannot start since the current limit function is activated Press to display the estimated cause that the current limit function was activated The inverter does not start because the inverter need not start the motor as a result of the arithmetic operation of PID control The inverter will not restart since the automatic restart after instantaneo...

Page 81: ...ing range Pr 31 to 36 the running frequency has jumped M SPEED ERROR Current Limit Activated SHIFT The current limit function was activated and forced the running frequency to reduce Press to display the cause that the current limit function was activated M SPEED ERROR Under PI Control As a result of arithmetic operation of PID control the running frequency differs from the set value Acceleration ...

Page 82: ...12 The motor in use may be a special motor other than the general purpose 3 phase induction motor If so reduce the torque boost setting Related parameters Pr 0 46 112 Low Trq Motor Reduce TrqBst Pr 0 46 112 The motor in use may be a constant torque motor motor for inverter If so reduce the torque boost setting Related parameters Pr 0 46 112 Trq Bst Setting Err See Pr 0 46 Since the torque boost se...

Page 83: ...wn and press to shift one screen 3 Press The signals assigned to the control circuit terminals and their ON OFF states are displayed 2 PU Oper 3 Pr List 1 MONITOR 4 Pr Clear 10 Selectop 11 Option 9 S W 12 PRCpy set RM 1 RH 2 RL 0 RT 3 REMARKS When FR PU07BB is used in the battery mode the ON OFF state of the input signal for the terminal assignment monitor are not displayed Plug in options cannot ...

Page 84: ...OP3 correspond to numbers 1 to 3 of the option slot on the inverter side For the inverter with only one option slot mounted option is displayed next to OP1 The plug in option which is mounted on the inverter is displayed 2 PU Oper 3 Pr List 1 MONITOR 4 Pr Clear 10 Selectop 11 Option 9 S W 12 PRCpy set OP1 OP2 option OP3 A7NC CAUTION Option fitting status monitor is not available in battery mode RE...

Page 85: ...running press to stop it Is the Pr 77 setting of the copy destination inverter correct Set 0 or 2 in Pr 77 Is the inverter of the copy destination the same series as that of the copy source Select the inverter of the same series Example FR A720 0 4K FR A720 0 75K Parameters can be copied only to the FR A720 0 4K FR F720 0 75K same series inverters CAUTION Turning power OFF during parameter copy re...

Page 86: ... the READ Using move the cursor to 1 Read VFD and press 2 PU Oper 3 Pr List 1 MONITOR 4 Pr Clear 12 PRCpy set 10 Selectop 11 Option 9 S W 2 Copy area 2 3 Copy area 3 1 Copy area 1 1 Read VFD 2 Write VFD Copy area 1 3 Verifing 6 Give a name You can name each of copy areas 1 to 3 Select the characters with and set them with Press to set the name for the area 7 Write to the copy area of FR PU07 The s...

Page 87: ...ctop 11 Option 9 S W 2 Copy area 2 3 Copy area 3 1 Copy area 1 2 Write VFD 1 Read VFD Copy area 1 3 Verifing 6 Writing the parameter settings is selected and the confirmation screen for writing is displayed 7 Press The parameter settings stored in the FR PU07 are copied to the copy destination inverter 8 Reset the inverter Refer to page 69 CAUTION Overwriting the data of the FR PU07 deletes the pr...

Page 88: ...RCpy set and press 5 Select the copy area Point the cursor to the copy area that stores the parameter settings required verification and press 2 PU Oper 3 Pr List 1 MONITOR 4 Pr Clear 12 PRCpy set 10 Selectop 11 Option 9 S W 2 Copy area 2 3 Copy area 3 1 Copy area 1 6 Select the Verifying Using point the cursor to 3 Verifing to press 7 Verification of the parameter settings is selected and the con...

Page 89: ...y Verify Err will be displayed if an incorrect value has been entered directly f setting or set in either Pr 173 or Pr 174 10 Press When verification is stopped with verification error press to continue verification 11 Verification is complete Pr 2 Param Copy Min F1 Verify Err Verify Err Completed Verifying Verifying Param Copy ...

Page 90: ... parameter unit to prevent setting from being disabled or incorrect values from being entered Precautions for the digit count and decimal point of input value The maximum number of input digits is six including a decimal point If you enter a value in excess of 6 digits the most significant digit is ignored 12345 6 2345 6 Input Ignored ...

Page 91: ... mode PU to External operation mode EXT Pressing switches to the External operation mode and changes the operation mode indication to EXT Confirmation Make sure that the external input signal STF STR is OFF 0 00Hz STOP PU Freq Set SET 0 400Hz 0 00Hz STOP EXT 0 00Hz READ List READ List Confirmation Make sure that the external input signal STF STR is OFF and that the operation command indication is ...

Page 92: ...nd key setting External signal input Multi speed selection Pr 4 to Pr 6 Pr 24 to Pr 27 4 to 20mADC across terminals 4 5 External signal input Terminal STF Terminal STR 4 External signal input 0 to 5 10VDC across terminals 2 5 4 to 20mADC across terminals 4 5 Multi speed selection Pr 4 to Pr 6 Pr 24 to Pr 27 JOG frequency Pr 15 Parameter unit REMARKS If the operation mode cannot be switched properl...

Page 93: ...rameter unit automatically enters the monitoring mode and shows the output frequency ON 1 Power on Operation mode check 0 00Hz STOP PU READ List 2 Running frequency setting Direct setting Freq Set SET 0 00Hz 0 400Hz 3 Start or 60 00Hz STF STOP PU READ List 4 Press The motor is decelerated to a stop REMARKS When performing PU operation to run the motor pressing the start key or after setting the ru...

Page 94: ...page 33 for the parameter setting method Initial value Pr 15 5Hz Pr 16 0 5s ON 1 Power on Operation mode check 0 00Hz STOP PU READ List 2 Parameter setting 3 Press then The PU Jog operation mode is selected and the PU Jog frequency setting screen appears on the display To change the frequency enter the value and press 4 Press or The display changes to the monitor screen Hold down the key to perfor...

Page 95: ...requency using direct setting or step setting Refer to page 30 ON 1 Power on 2 Operation mode selection 0 00 Hz STOP PU E READ List 3 Running frequency setting Direct setting Step setting 4 Set the start switch STF or STR to ON The operation command indication changes to STF or STR and the operation status indication changes to the output FWD or REV indication If the forward and reverse rotation s...

Page 96: ... potentiometer ON 1 Power on 2 Operation mode selection 0 00 Hz STOP PU E READ List 3 Running frequency ON High speed Low speed Middle speed or 4 Press or of the parameter unit The motor starts running and the state of the output frequency is shown on the display The starting terminals STF STR of the inverter are invalid The inverter may also be started by pressing the PU or and then inputting the...

Page 97: ...ion the motor is decelerated to a stop ON 1 Power on 2 Multi speed signal selection ON High speed Low speed Middle speed 3 Start 60 00Hz STF FWD EXT READ List ON Forward rotation Reverse rotation 4 Change the multi speed frequency during operation from the parameter unit When high speed has been selected RH signal ON changing the Pr 4 Multi speed setting high speed value varies the speed The other...

Page 98: ...r unit is connected properly Or check that the PU cable is inserted far into the PU connector Check the connection of the parameter unit and the PU cable The setting of Pr 991 PU contrast adjustment is changed from the initial value Check the Pr 991 setting Return the Pr 991 setting to the initial value using the operation panel The inverter is in the standby status Check whether the PU cable is d...

Page 99: ...verters Check the SERIAL number indicated on the inverter rating plate or package The PU07BB COMPATIBILITY ERROR display remains on and it will not accept operation FR PU07BB was connected to an incompatible FR E700 series inverter Refer to page 2 for supporting models Check the manufacture date of inverters Check the SERIAL number indicated on the inverter rating plate or package FR PU07BB cannot...

Page 100: ... and dirt Altitude vibration Maximum 1000m above sea level for standard operation 5 9m s2 or less at 10 to 55Hz directions of X Y Z axes Power supply Power is supplied from the inverter Power is supplied from the inverter a battery or an AC adapter sold separately Connection Installed to the inverter or connected to the inverter by the cable Connected by the dedicated cable Display LCD liquid crys...

Page 101: ... the usage Item Specifications Battery life Alkaline battery Nickel metal hydride battery A700 F700 E700 A700 F700 E700 Battery life Approx 90 min Approx 150 min Approx 120 min Approx 300 min Battery exhaustion warning lamp color changing start time From green to orange at lowering of battery power Approx 50 min before Approx 10 min before ...

Page 102: ...5 4 R1 Mounting hole 4 4 hole Valid screw depth 5 0 M3 screw 2 26 5 40 Outline drawing Panel cutting drawing 1 1 1 1 1 When installing the FR PU07 on the enclosure etc remove screws for fixing the FR PU07 to the inverter or fix the screws to the FR PU07 with M3 nuts 2 Select the installation screws of which length will not exceed the effective depth of the installation screws threads Unit mm ...

Page 103: ...94 Outline Drawing and Panel Cutting Drawing 6 2 2 FR PU07BB outline dimension drawings Outline drawing 8 2 46 7 44 7 46 7 135 83 18 6 Unit mm FR PU07BB cannot be installed to the enclosure and such ...

Page 104: ...waste Please dispose of this equipment at your local community waste collection recycling centre if it is to be disposed of in EU countries In the European Union there are separate collection systems for used electrical and electronic product Please help us to conserve the environment we live in Note This symbol is for EU countries only This symbol is according to the directive 2006 66 EC Article ...

Page 105: ...e Manual Number Revision Aug 2005 IB NA 0600240ENG A First edition May 2007 IB NA 0600240ENG B FR PU07BB Disposing of the equipment in EU countries Mar 2008 IB NA 0600240ENG C Partial changes Jan 2009 IB NA 0600240ENG D FR D700 series FR F700 series Additions Additions IB NA 0600240ENG D ...

Reviews: