15
Ⅲ
. Use after connection
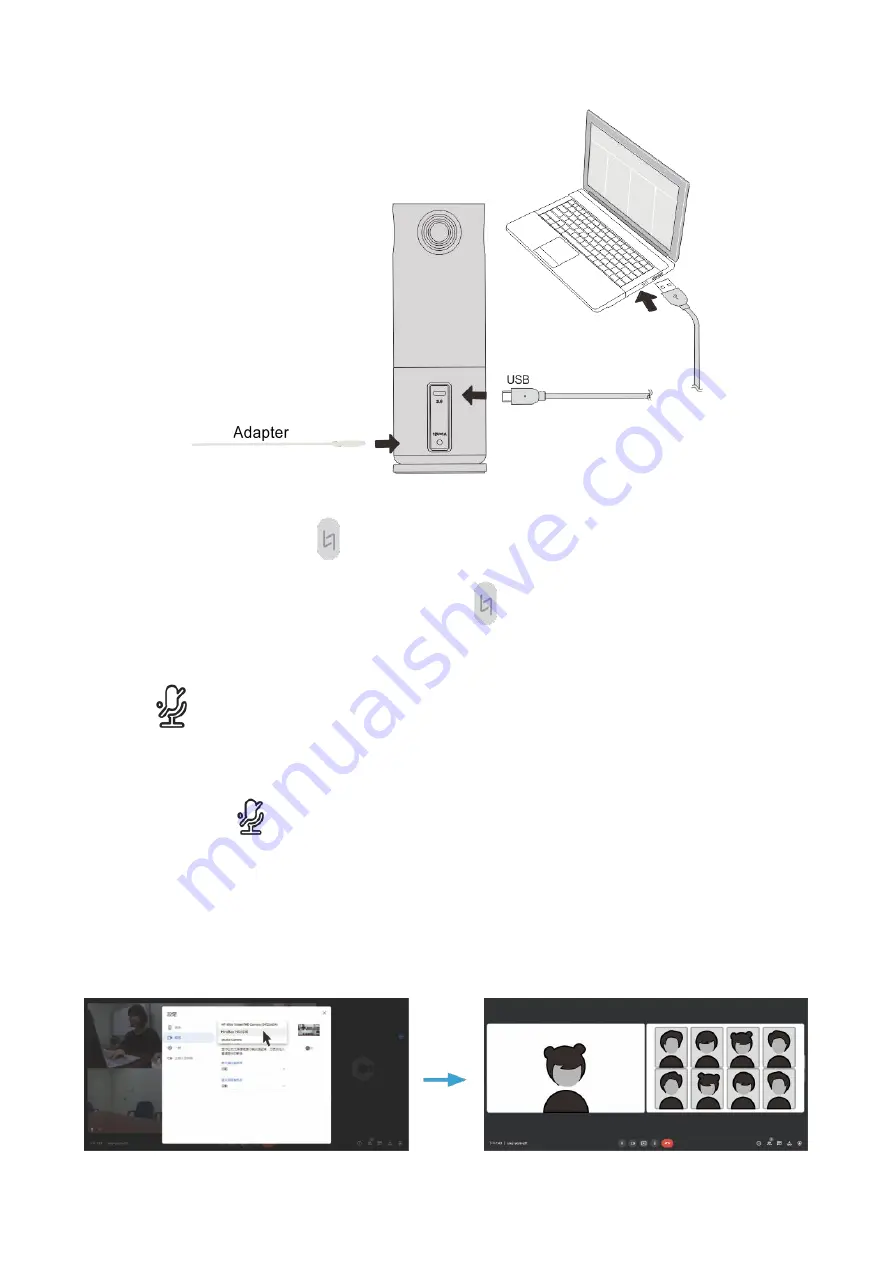
1. Connect the Video Conferencing Camera to the computer and the power supply through the dedicated
USB cable and 12V 1A adapter in the accessories, and the camera can be turned on after power on.
2. Press the mode switch button
to select the display mode to be output: Panorama Mode/Up and
down split Mode/Composed Mode/Speaker1 Mode (Upper: Presenter, Lower: panoramic view) /Speaker2
Mode (only the presenter is displayed). Long press the
button for 3 seconds to enter Panning mode.
The microphone is turned on by default, and the ring indicator lights up in blue.
One of the four Beamforming LEDs is displayed in blue, which indicates the current sound direction. You
can touch
button to turn off the microphone, the ring indicator turns red, and the Beamforming LED
turns off.
3. Open the conference video platform,such as Webex,Google Meet,Skype,Microsoft Teams, etc., and
access the remote meeting, the Beamforming LED is always on.
4. You can touch the
button to adjust the mute.
5. The video conferencing shuts down when it is powered off.
●
Some video conferencing platforms require you to choose the camera and microphone of MiraBox M6.
Video image output
1.Open any video software. Take Google Meet as an example to operate as shown in the figure below.
2.Select "MiraBox M6" in the camera device.
3.Google Meet displays the video output from Hardware.
Summary of Contents for HSV230
Page 3: ...3 MiraBox HSV230 TC 360 HSV230 VB044280299 0 Printed in China...
Page 4: ...4 USB Type A Type C 1 5m 12V 1A...
Page 7: ...7 MiraBox MiraBox 4 Readytech MiraBox MiraBox...
Page 8: ...8 MiraBox HSV230 SC 360 HSV230...
Page 9: ...9 USB Type A Type C 1 5m 12V 1A...
Page 12: ...12 MiraBox MiraBox 4 Readytech MiraBox MiraBox...


