Chapter 3 Setup
3-7
3
2
2
6
Check the correction pattern and enter a
correction value.
• A screen for entering the correction value
appears.
•
Enter a correction value in “+”
:
The boundary between the two bands is widened.
•
Enter a correction value in “-”
:
The boundary between the two bands is
narrowed.
• When you change the correction value by “25”,
the width of the boundary changes by about 0.1
mm.
7
Press
key.
• Print a correction pattern again and check it.
• When media correction is needed, perform the
operation in Step 6 to make correction.
8
Press
key several times to end
the setting.
Correcting Media-feeding during
Printing
A media-feeding rate can be corrected even in the remote
mode or when image data is printed.
1
Press the
(ADJUST)
in the Remote.
2
Press
to enter a corrected
feeding rate.
•
Corrected feeding rate
: -9999 to 9999
• The value entered here is reflected in the corrected
feeding rate soon.
3
Press
key.
• The changed value is registered.
If the Positions of Dots Shift...
When the condition for printing (Distance of the platen and
the head /media thickness/media type/etc.) has been
changed, perform the following operation to correct the
ink drop position for bidirectional (Bi) printing and obtain
the proper printing result.
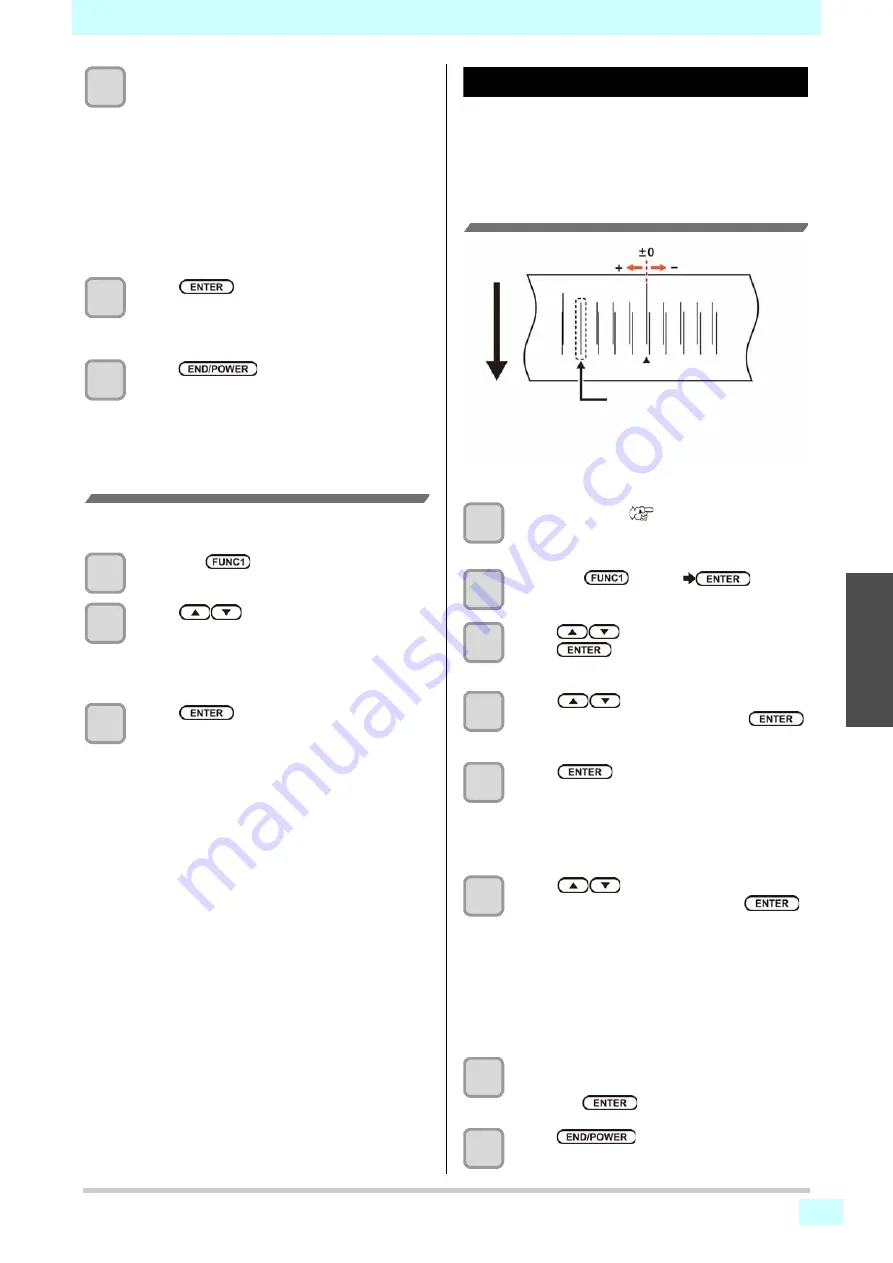
Example of a Printed Pattern
1
Setting a Media (
• In order to print a pattern, a media that is 500 mm
wide at least is necessary.
2
Press the
(MENU)
key in
Local.
3
Press
to select SETUP 1 to 4, and
press
key.
• Setup menu will be displayed.
4
Press
to select
“DropPos.Correct” , and press the
key.
5
Press
key.
• Printing of the Drop position correct printed
pattern will start.
• Multiple test patterns are printed. (The printed
patterns are called Pattern 1, Pattern 2 in the
order of printing.)
6
Press
to enter the correction
value for pattern 1, and press the
key.
•
Corrected feeding rate
: -40 to 40
• Check the test patterns. The position where an
outward feeding line and a return feeding line
become one straight line is the correction value.
• When the correction value in not between -40 and
40, adjust the height of the printing heads and
then perform the operations in Step 2 and later.
7
In the same way as step 6, enter the
correction value for patterns 2 to 5, and
press the
key.
8
Press
key several times to end
the setting.
The dots at the fourth position
counted from the zero position in
the positive direction form a
straight line.
In this case, the dot position
correction value is 4.0.
Output
direction


