background image

OM-246 466 Page 1

SECTION 1 

 SAFETY PRECAUTIONS - READ BEFORE USING

som _2010

03

7

Protect yourself and others from injury — read and follow these precautions.

1-1. Symbol Usage

DANGER! 

 Indicates a hazardous situation which, if

not avoided, will result in death or serious injury. The

possible hazards are shown in the adjoining symbols

or explained in the text.
Indicates a hazardous situation which, if not avoided,

could result in death or serious injury. The possible

hazards are shown in the adjoining symbols or ex-

plained in the text.

NOTICE


 Indicates statements not related to personal injury.

.

Indicates special instructions.

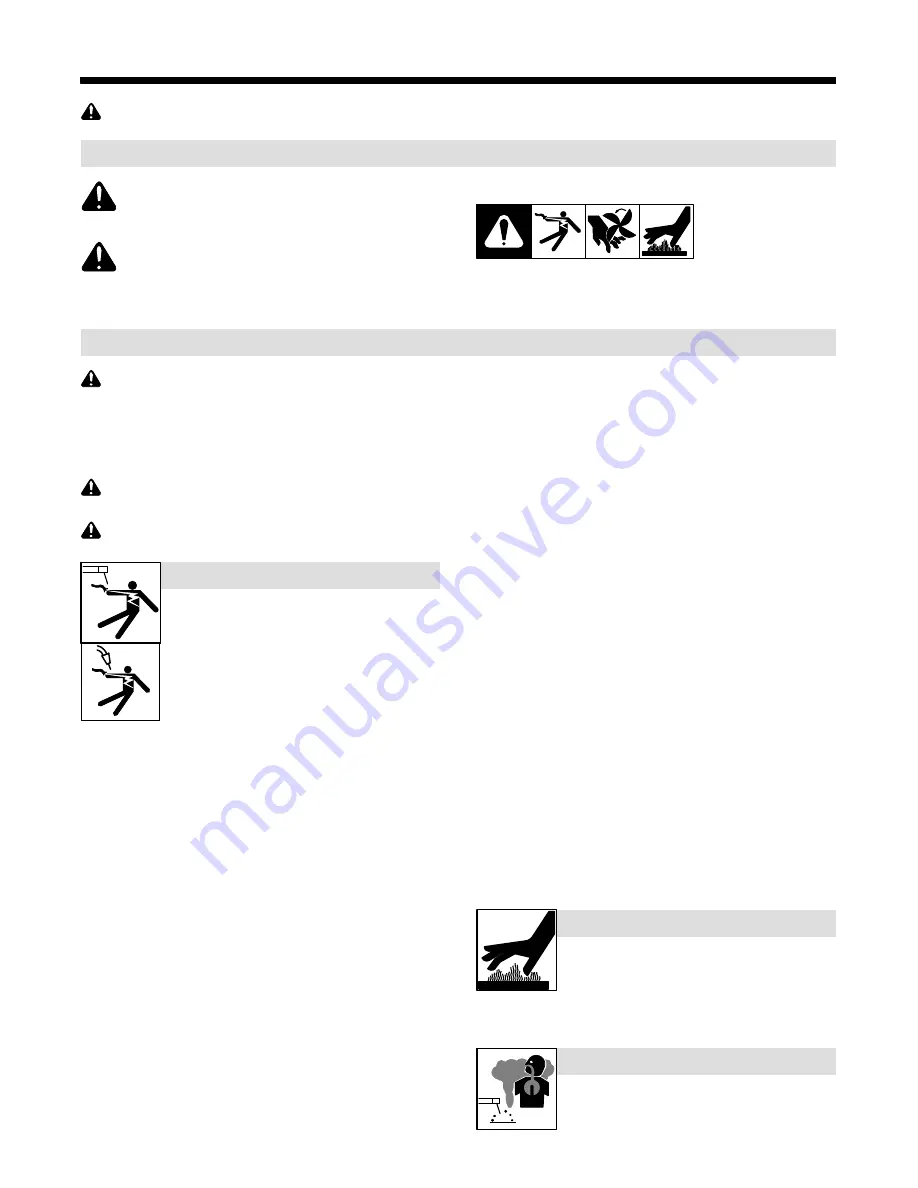
This group of symbols means Warning! Watch Out! ELECTRIC

SHOCK, MOVING PARTS, and HOT PARTS hazards. Consult sym-

bols and related instructions below for necessary actions to avoid the

hazards.

1-2. Arc Welding Hazards

The symbols shown below are used throughout this manual

to call attention to and identify possible hazards. When you

see the symbol, watch out, and follow the related instructions

to avoid the hazard. The safety information given below is

only a summary of the more complete safety information

found in the Safety Standards listed in Section 1-5. Read and

follow all Safety Standards.

Only qualified persons should install, operate, maintain, and

repair this unit.

During operation, keep everybody, especially children, away.

ELECTRIC SHOCK can kill.

Touching live electrical parts can cause fatal shocks

or  severe burns. The electrode and work circuit is

electrically live whenever the output is on. The input

power circuit and machine internal circuits are also

live when power is on. In semiautomatic or automatic

wire welding, the wire, wire reel, drive roll housing,

and all metal parts touching the welding wire are

electrically live. Incorrectly installed or improperly

grounded equipment is a hazard.

D

Do not touch live electrical parts.

D

Wear dry, hole-free insulating gloves and body protection.

D

Insulate yourself from work and ground using dry insulating mats

or covers big enough to prevent any physical contact with the work

or ground.

D

Do not use AC output in damp areas, if movement is confined, or if

there is a danger of falling.

D

Use AC output ONLY if required for the welding process.

D

If AC output is required, use remote output control if present on

unit.

D

Additional safety precautions are required when any of the follow-

ing electrically hazardous conditions are present: in damp

locations or while wearing wet clothing; on metal structures such

as floors, gratings, or scaffolds; when in cramped positions such

as sitting, kneeling, or lying; or when there is a high risk of unavoid-

able or accidental contact with the workpiece or ground. For these

conditions, use the following equipment in order presented: 1) a

semiautomatic DC constant voltage (wire) welder, 2) a DC manual

(stick) welder, or 3) an AC welder with reduced open-circuit volt-

age. In most situations, use of a DC, constant voltage wire welder

is recommended. And, do not work alone!

D

Disconnect input power or stop engine before installing or

servicing this equipment. Lockout/tagout input power according to

OSHA 29 CFR 1910.147 (see Safety Standards).

D

Properly install and ground this equipment according to its

Owner’s Manual and national, state, and local codes.

D

Always verify the supply ground 

 check and be sure that input

power cord ground wire is properly connected to ground terminal in

disconnect box or that cord plug is connected to a properly

grounded receptacle outlet.

D

When making input connections, attach proper grounding conduc-

tor first 

 double-check connections.

D

Keep cords dry, free of oil and grease, and protected from hot metal

and sparks.

D

Frequently inspect input power cord for damage or bare wiring 

replace cord immediately if damaged 

 bare wiring can kill.

D

Turn off all equipment when not in use.

D

Do not use worn, damaged, undersized, or poorly spliced cables.

D

Do not drape cables over your body.

D

If earth grounding of the workpiece is required, ground it directly

with a separate cable.

D

Do not touch electrode if you are in contact with the work, ground,

or another electrode from a different machine.

D

Do not touch electrode holders connected to two welding ma-

chines at the same time since double open-circuit voltage will be

present.

D

Use only well-maintained equipment. Repair or replace damaged

parts at once. Maintain unit according to manual.

D

Wear a safety harness if working above floor level.

D

Keep all panels and covers securely in place.

D

Clamp work cable with good metal-to-metal contact to workpiece

or worktable as near the weld as practical.

D

Insulate work clamp when not connected to workpiece to prevent

contact with any metal object.

D

Do not connect more than one electrode or work cable to any

single weld output terminal.

SIGNIFICANT DC VOLTAGE exists in inverter weld-

ing power sources AFTER removal of inputpower.

D

Turn Off inverter, disconnect input power, and discharge input

capacitors according to instructions in Maintenance Section

before touching any parts.

HOT PARTS can burn.

D

Do not touch hot parts bare handed.

D

Allow cooling period before working on equip-

ment.

D

To handle hot parts, use proper tools and/or

wear heavy, insulated welding gloves and

clothing to prevent burns.

Welding produces fumes and gases. Breathing

these fumes and gases can be hazardous to your

health.

FUMES AND GASES can be hazardous.

Summary of Contents for OM-246 466B

Page 1: ...ription MIG GMAW Welding RMD Modified Short Circuit Pulsed MIG GMAW P TIG GTAW Welding Stick SMAW Welding Arc Welding Power Source Multiprocess Welding File Pipe Welding Products Visit our website at...

Page 2: ...ntinue the tradition They re just as committed to providing equipment and service that meets the high standards of quality and value established in 1929 This Owner s Manual is designed to help you get...

Page 3: ...case Feeder 17 3 11 Voltage Sensing Lead And Work Cable Connections For Multiple Welding Arcs Suitcase Feeder 18 3 12 Rear Panel Receptacles And Supplementary Protectors 20 3 13 Peripheral Receptacle...

Page 4: ...e Wire Feeder Issues 49 7 3 Diagnostics 50 7 4 Removing Cover and Measuring Input Capacitor Voltage 52 7 5 Process Control Module PC4 Diagnostic LEDs 53 7 6 Diagnostic LEDs On Process Control Module P...

Page 5: ...r when there is a high risk of unavoid able or accidental contact with the workpiece or ground For these conditions use the following equipment in order presented 1 a semiautomaticDC constant voltage...

Page 6: ...Standards D Do not weld where the atmosphere may contain flammable dust gas or liquid vapors such as gasoline D Connect work cable to the work as close to the welding area as practical to prevent weld...

Page 7: ...panels covers and guards closed and securely in place D Have only qualified persons remove doors panels covers or guards for maintenance and troubleshooting as necessary D Reinstall doors panels cover...

Page 8: ...web site www ansi org Standard for Fire Prevention During Welding Cutting and Other Hot Work NFPA Standard 51B from National Fire Protection Association Quincy MA 02269 phone 1 800 344 3555 website ww...

Page 9: ...source lectrique courant lectrique s av re n cessaire se servir de la fonction de t l commande si l appareil en est quip D D autres consignes de s curit sont n cessaires dans les condi tions suivante...

Page 10: ...u laine et des bottes de protection LE SOUDAGE peut provoquer un incendie ou une explosion Le soudage effectu sur des conteneurs ferm s tels que des r servoirs tambours ou des conduites peut provoquer...

Page 11: ...lt rieur D Utiliser les quipements corrects les bonnes proc dures et suffi samment de personnes pour soulever et d placer les bouteilles D Lire et suivre les instructions sur les bouteilles de gaz com...

Page 12: ...stan ce correcte et utiliser une terre et un blindage pour r duire les interf rences ventuelles LE SOUDAGE L ARC risque de provoquer des interf rences D L nergie lectromagn tique risque de provoquer d...

Page 13: ...r gion 5 Chicago est 312 353 2220 site Internet www osha gov U S Consumer Product Safety Commission CPSC 4330 East West Highway Bethesda MD 20814 t l phone 301 504 7923 site inter net www cpsc gov Ap...

Page 14: ...OM 246 466 Page 10...

Page 15: ...0 1A 27 6 0 1A 16 5 0 1A 15 7 0 1A 13 6 0 1A 10 9 0 1A 10 9 0 2 10 4 0 4 225 A 29 V DC 100 Duty Cycle 10 300 A In CC Mode 80 V In CC Mode 22 8 0 1A 20 6 0 1A 12 4 0 1A 11 8 0 1A 10 3 0 1A 8 6 0 1A 8 3...

Page 16: ...s opens output stops and cooling fan runs Wait fifteen minutes for unit to cool Reduce amperage or duty cycle before welding NOTICE Exceeding duty cycle can damage unit and void warranty Overheating...

Page 17: ...cting A Location loc_2 3 96 243 893 A Do not stack units Beware of tipping 1 Lifting Forks Use lifting forks to move unit Extend forks beyond opposite side of unit 2 Hand Cart Use cart or similar devi...

Page 18: ...r Heat Shrink Tubing 3 Braided Shield Cut off shield at end of jacket 4 Inner Core 5 Center Conductor 6 Ring Terminal Tools Needed 1 2 6 1 4 in 2 in 3 59 ft 2 4 5 3 8 in 1 in 208 810 Front View 3 7 Co...

Page 19: ...select proper cable size 1 Positive Weld Output Terminal 2 Negative Weld Output Terminal Connect positive weld cable to Positive weld terminal and negative cable to Negative weld terminal 3 Weld Outp...

Page 20: ...0 2 35 1 50 1 0 60 2 0 70 3 0 95 3 0 95 200 3 30 2 35 1 50 1 0 60 2 0 70 3 0 95 4 0 120 4 0 120 250 2 35 1 50 1 0 60 2 0 70 3 0 95 4 0 120 2 ea 2 0 2x70 2 ea 2 0 2x70 300 1 50 1 0 60 2 0 70 3 0 95 4 0...

Page 21: ...ource Do not coil excess cables Use cables that are the appropriate length for the application Whenever using long weld cables longer than 50 ft 15 m try to arrange positive and negative weld cables t...

Page 22: ...rkpiece This arrangement is a bad setup due to sensing leads being directly in the current flow path of the welding arc Interaction between welding circuits will affect voltage drop in the workpiece T...

Page 23: ...Voltage Sensing Lead 6 Wire Feeder 7 Workpiece This arrangement is a better setup for supporting separate voltage feedback to the welding power sources The most accurate voltage sensing may not be ac...

Page 24: ...work CB2 is rated at 15 amperes and protects the wire feeder from overload If CB2 opens the wire feeder does not work Press button to reset breaker If breaker continue to open contact a Factory Author...

Page 25: ...ct closure to F indicates coolant flow switch is closed and recirculating coolant system is operational F Circuit common H Not used J Not used K Not used L Not used M Not used Circuit common is same e...

Page 26: ...to socket B completes contactor control circuit C 10 volts dc input from power source to wire feeder with respect to socket D D Remote volt control circuit common E 0 to 10 volts dc remote volt trim...

Page 27: ...460 575 Input Amperes A At Rated Output 19 5 17 6 10 5 10 0 8 7 7 7 Max Recommended Standard Fuse Rating In Amperes1 Time Delay Fuses 2 20 20 10 10 10 8 Normal Operating Fuses 3 30 25 15 15 15 10 Min...

Page 28: ...r through current transducer and connect to welding power source grounding terminal first Then connect input conductors L1 L2 and L3 to welding power source line terminals Reinstall side panel onto we...

Page 29: ...constant current ramps with constant voltage control of peaks and backgrounds Adaptive response is controlled by peak and minimum current levels Benefits are shorter arc lengths better puddle control...

Page 30: ...LED indicates which setup mode is active Setup mode parameters are shown in Display Windows see Items 13 and 15 Process LED When this LED is lit turn the Adjust knob to select the desired weld process...

Page 31: ...on menu when using a PDA with PipePro Program Management software PipeProMgr Command values are displayed prior to welding and actual values are displayed while welding unless a PDA with PipePro Progr...

Page 32: ...eder control cable or optional extension cable Connect 72 pin connector to I O receptacle RC72 on rear of power source Connect 10 pin connector into receptacle RC8 on rear of power source 4 Negative W...

Page 33: ...but does have a gas setting go to Step 6 3 Push Setup button again Use the Adjust knob to choose Wire Type INCO MCOR CrMo SS or STL 4 Push Setup button again Use the Adjust knob to choose Alloy Type f...

Page 34: ...urce 3 Negative Weld Cable 4 Positive Weld Cable 5 Workpiece 6 14 Pin Plug On Remote Foot Control Cable Turn off welding power source before connecting to foot control 14 pin plug 7 Remote Foot Contro...

Page 35: ...put Use the Adjust knob to set the desired amperage b If Remote control is selected connect a remote device using a remote cable adapter 300 248 to connect to an Interconnect Cable and then connect th...

Page 36: ...t sense lead to work clamp and attach work clamp as close to arc as possible 3 Volt Sense Cable 4 Negative Weld Cable 5 Positive Weld Cable 6 Workpiece 7 14 Pin Plug On Remote Hand Control Cable Turn...

Page 37: ...Adjust knob to choose type of Control CTRL PANL or CTRL REMT a If Panel control is selected press the Wire Feed Speed Amps display button for amperage output Use the Adjust knob to set the desired amp...

Page 38: ...Isolation Control 042 871 Without HF Unit Ref 099 082 C Ref 098 115 B Tools Needed 13 16 in 1 Electrode 1 2 Electrode 2 3 A Terminal 4 B Terminal 5 C Terminal 1 E 2 E 1 C B A FROM POWER SOURCE S1 2 3...

Page 39: ...71 Without HF Unit Ref 099 082 C Ref 098 115 B Tools Needed 13 16 in 1 Electrode 1 2 Electrode 2 3 A Terminal 4 Bus Bar 5 B Terminal 6 C Terminal E 2 E 1 C B A FROM POWER SOURCE S1 TIG WORK POLARITY R...

Page 40: ...Argon 2 Oxygen OX2 81 Argon 18 Helium 1 CO2 TRIA 90 Helium 7 5 Argon 2 5 CO2 TRIH 0 045 1 2 98 Argon 2 CO2 C2 98 Argon 2 Oxygen OX2 81 Argon 18 Helium 1 CO2 TRIA 90 Helium 7 5 Argon 2 5 CO2 TRIH DPLX...

Page 41: ...2 C10 85 Argon 15 CO2 C15 75 Argon 25 CO2 C25 100 CO2 CO2 0 045 1 2 90 Argon 10 CO2 C10 85 Argon 15 CO2 C15 75 Argon 25 CO2 C25 100 CO2 CO2 E80 0 035 0 9 85 Argon 15 CO2 C15 100 CO2 CO2 FCAW N A Gas Y...

Page 42: ...ower up the front panel will display messages indicating the status of the unit The first message is PLS WAIT PLS WAIT is an abbreviation for network updating and means the internal control network is...

Page 43: ...0 100 275 w 175 Nominal 2 5 7 0 w 4 4 Nominal 50 55 w 53 Nominal 25 CO2 045 1 1 100 200 w 150 Nominal 2 5 5 1 w 3 8 Nominal 47 53 w 50 Nominal 25 90 10 045 1 1 100 200 w 150 Nominal 2 5 5 1 w 3 8 Nomi...

Page 44: ...00 200 w 175 Nominal 2 5 5 1 w 4 4 Nominal 50 55 w 53 Nominal 25 90 10 045 1 1 100 200 w 175 Nominal 2 5 5 1 w 4 4 Nominal 50 55 w 53 Nominal 25 85 15 Stainless Steel Process Wire Size in mm Wire Feed...

Page 45: ...w 5 1 Nominal 53 57 w 55 Nominal 16 98 2 CO2 045 1 1 150 250 w 200 Nominal 3 8 6 4 w 5 1 Nominal 53 57 w 55 Nominal 25 98 2 Ox ProPulse Stainless Steel Welding In Position 035 0 9 120 300 w 175 Nomina...

Page 46: ...flow of the weld puddle and the silicon acts as a de oxidizer 2 It is important to have proper joint preparation and fit up Use a bevel at the pipe joint of 35 37 5 degrees 70 75 degrees inclusive wi...

Page 47: ...SMAW EXX18 Program 8 Lift TIG Press the Arc Control button to confirm the reset The reset message is displayed for 2 seconds while factory program settings are being reloaded During the reset mode the...

Page 48: ...the display message appears in approximately 15 seconds Rotate Adjust knob to check the program revision level of each module as follows PCM Process Control Module X UIM User Interface Module X WFCM W...

Page 49: ...lace To be done by Factory Authorized Service Agent Reference Every 3 Months l Unreadable Labels Weld Terminals l Damaged Gas Hose nl Weld Cables nl Cords nl Gun Cables Every 6 Months OR Drive Rolls I...

Page 50: ...nd method Do not put both hands inside unit Keep one hand free D Disconnect input power conductors from deenergized supply line BEFORE moving a welding power source SIGNIFICANT DC VOLTAGE exists in in...

Page 51: ...which contain chemicals known to the State of California to cause birth defects and in some cases cancer California Health Safety Code Section 25249 5 et seq Battery posts terminals and related access...

Page 52: ...the display windows indicate whether Volts Arc Adjust or Wire Speed can be changed turning the Adjust knob Depending on the defined weld process either volts MIG or arc adjust RMD Pro can be changed...

Page 53: ...re Check for any frayed wires at ground end of volt sensing lead that may prevent a good connection S Be sure that volt sense lead shielding is not touching center conductor S Be sure that wire feeder...

Page 54: ...e Agent PLS WAIT The uim communication error indicates user interface module PC7 lost data communications Press any button on front panel to clear error If condition persists contact nearest factory a...

Page 55: ...n the PCM board is not functioning properly Press Jog Purge button to clear error Leave the unit powered up for five minutes and then turn on the con tactor to clear the fault NET WAIT The network wai...

Page 56: ...C2 2 Voltmeter Measure the dc voltage across the bus terminal and bus terminal on PC2 as shown until voltage drops to near 0 zero volts Measure input capacitor voltage on both inverter assemblies befo...

Page 57: ...Diagnostic LEDs 1 LED2 LED1 LED4 LED3 7 6 Diagnostic LEDs On Process Control Module PC4 LED Status Diagnosis 1 On Indicates 25 volts dc is present on process control module PC4 Off Indicates 25 volts...

Page 58: ...p Switch S2 Dip switches are used to identify each circuit board on the internal network Dip switch settings are different for each circuit board For proper operation do not change dip settings from t...

Page 59: ...ches are used to identify each circuit board on the internal network Dip switch settings are different for each circuit board For proper operation do not change dip settings from those shown 216 958 A...

Page 60: ...nal On from robot for jog retract Off Input signal Off from robot for no jog retract 12 On Input signal On from robot for purge Off Input signal Off from robot for no purge 13 On Input signal On remot...

Page 61: ...ent on automation interface module PC9 Off Indicates 15 volts dc is not present on automation interface module PC9 28 On Indicates 15 volts dc is present on automation interface module PC9 Off Indicat...

Page 62: ...ircuit board has encountered a recoverable fault Wait or cycle power to clear fault Red The circuit board has encountered an unrecoverable fault 7 12 Troubleshooting Trouble Remedy No weld output comp...

Page 63: ...OM 246 466 Page 59 Notes...

Page 64: ...OM 246 466 Page 60 SECTION 8 ELECTRICAL DIAGRAMS Figure 8 1 Circuit Diagram For Welding Power Source...

Page 65: ...OM 246 466 Page 61 243 024 B...

Page 66: ...466 Page 62 SECTION 9 PARTS LIST Hardware is common and not available unless listed Ref 249 011 A 4 Fig 9 3 5 Fig 9 2 6 Fig 9 4 14 Fig 9 5 1 2 3 7 8 9 10 11 12 13 16 15 16 17 7 18 Figure 9 1 Main Ass...

Page 67: ...Module Supply V 15V 1 11 198951 Terminal Block 1 12 148025 Lug Univ W SCR 600V 2 0 6 Wire 266 Stud 1 13 226550 Filter Assy Secondary 1 14 Fig 9 5 Front Panel Assembly 1 227855 Kit Connectors W Washer...

Page 68: ...802 955 A 3 4 5 6 7 8 33 34 35 17 18 20 21 23 24 25 23 36 29 26 13 27 28 30 31 10 11 15 14 2 9 19 37 38 23 22 32 12 Hardware is common and not available unless listed 7 6 13 1 16 Figure 9 2 Windtunnel...

Page 69: ...RT1 RT2 RT3 214015 Thermistor NTC 30K Ohm 25 Deg C 7 18in Lead 3 25 PC2 222661 Circuit Card Assy Power Interconnect 1 199107 Clip Wire Stdf 20 30 Bndl 156hole 031 078thk 1 199108 Clip Wire Stdf 30 40...

Page 70: ...083147 Grommet SCR No 8 10 Panel Hole 312 Sq 500 High 4 6 PC4 Process Control Module PCM see Table 9 1 1 7 170647 Bushing Snap in Nyl 1 312 Id X 1 500 Mtg Hole 1 8 210491 Tray Mtg PC Card 1 9 223439 I...

Page 71: ...t eye shld thd stem 500 13 X 1 500 1 8 210505 Nameplate Rear 1 9 201058 Connector Rect 72 Pin Assy 1 10 210483 Bracket lift eye 1 11 CB1 083432 Supplementary Protector Man Reset 1P 10A 250VAC Frict 1...

Page 72: ...em 14 Quantity 1 S1 207456 Switch Assy Rotary 2 Posn 1P 40A 600VAC PNLMTG 90Deg 1 2 207895 Insulator Switch Power 1 3 179851 Knob Pointer 1 670 Dia X 250 Id Push On W Spring 1 4 User Interface Module...

Page 73: ...ram revision may not match the serial number of the PipePro 300 shown in Table 9 1 In order to provide the correct replacement board it is necessary to know the program revision for each of the boards...

Page 74: ...Notes...

Page 75: ...bles No Labor 5 6 Months Parts Batteries Bernard Guns No Labor Tregaskiss Guns No Labor 6 90 Days Parts Accessory Kits Canvas Covers Induction Heating Coils and Blankets Cables and Non Electronic Cont...

Page 76: ...your personal records Always provide Model Name and Serial Style Number Contact a DISTRIBUTOR or SERVICE AGENCY near you Welding Supplies and Consumables Options and Accessories Personal Safety Equip...

Reviews: