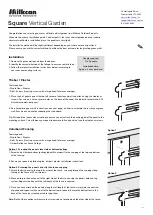
Square
Vertical Garden
www.milkcan.com.au
(03) 9464 6964
56 Northgate Drive,
Thomastown VIC 3043
1.0
Congratulations on selecting your new arti cial vertical garden from Milkcan Outdoor Products.
Welcome to our easy installation guide. The best part is that your vertical garden does not require
structural work before installation (since the panels are very light).
The installation method will be slightly different depending on your chosen mounting surface.
Please ensure you use the correct method to achieve the best outcome for long lasting green walls.
People required:
1 to 2 people
Installation time:
Approx. 5 mins per panel
1. Remove the green wall panels from their boxes.
2. Identify the correct direction of the foliage to ensure a realistic look.
3. Follow the relevant installation instructions below (according to
your chosen mounting surface).
Installation
Timber / Plaster
1. Place the rst panel against the top left corner of your fence/wall and attach using the staples or
screws. For screws, use the circular holes on the back of the panel. We typically recommend 8-12
attachment points per panel.
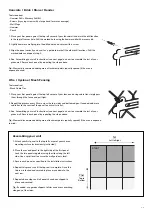
2. See ‘Assembling your wall’ instructions (see next page) on how to assemble the rest of your green
wall. Ssecure each panel by repeating the step above.
Tip: Pull apart the leaves when stapling to ensure you only attach the backing grid of the panel to the
mounting surface. This will mean your panel looks more full and you don't see the staples or screws.
Tools required:
- Staple Gun + Staples
- Drill + Screws (try using screws with a large head for more coverage)
Colorbond Fencing
Tools required
- Staple Gun + Staples
- Drill + Screws (try using screws with a large head for more coverage)
- Timber Battens or Fence Palings
Option 1 Screwing the panels into timber battens/palings
1. Screw vertical timber battens/palings (about 30cm apart) to the capping at the top and bottom
of the fencing.
2. Secure your panels by following the ‘timber / plaster’ installation instructions.
Option 2 Screwing the panels directly into fence capping
1. Attach the rst panel to the top left corner of the fence, screwing through the capping along
the top of the fence at 25cm intervals.
2. Proceed to join the next panel to the right side of the rst one using the panels hole and lug
system. Repeat step one until the full length of the fence is covered.
3. Once you have attached the panels along the full length of the fence, simply join the next row
of panels and repeat until you get to the bottom row of panels. Secure the bottom row to the
base of the fence by screwing or cable tying them.
Note: Both of these options will ensure that screws do not protrude on the other side of the fence.
Option 1
Option 2


