Operating Instructions
Dishwasher
G 2732
To prevent accidentsand appliance damageread these instructions
before
installation or use.
M.-Nr. 07 724 110
en - US, CA
Page 1: ...Operating Instructions Dishwasher G 2732 To prevent accidents and appliance damage read these instructions before installation or use M Nr 07 724 110 en US CA ...
Page 2: ...4 Rinse aid 15 Adding rinse aid 15 Rinse aid refill message 16 Loading the dishwasher 17 Items not recommended for dishwashing 18 Split cutlery tray 19 Upper basket 20 Adjusting the upper basket 23 Lower basket 24 Basket accessories 27 Use 28 Adding detergent 29 Turning on 30 Selecting a program 30 Program guide 31 Use 33 Selecting options 33 Starting a program 34 Time display 34 At the end of a p...
Page 3: ...53 Poor cleaning results 54 Comparison Tests 57 After sales service 59 Transport 60 User Maintenance Instructions 61 Cleaning and Care 62 Triple filter system 63 Cleaning the spray arms 65 Cleaning the water inlet filter 66 Cleaning the drain pump and non return valve 67 Installation instructions 69 Help to protect the environment 70 Electrical connection 71 Plumbing 72 Waterproof system 72 Connec...
Page 4: ...achine damage Consult a qualified electrician if in doubt Before installation or service disconnect the power supply to the work area by unplugging the unit tripping the circuit breaker or removing the fuse Do not use an extension cord to connect this appliance to electricity Extension cords do not guarantee the required safety of the appliance e g danger of overheating Be certain your appliance i...
Page 5: ... connected to the mains with the plug no hard wiring The outlet must be accessible at all times after installation to disconnect the dishwasher WARNING Fire hazard Do not cover or crush the plug of the appliance Ensure that the cabinet opening for the dishwasher provides ample space for the plug Installing the dishwasher in a tight space may crimp the power cord or put pressure on the plug which c...
Page 6: ...ay from the door to prevent damage to the seal Load sharp items pointing downwards to prevent injuries Only use detergents and rinse aids recommended for residential dishwashers Keep all detergents and rinse aids out of the reach of children Do not inhale or swallow detergents Dishwasher detergents contain irritant and corrosive ingredients They can cause burning in the mouth and throat if swallow...
Page 7: ... Middle spray arm e Air inlet for drying depending on model f Lower spray arm gTriple filter system hData plate iChild Safety Lock in the door handle not visible jRinse aid reservoir kDual compartment detergent dispenser lSalt container Guide to the dishwasher 7 ...
Page 8: ... about the displayed menu d Display See the following pages for more information e Selection buttons e To highlight selections in the display to change displayed values and to scroll between menus f OK button To confirm the highlighted menu or selected value g Start button with indicator To start the selected wash program h s On Off button To turn the dishwasher on and off Guide to the dishwasher ...
Page 9: ...ons To confirm these messages or settings press OK and the display switches to the next menu or to another menu level To select a menu highlight it with the selection buttons and confirm with OK The symbols in the left column of the Settings J menu show which submenu is displayed The arrows on the right side in the display show that more selections or text are available and can be displayed with e...
Page 10: ...ed dishware The water will not be heated therefore the dishes may be more wet at the end of this program than when using other programs Make full use of the baskets without overloading for the most economical washing Use the correct amount of detergent and rinse aid Detergent dosage is dependent upon the amount of soiling and type of dishware being washed See the Program Guide for more information...
Page 11: ...the program will restart To close the door Push the baskets in Lift the door and push until it clicks into place Child Safety Lock The Child Safety Lock is designed to prevent children from opening the dishwasher To lock the door push the slider below the door grip to the right To unlock the door push the slider to the left Before using for the first time 11 ...
Page 12: ...he clock format desired and confirm with OK The display changes automatically to the time of day setting 12 00 Set the time of day Select the hours with the e buttons and confirm with OK Repeat to set the minutes The settings will be saved after the first wash program has finished After confirming the minutes the Refill salt and Refill rinse aid messages may show See the relevant sections of the m...
Page 13: ...f the water hardness level in your area The dishwasher must be programmed to correspond to the water hardness in your area If the hardness of your local supply is constantly lower than 4 d 4 gr gal US you do not need to add water softener salt The Refill salt indicator will turn itself off automatically Checking the water hardness The water hardness level set can be viewed under the submenu Water ...
Page 14: ...e added with subsequent refills Place the provided funnel over the salt container Carefully fill with salt The salt container holds approx 4 5 lbs 2 kg of salt As it is filled water will run out Clean any excess salt from the threads of the container opening Screw the lid on firmly If the dishwasher will not be used im mediately run the Express program without the Turbo function This will remove a...
Page 15: ...inse aid Press the button in the direction of the arrow until the flap springs open Pour liquid rinse aid into the reservoir until it is visible on the surface of the screen The rinse aid reservoir holds approx 3 7 oz 110 ml Press on the flap until you hear it click shut Failure to close it all the way allows water to enter the reservoir during the wash program Clean any spilled rinse aid The flap...
Page 16: ...there will be enough rinse aid left for 2 3 washes Refill rinse aid after the program has finished If the Tab option is selected the Refill rinse aid will not come on See Settings J Detergent Confirm with OK The message will clear from the display Before using for the first time 16 ...
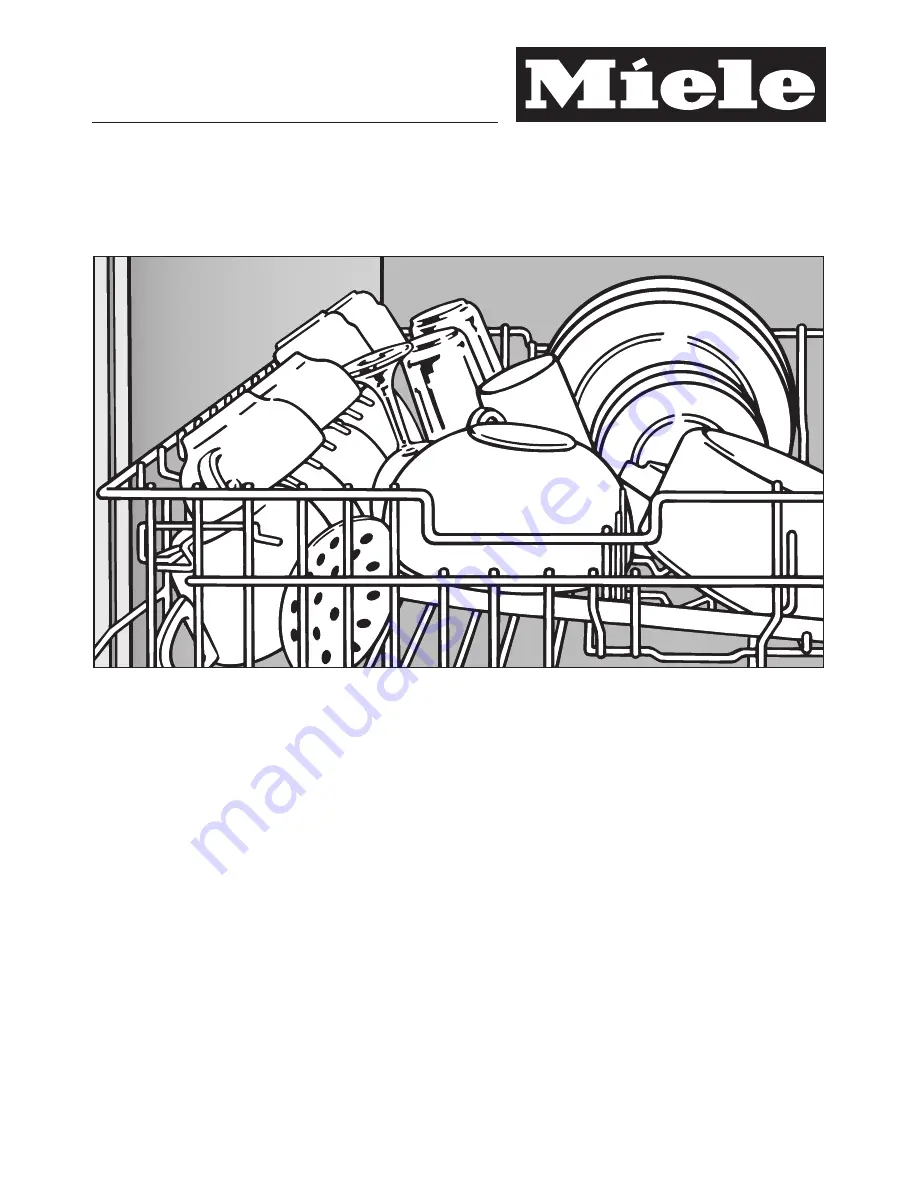
Page 17: ...e that all items are securely positioned Hollow items such as cups and glasses should be placed upside down in the baskets To ensure good water coverage tall narrow and hollow items i e vases or champagne glasses should be placed in the center of the basket rather than in the corners Concave based items such as mugs or bowls should be placed at an angle so that water does not pool The spray arms m...
Page 18: ...assware There are no standard guidelines for washing glassware when in doubt wash by hand When purchasing new dishes glasses and cutlery make sure they are dishwasher safe Only wash items marked dishwasher safe in the dishwasher If fine glassware is washed in the dishwasher select the China Crystal program This will reduce the risk of clouding Silver and aluminum Silver or aluminum items may tarni...
Page 19: ... prongs between the holders Spoons should be placed in the opposite direction with the handles between the holders The upper spray arm must not be blocked by tall cutlery items The inserts of the cutlery tray can be removed Single inserts can be removed to make room for tall items in the upper basket Spoons with thick handles may have to be placed as knives and forks with their heads in the holder...
Page 20: ...dles mixing spoons and long knives should be placed lying down across the front of the upper basket Removable spike insert The spike insert can be removed to create more space for larger items e g a saucepan Removing the insert a To remove an insert gently pull up on the handle Replacing the insert b Slide the hitches of the insert under the horizontal struts of the upper basket Push down on the h...
Page 21: ...p rack can be adjusted in two levels Pull the cup rack upwards and let it engage at the desired height Coffee bar depending on model Glasses can be leaned against the coffee bar to allow a firm stand The bar can also be used to separate two rows of glasses To stack wide items flip the bar to the right Loading the dishwasher 21 ...
Page 22: ...upport bar will hold tall glasses and stem ware securely Fold the bar down and lean the desired glasses against it If desired a section of the cutlery tray can be removed to allow for even taller glasses Loading the dishwasher 22 ...
Page 23: ...e care when sliding the basket in and out in this position Slide out the upper basket Pull up the levers at the sides of the upper basket and adjust the basket height Release the levers and the basket will lock in place Depending on the setting of the upper basket a variety of plate dimensions can be accommodated For example If the upper basket is in its highest position a plate with a diameter of...
Page 24: ... saucers can also be arranged in the lower basket Foldable spikes The foldable spikes can be used for small plates and saucers Two rows of spikes can be folded down to create more room for larger dishware e g pots pans and bowls Press the yellow lever down a and fold down the spikes b Loading the dishwasher 24 ...
Page 25: ...e insert b Slide the hitches of the insert under the struts of the lower basket Push down on the handle to snap the insert into position Removable PlateGuard Plus with StemGuard depending on model This insert is ideal for cups glasses plates bowls pots and pans To arrange tall items the cup rack can be raised The stemguard can be used to hold the stems of glassware or coffee cup handles Loading th...
Page 26: ...f the lower basket Push down on the handle to snap the insert into position Vase Bottle insert depending on model The vase bottle insert can be used to rinse narrow items e g vases baby bottles etc Place the insert into the lower basket as shown in the illustration If placed anywhere else water will not reach all surfaces The item will not be properly cleaned Loading the dishwasher 26 ...
Page 27: ...of the Cappuccinatore milk froth mug supplied with the Miele Coffee System attaches to the upper basket Cappuccinatore insert GCEO To wash the parts of the Cappuccinatore Multi function basket GMFO To wash baby bottles saucers and small items attaches to the upper basket Tall glassware insert GGU To wash a large number of tall glasses attaches to the lower basket Large diameter plate insert GTLU 3...
Page 28: ...ued use of too much detergent may cause machine damage When using the China Crystal program reduce the amount of detergent used to at least of the normal dosage Also make certain your china and crystal are dishwasher safe You can use powder gel or tab detergents Follow the dosage information on the detergent packaging See Settings J Tab for more information on detergent usage Detergent tabs are no...
Page 29: ...Add detergent to compartment II and close the flap If a Pre rinse is desired and available for your chosen program add 1 teaspoon 5 ml of detergent to compartment I The horizontal marks in compartment II indicate the levels of approximately 1 and 2 tablespoons 20 and 30 ml respectively Compartment I holds a maximum of 2 teaspoons 10 ml Use 29 ...
Page 30: ...mory Normal Pots Pans China Crystal e Selecting a program Choose your program according to the type of load and soiling The Program guide describes the programs and using Information about the selected program can be displayed by pressing the K button Select the desired program and confirm with OK The display changes to the program menu Sensor Wash Duration 1 32 h Options Back The detergent type c...
Page 31: ...r lightly soiled dishware e g party dishware or to remove salt traces from the wash cabinet after refilling salt includes sensor controlled GlassCare not suitable for detergent tabs x x x x Rinse Hold To rinse dishes when a complete program is not needed x SaniWash To sanitize dishware e g baby bottles cutting boards and preparation dishware x x x x Heavy Soil For heavily soiled dishware with drie...
Page 32: ...and plastic toys x x x x x Starch Cheese For dishware with dried on starchy or cheesy food 120 detergent recommended x x x x x LG items soiled For extra large heat resistant items e g large vases Remove upper basket x x x x x Glassware no rinse aid warm To wash glassware without detergent and rinse aid rinse cycle with warm water x x x Glassware no rinse aid cold For a quick cleaning of glassware ...
Page 33: ...ase Pre rinse For easily removable soiling Soak To soak stubborn soiling When using powder detergent fill approx 1 teaspoon 5 g of detergent in detergent compartment I Extended drying To enhance drying of odd shaped dishware and plastic items c Back Turbo L Extended drying Select the desired option and confirm with OK The selected options are marked with a L check The display changes to the progra...
Page 34: ...ng time is shown in the display The running time for the same program may vary depending on the intake water temperature load size and soiling When a program is selected for the first time a time is shown which equals an average program running time with cold water Each time a program is run the electronic adjusts the program running time according to the intake water temperature and the load size...
Page 35: ... will cool much faster Unload the dishwasher Unloading the lower basket first will prevent water drops from the upper basket and cutlery tray depending on model from dropping onto dishes in the lower basket Turn the dishwasher off s The dishwasher continues to use electricity until turned off with the s button If the dishwasher is not used for an extended period of time e g vacationing turn off th...
Page 36: ...secs This will enable the temperature in the wash cabinet to settle Close the door firmly until it clicks into place Changing a program If the detergent flap is already open do not change the program If a program has already started and you wish to change it Sensor Wash Rinse 1 30 h Cancel Select Cancel and confirm with OK The program is canceled Sensor Wash End Back Select Back and confirm with O...
Page 37: ...d time The d indicator lights 12 00 Start time 8 00pm End 9 32pm Select the desired start time Holding the button automatically increases or decreases the time The end time will be automatically adjusted Confirm with OK The display changes to the program menu Press the Start button Sensor Wash Start at 8 00pm Cancel The program name and the start time are displayed The indicators Start and d light...
Page 38: ... menu Settings J Select the desired submenu and confirm with OK The selected options in the submenus are marked with a check L Press the button to see more information about the program currently selected Language J The display contents can be shown in different languages The displayed language can be changed in the submenu Language J Select the desired language and confirm with OK The flag behind...
Page 39: ...e could increase Powder When using powder detergent salt and rinse aid must be added for best results See Filling the salt container and Rinse aid for more info The rinse aid refill message is activated Gel When using gel detergent salt and rinse aid should be added for best results See Filling the salt container and Rinse aid for more info The rinse aid refill message is activated Tab If the Tab ...
Page 40: ...al water softener unit which is regenerated with salt set the dishwasher to the water hardness of the external water softener Select the water hardness setting using e confirm with OK d gr gal Setting in display 1 2 3 4 5 6 7 8 9 10 11 12 13 14 15 16 17 18 19 20 21 22 23 24 25 26 27 28 29 30 31 32 33 34 35 36 37 45 46 60 61 70 1 2 3 4 5 6 7 8 9 10 11 12 13 14 15 16 17 18 19 20 21 22 23 25 26 27 28...
Page 41: ...nse aid amount and confirm with OK Filter check h This selection allows you to set the number of cycles run before the filter check message shows You can select between 30 and 60 cycles The filter check message is set by default to 40 cycles Select the desired number of cycles and confirm with OK See Cleaning and Care Triple filter system for more information Adjust Sensor Wash The Sensor Wash pro...
Page 42: ...he program to be saved to the position of the previously selected program Confirm with OK The reorganizing is confirmed and the new order of programs is shown b Back k 1 Starch Cheese 2 China Crystal e Reorganize another program or switch back to Settings J with Back Save options Ö Additional options can be selected for some programs e g extended drying See Use Selecting options Save options allow...
Page 43: ...r is locked every time it is turned on The function is turned off by default Select On and confirm with OK Unlocking the dishwasher Turn the dishwasher on The message Machine locked shows Press the OK button Child Safety Lock Cancel Yes No Select Yes and confirm with OK The dishwasher is unlocked and ready to use Temperature The temperature can be displayed in C Celsius or F Fahrenheit The tempera...
Page 44: ...hwasher in not turned off Buzzer in case of a fault The buzzer for a fault sounds continuously The buzzer sounds up to two minutes if the dishwasher is not turned off or the fault is fixed The buzzer for a fault cannot be set to off Buzzer volume Two buzzer volumes can be selected or the buzzer can be turned off Off The buzzer tone at the end of a program is turned off Soft The tone sounds in a so...
Page 45: ...ion allows you to save the last selected program When turning the dishwasher off and on again after a program has finished or opening and closing the door the last selected program is displayed instead of the main menu The function is turned on by default Select the desired option and confirm with OK RemoteVision Optional accessory To learn more about RemoteVision visit www miele com Select e to s...
Page 46: ...demonstrate the wash sound Trade show mode Once the machine is used for the first time this option is disabled in the display Turning the demo mode on Select the desired option Confirm the following messages with OK Press any button to start the selected demo mode To cancel the demo mode press any button again and confirm with OK Turning the demo mode off Select Off and confirm with OK The display...
Page 47: ...e the separate RemoteVision installation manual Be sure your wireless system meets the following requirements A wireless router that supports an IEEE 802 11b protocol Windows XP or newer operating system Mac OS X 10 3 or higher Cable or DSL modem Microsoft Internet Explorer 6 or higher Safari 2 0 or higher Firefox 1 5 or higher Please note that each wireless router manufacturer supplies their own ...
Page 48: ...ircuit breaker See data plate for minimum amperage The dishwasher stops during a program The fuse has tripped Reset the circuit breaker See data plate for minimum amperage The buzzer sounds The display shows the following Technical fault FXX Call Technical Service There may be a technical fault Turn the dishwasher off s After a few seconds Turn the dishwasher on Select the desired program with the...
Page 49: ...e water supply all the way Fault Water intake FXX Before fixing the fault Turn the dishwasher off s Fault F12 F13 Fault in the water intake Open the water supply all the way and restart the program Clean the water intake filter see User Maintenance Instructions The water pressure at the water connection is lower than 4 35 psi Consult a plumber Frequently asked questions 49 ...
Page 50: ...If the fault is displayed again use a different program The buzzer sounds The display shows the following Fault FXX Drain Before fixing the fault Turn the dishwasher off s Fault F11 Fault in the water drain There might be water in the wash cabinet Clean the triple filter Clean the drain pump and the non return valve See User Maintenance Instructions for more information on the above Remove any kin...
Page 51: ...s on again The display shows the following Middle spray arm blocked or Lower spray arm blocked The middle or lower spray arm is blocked by dishware Open the dishwasher door and rearrange items blocking the spray arms The spray arm jets of the middle or lower spray arm are clogged Turn the dishwasher off s Then Clean the spray arms See User Maintenance Instructions Frequently asked questions 51 ...
Page 52: ... This is not a fault It is the normal operating mode of the drying system The moisture will evaporate after a short time Water remains in the wash cabinet at the end of a program Before fixing the fault Turn the dishwasher off s The triple filter in the wash cabinet is clogged Clean the triple filter See User Maintenance Instructions The drain pump or the non return valve may be blocked Clean the ...
Page 53: ... blocking the spray arms There is a rattling noise in the wash cabinet Items are not secure in the wash cabinet Interrupt the program and rearrange loose pieces There is a knocking noise in the water pipes This may be caused by the installation or the diameter of the pipe This has no effect on the dishwasher If in doubt contact a plumber Frequently asked questions 53 ...
Page 54: ...ocked Turn the spray arm and rearrange the dishes if necessary The triple filter is clogged or not correctly inserted The spray arm jets might be clogged Clean the filter and insert it correctly see User Maintenance Instructions The drain pump or the non return valve is blocked Wash water will run back into the wash cabinet Clean the drain pump and the non return valve see maintenance instructions...
Page 55: ...d on but a normal powder or gel product was used Set the Detergent setting to the detergent used see Additional options Tab White residue is visible on cutlery and dishes Clouding occurs on glassware and film can be wiped off Not enough rinse aid was used Increase the dosage see Before using for the first time The salt container is empty Refill the salt container see Before using for the first tim...
Page 56: ...asses in the dishwasher Tea or lipstick stains have not been completely removed The wash temperature of the selected program was too low Select a program with a higher temperature The detergent has a low bleaching effect Use a different detergent Plastics are discolored Natural dyes e g from vegetables may be the cause Not enough detergent was used to break down natural dyes Use more detergent see...
Page 57: ...10 place settings Standard program Normal Upper basket Lower basket Cutlery tray Comparison Tests 57 ...
Page 58: ...16 place settings Standard program Normal Upper basket Lower basket Cutlery tray Comparison Tests 58 ...
Page 59: ...tract program gives you the assurance of knowing that your appliance investment is covered by 5 years of worry free ownership MieleCare is the only Extended Service Contract in the industry that guarantees repairs by a Miele Authorized Service Provider using genuine Miele parts Only genuine Miele parts installed by factory trained professionals can guarantee the safety reliability and longevity of...
Page 60: ...shwasher Secure any loose parts e g hoses cables cutlery baskets Transport the dishwasher in the upright position If unavoidable it may be transported on its back Do not transport it on its side or on the door Residual water in the machine could leak and cause electrical damage Transport 60 ...
Page 61: ...User Maintenance Instructions To prevent accidents and appliance damage read these instructions before installation or use ...
Page 62: ... arms Control panel The plastic control panel should only be wiped with a damp cloth or suitable cleaning agent designed for use on plastic The appliance front and controls are not scratch proof Remove spills immediately Exterior Only use a conditioner suitable for your kitchen cabinetry Clean wood only with a damp cloth and wipe dry Clean the exterior with a solution of warm water and liquid soap...
Page 63: ...ng and time it takes before the filters need cleaning will vary depending on your household usage The display shows W Check filter after 40 wash cycles default setting The filter check frequency can be set from 30 to 60 cycles See Settings J Filter check Check and clean the triple filter Confirm with OK The display changes to the program menu Cleaning the triple filter Turn off K the dishwasher be...
Page 64: ...er running water Close the flap so that the clip engages Return the filter so it lies flat in the base of the wash cabinet Lock the filter by turning the handle clockwise The triple filter system must be inserted and locked Large particles could get in the circulation system and cause a blockage Cleaning and Care 64 ...
Page 65: ...sent Push the upper spray arm up to engage the inner ratchet and unscrew the spray arm Lift up the middle spray arm a to engage the ratchet and unscrew the spray arm b Remove the lower basket Pull the lower spray arm firmly upwards to remove Use a pointed object such as a toothpick to push food particles into the spray arm jets Rinse thoroughly under running water Return the spray arms and check t...
Page 66: ... water contains a large number of insoluble substances a filter between the water valve and the intake hose connection is recommended These filters can be purchased from Miele Cleaning the filter Turn off the dishwasher and pull the plug Turn off the water supply Unscrew the intake hose Carefully remove the rubber seal Remove the filter using needle nose pliers and rinse it under running water Rei...
Page 67: ...a Pull out the non return valve b and rinse it under running water Remove all foreign objects from the non return valve The drain pump is beneath the non return valve see arrow Remove all foreign objects from the drain pump glass or bone splinters Before returning the non return valve check that the drain pump is not blocked Spin the propeller several times in both directions to check for obstruct...
Page 68: ......
Page 69: ...lied with these instructions For installation in compliance with IEC sound testing please contact Miele for additional instructions Information is subject to change Please refer to our website to obtain the most current product specification technical warranty information ...
Page 70: ...f children Danger of suffocation Disposal of an old machine Old appliances may contain materials that can be recycled Please contact your local recycling authority about the possibility of recycling these materials Ensure that the appliance presents no danger to children while being stored for disposal Before discarding an old appliance unplug it from the outlet cut off its power cord and remove a...
Page 71: ...al current This appliance is equipped with a cord having an equipment grounding conductor and a grounding plug The plug must be plugged into an appropriate outlet that is installed and grounded in accordance with all local codes and ordinances Improper connection of the equipment grounding conductor can result in electric shock Do not modify the plug provided with the appliance if it will not fit ...
Page 72: ...use hot water in the rinse cycles To use the Energy Saver program a hot water connection of minimum 115 F 45 C and maximum 140 F 60 C water intake temperature is necessary The higher the water intake temperature the better the cleaning and drying results The inlet hose is approximately 5 ft 1 5m long A 5 ft 1 5m drain extension is available from Miele The water inlet hose comes equipped with a 3 4...
Page 73: ...ng drain pipe for the drain hose is designed for various hose diameters The drain pipe must be shortened if the drain pipe extends too far into the drain hose The drain hose could get clogged The drain hose must not be shortened Make sure the hose is installed without kinking pressure or being pulled Venting the drainage system If the dishwasher drain hose is connected to a floor drain or to a dra...
Page 74: ...74 ...
Page 75: ...75 ...
Page 76: ...Alteration rights reserved 0910 G 2732 INFORMATION IS SUBJECT TO CHANGE PLEASE REFER TO OUR WEBSITE TO OBTAIN THE MOST CURRENT PRODUCT SPECIFICATIONS TECHNICAL WARRANTY INFORMATION M Nr 07 724 110 01 ...