Installation and Owner’s Manual
IMPORTANT NOTE:
Please read this manual carefully
before installing or operating your
wired remote controller. Make sure to
save this manual for future reference.
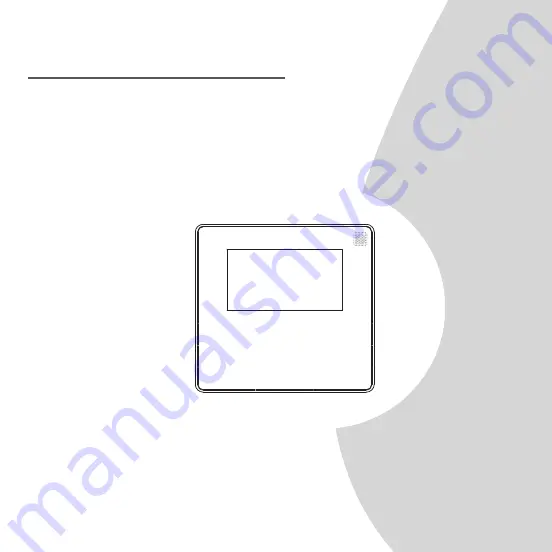
WIRED REMOTE CONTROLLER
MODEL:
KJR-120X/TFBG-E
Page 1: ...ner s Manual IMPORTANT NOTE Please read this manual carefully before installing or operating your wired remote controller Make sure to save this manual for future reference WIRED REMOTE CONTROLLER MOD...
Page 2: ...vice of the wired controller please read this manual carefully before using the unit For convenience of future reference keep this manual after reading it All the pictures in this manual are for expla...
Page 3: ...ller 6 Name on the LCD of the wired controller 7 Name of button on the wired controller 8 Preparatory operation 9 Operation 10 Timer functions 11 Weekly Timer 1 12 Weekly Timer 2 13 Fault alarm handin...
Page 4: ...is installation manual Imporper installation may lead to electric shock or fire Reinstallation must be performed by professionals NOTE Do not install the unit in a place vulnerable to leakage of flamm...
Page 5: ...d that would lead to system malfunction Select the installation location Preparation before installation 1 Please confirm that all the following parts you have been supply 1 2 3 4 5 3 2 M3 9X25 For Mo...
Page 6: ...cable of high voltage above like 115V 220V 380V and don t wire this kind of wire in the said loop wiring clearance between configured tubes should be at the range of 300 500mm or above 3 The Shielded...
Page 7: ...e the upper part of wired controller Insert a slot screwdriver into the slots in the lower part of the wired controller 2 places and remove the upper part of the wire controller Fig 3 2 19mm 84mm 46mm...
Page 8: ...ck cover on the 86 switch box and use one M3 9X25 screw to fix to the wall 3 Fasten the back plate of the wired controller Back plate Screws M4 20 Screw hole fixed on the wall useone 3 9X25mm Screw ho...
Page 9: ...orrected on the first time operation Batteries in the wire controller can time under power failure which ensure the time keep right When the power restores if the time displayed is not correct it mean...
Page 10: ...and the terminals of the indoor unit HA HB HA and HB do not have polarity HA HB 1 3 Installation method Fig 3 6 5 Wire with the indoor unit DO NOT allow water to enter the wire controller Use the tra...
Page 11: ...e units the wired controller connects to the unit HA and HB ports through the HA and HB ports There is no polarity between HA and HB SeeFig 3 7 HA HB Indoor Unit Wired Controller Fig 3 7 3 Installatio...
Page 12: ...s to control one unit and the wired controllers connect to the unit HA and HB ports through the HA and HB port on the controller There is no polarity between HA and HB SeeFig 3 8 HA HB HA HB HA HB Ind...
Page 13: ...the wired controller and unit need to be connected to the HA and HB ports at the same time In group control there will be no error displayed on the wired controller SeeFig 3 9 HA HB HA HB HA HB Indoor...
Page 14: ...per part of the wired controller After adjusting the upper case and then buckle the upper case avoid clamping the wiring during installation Fig 3 11 All the pictures in this manual are for explanatio...
Page 15: ...cification Wiring specifications Wiring type Size Total length shielded vinyl cord or cable 0 5mm 0 75 1 25mm 20m 66 2 2 50m 164 DC 12V 5 43 23 110 RH40 RH90 Input voltage Ambient temperature Ambient...
Page 16: ...and install the device Room temperature display Weekly Timer Mode choose Auto Cool Dry Heat Fan Fan speed Auto Low Med High speed Swing on some models Timer ON OFF Temp setting Weekly timer Follow me...
Page 17: ...ain unit and secondary unit indication 8 Room temperature indication 9 Follow Me function indication 10 Sleep mode indication 11 Electric Auxiliary Heat Turbo function indication some models NOTE AHU...
Page 18: ...the wired controller 1 POWER button 2 MODE button 3 DAY OFF DEL button 4 ADJUST button 5 CONFIRM button 6 TIMER button 7 FAN SPEED button 8 BACK bottom 9 SWING bottom 10 FUNC button 11 COPY button 3...
Page 19: ...button in 10 seconds The setting is done after pressing CONFIRM button or there is no pressing button in 10 seconds Set the current day and time 5 ex Monday 11 20 Press the button or to set the date...
Page 20: ...me display between the 12h 24h scale NOTE When the heating mode is 16 C 60 F 17 C 62 F press the down button twice within 1 second to turn on the 8 heating function and press the Power Mode adjust Fan...
Page 21: ...emergency heating single on electric auxiliary heating mode is displayed in the mode area the fan speed display automatic wind and the fan speed key does not respond There is no sleep 8 degree heatin...
Page 22: ...ttons Swing and FUNC for 3 seconds to close the keypad tone Press the buttons again for 3 seconds to open the keypad tone Press the button or to set the room temperature Indoor Setting Temperature Ran...
Page 23: ...button to start up down swing function Press it again to stop When the Up Down swing function is activated the mark appears Swing function For the unit left right auto swing models only Press the butt...
Page 24: ...t turns into up down swing mode press ti again to stop When the Up Down swing function is activated the mark appears Not applicable to all the models Use Swing button to adjust the Up down airflow dir...
Page 25: ...select the sleep icon and then press the OK button to turn on or off the sleep function and set the wind speed to display as automatic wind After the sleep function is turned on turning on turbo 8 de...
Page 26: ...tion Press the FUNC button to select whether the room temperature is detected at the indoor unit or the wire controller Follow me function indication Press the button again to cancel the follow me fun...
Page 27: ...32 degrees that is this function is invalid When the ambient temperature is 26 32 degrees when the ambient temperature is greater than or equal to the set temperature the two machines will run 24 deg...
Page 28: ...hour it will automatically turn on another air conditioner and turn off the current air conditioner Press the POWER button to switch to another one immediately A or B icons flicker to indicate the co...
Page 29: ...operation starts after the time has passed Off timer Use this timer function to stop air conditioner operation The timer operates and air conditioner operation stops after the time has passed On and O...
Page 30: ...firm button and the Timer display is flashing Press the Confirm button again to finish the settings 3 ex Off timer set at 18 00 4 Press the button or to set the time After the time is set the timer wi...
Page 31: ...mer button to select the 1 2 Press the Confirm button and the Clock display is flashing 3 Press the button or to set the time of On timer and then press the Confirm button to confirm the setting 4 5 P...
Page 32: ...eekly timer setting 1 Press the button or to select the day of the week and then press the Confirm button to confirm the setting 2 Day of the week setting Press the button or to set the time of On tim...
Page 33: ...then press the Confirm button to confirm the setting NOTE The weekly timer setting can be returned to the previous step by pressing Back button The time of timer setting can be delete by pressing Day...
Page 34: ...And the air conditioner will turn on automatically until the time of On timer ON OFF ON OFF 8 00 12 00 14 00 17 00 10 00 ex If press the POWER button once and quickly at 10 00 The air conditioner wil...
Page 35: ...he Day off button to set the DAY OFF 3 5 To cancel Follow the same procedures as those for setup 4 ex The DAY OFF is set for Wednesday The DAY OFF can be setted for other days by repeating the steps 2...
Page 36: ...ode ensures ease of making reservations 2 Press the button or to select the day to copy from During the weekly timer pressing the Del button once display Press this button twice display and wait 3 sec...
Page 37: ...e day to copy to Press the Confirm button to confirm the settings Press the Back button to back to the weekly timer 5 Press the Copy button to confirm Other days can be copied by repeating step 4 and...
Page 38: ...rm Press or to select the day of the week and then press CONFIRM 2 Day of the week setting Press or to select the setting time The setting time mode temperature and fan speed appear on the LCD Press C...
Page 39: ...IRM Press or to set the time then press CONFIRM 12 Weekly Timer 2 ex Tuesday time scale 1 IMPORTANT Up to 8 scheduled events can be set on one day Various events can be scheduled in either MODE TEMPER...
Page 40: ...scheduled events can be set by repeating steps 3 through 7 8 Additional days in a one week period can be set by repeating steps 3 through 8 9 NOTE The weekly timer setting can be returned to the previ...
Page 41: ...starts automatically ex To cancel To set the DAY OFF for a holiday After setting the weekly timer press CONFIRM 1 Press or to select the day of the week 2 The timer mode can also be canceled by changi...
Page 42: ...rocedures used for setup 4 ex The DAY OFF is set for Wednesday Set the DAY OFF for other days by repeating the steps 2 and 3 Copy out the setting in one day into the other day In the weekly timer pres...
Page 43: ...m the settings Press BACK to revert to the weekly timer 5 Press COPY to confirm Other days can be copied by repeating steps 4 and 5 ex Copy the setting of Monday to Wednesday The mark flashes quickly...
Page 44: ...or to select the day of the week and then press CONFIRM Press or to select the setting time want to delete The setting time mode temperature and fan speed appear on the LCD The setting time mode tempe...
Page 45: ...e the system according to the following procedures The error displayed on the wire controller are different from those on the unit If error code appears please check the Owner s And Installation Manua...
Page 46: ...ttings Not operating keys 15 seconds or press Back or press ON OFF drop out of query temperature When the air conditioning unit is switch machine Long press COPY for 3 seconds first display P 00 if co...
Page 47: ...nfirm into setting state press or to select the temperature then press Confirm to complete it compensation temperature Follow me function temperature compensation When the air conditioning unit is off...
Page 48: ...select then press Confirm to complete it When the air conditioning unit is off into the query function of temperature press or to select tHI or tLo Press Confirm into setting state press or to select...
Page 49: ...ting of the wire controller Press Confirm into setting state press or to select then press Confirm to complete it The code setting of the wire controller shall prevail The wire controller address sett...
Page 50: ...t set The compensation of body temperature is uncompensated COOL and HEAT single COOL mode is restored to COOL and HEAT model The temperature range was restored to 16 30 C 60 86 F 17 30 C 62 86 F Remo...
Page 51: ......
Page 52: ...QSX003IU 120X 16117100A18916 20210327 The design and specifications are subject to change without prior notice for product improvement Consult with the sales agency or manufacturer for details...