12
X22-19688-01
Step 1: Non-Skid Foot Pad Removal Process
Preliminary Requirements
IMPORTANT:
Be sure to follow all special (bolded) notes of caution within each process section.
Required Tools and Components
·
Tools:
o
Spudger tool
o
Clamps (2), 2” Spring
o
Plastic Feeler Gage – 0.050mm
·
Components:
o
Feet qty= 4 (device color specific)
Prerequisite Steps:
·
Power off device - Ensure device is powered off and disconnected from a power supply.
·
General Safety - Check to make sure that general guidelines and ESD compliance steps are followed prior to
opening the device. Refer to Refer to Prior to Device Disassembly section (
·
Position device - To prevent scratches, flip device over onto a clean surface free of debris with the device
bottom facing up for access to the feet for removal.
IMPORTANT:
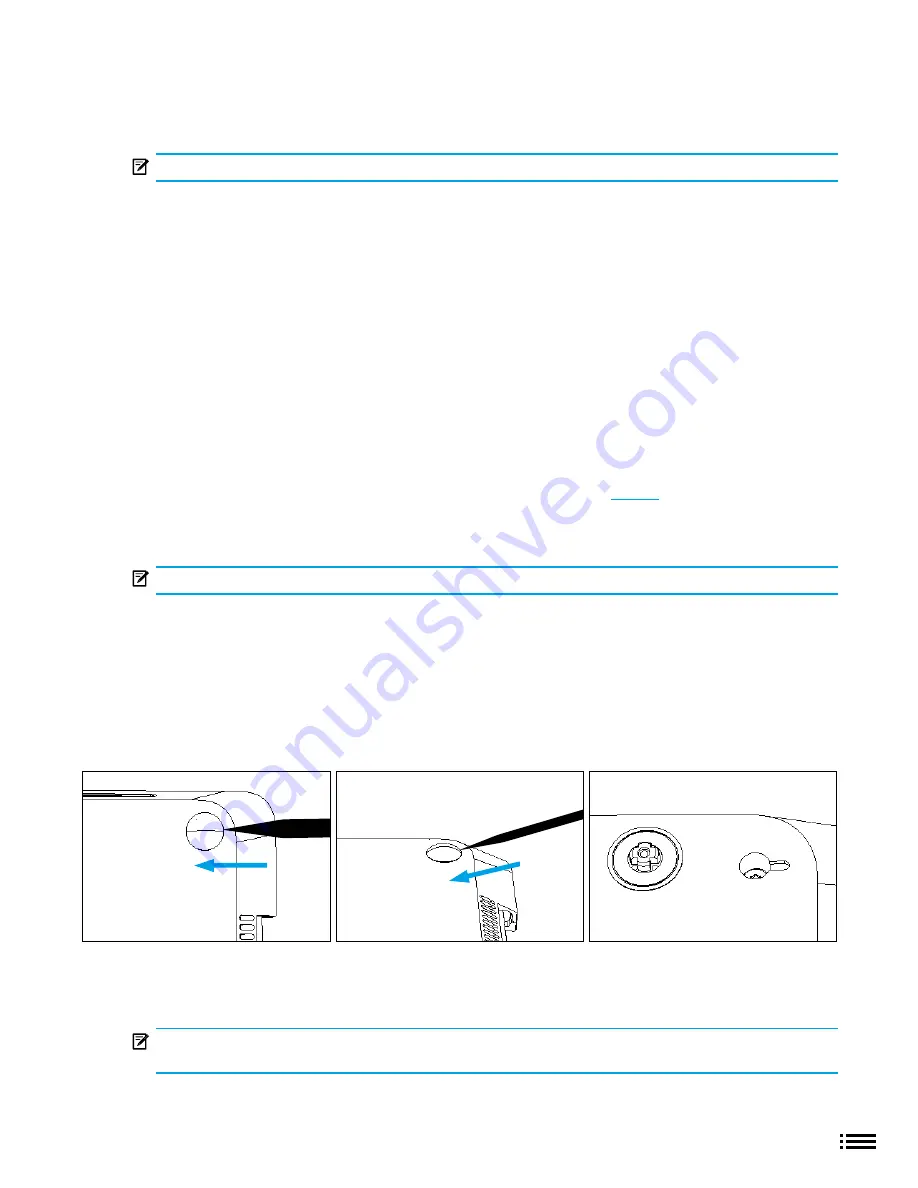
There are two types of feet (front and back) – refer to illustration for details.
Procedure – Removal (Non-Skid Foot Pad)
1.
Front foot removal technique - To remove front feet, insert the pointed end of a plastic Spudger tool
(pictured) from the long side of the device under the foot. There is a designed gap in the foot located at the
center of the outside edge of the foot. Point the plastic tool directly in the middle of the foot starting from
the front edge and push in towards the middle of the device.
2.
Back foot removal technique - To remove back feet, perform the same steps as for the front feet but from
the back side of the device and along the long edge.
3.
Adhesive removal - Remove any adhesive liners in the foot pockets. Use IPA and cotton wipes to clean off
any adhesive residue within the foot pocket.
IMPORTANT:
Ensure the IPA is completely dried off device and that no adhesive residue is left before
applying new feet to avoid the risk insufficient adhesion of the new feet.
Front Feet
Back Feet


