

Installing the KW270 USB WiFi Option
MD0018-002
Revision B
Page 1 of 2
This MD describes how to install the
KW270 Wireless Option using the
SagRad USB WiFi Board. The option
consists of an 802.11 b/g WiFi Card,
mounting bracket, interface cable and
modified antenna bracket with pre-
mounted WiFi antenna.
Procedure
1. Power off the workstation by
pressing and holding the Power
Button. Remove all cables.
2. Place the workstation face down and
loosen the six captive screws that
hold the cover in place.
3. Return the unit to the normal
operating position and lift up on the
cover until it just clears the chassis,
then place it behind the unit.
4. In order to access the antenna
brackets on the rear of the unit, you
may need to remove system board
cables.
5. Remove the two rear screws from
the SD Riser Card and install the
WiFi bracket. The WiFi Card can be
installed in the bracket with the
interface cable located on the left or
right. Figure 1, below.
Figure 1: Installing the WiFi Card Bracket
6. The bracket and preinstalled antenna
can be installed on the left or right
side. You may need to remove the
old style paddle antenna bracket to
install the new bracket/antenna.
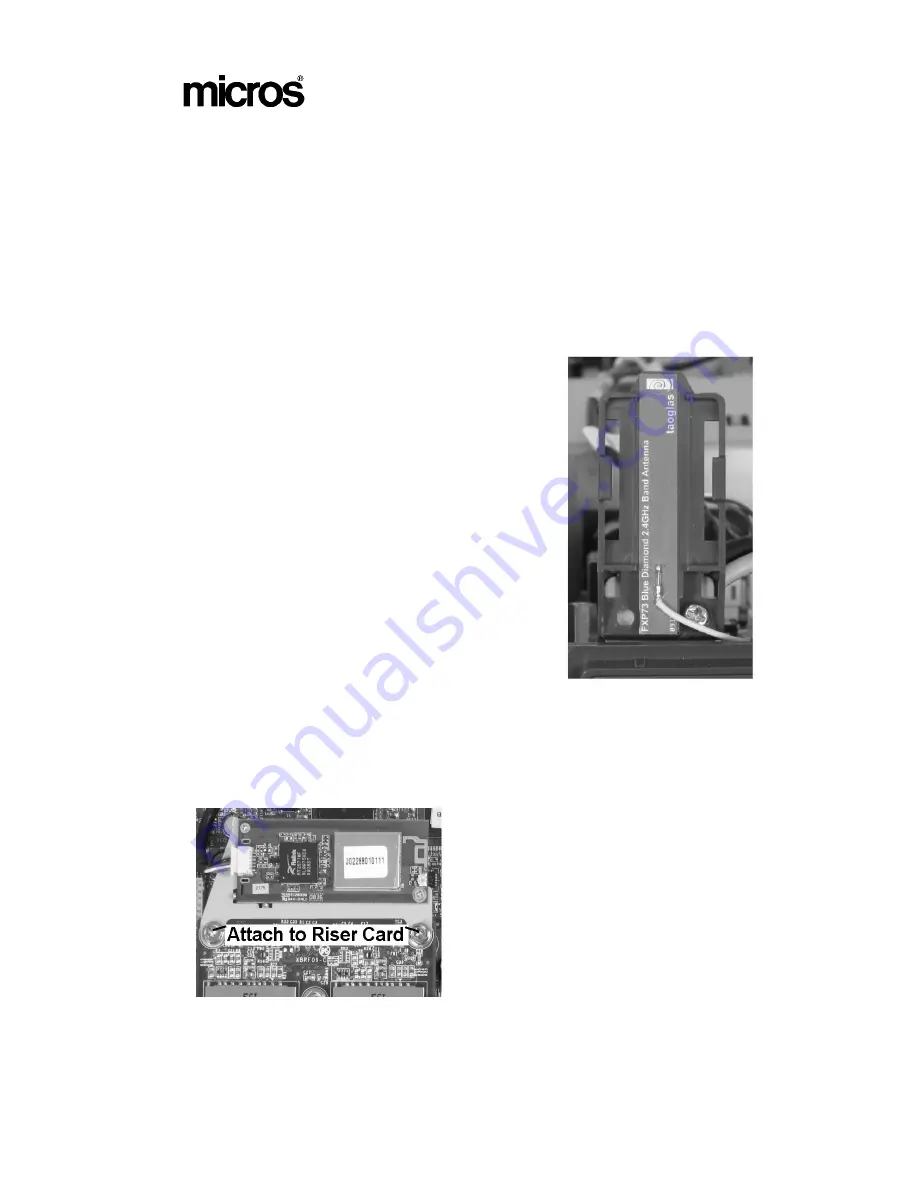
7. Install the modified antenna bracket
with pre-mounted WiFi antenna
supplied in the kit. Figure 2.
Figure 2: Install the Antenna Bracket
8. Refer to Figure 3 on the next page,
and complete the installation by
connecting the interface cable
between the WiFi Card and System
Board connector J13.
9. Connect WiFi antenna cable to the
WiFi card as shown. The antenna
cable length may vary.
On kits with a 100mm antenna cable,
the bracket/antenna should be
installed on the left side of the
workstation.
Continues on the next page


