MIOConsole3d Session
315
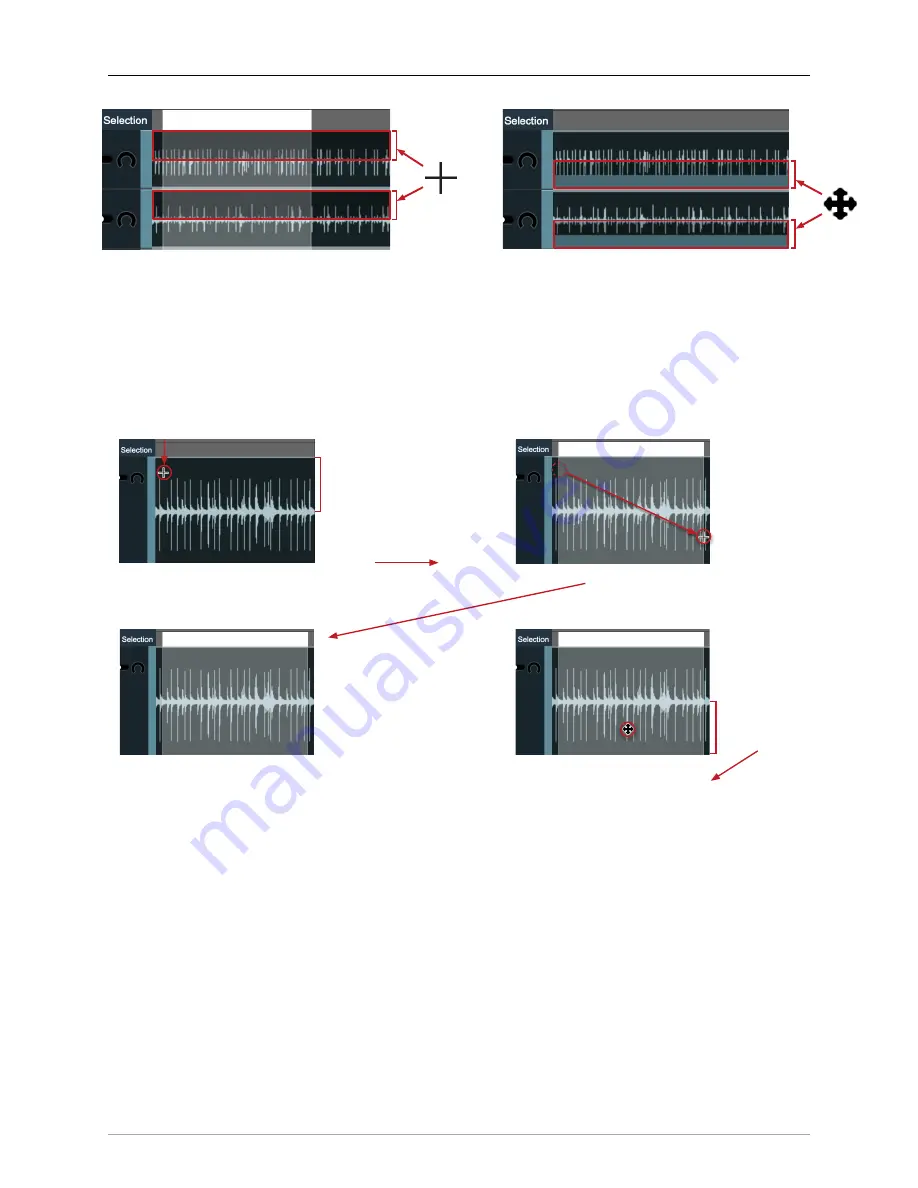
Time Range selection cursor area
Segment selection / drag cursor area
Figure 12.4: Time Range Selection (left) - Segment Selection (right)
•
Time range selections
are made by clicking in the top half of any track, and dragging across the
overview field. The mouse cursor turns into a thin crosshair icon in the top of half of a track to
indicate time range selection mode.
cursor over the top half of a track
to make a time range selection
time range selection
“crosshair” cursor
Release the drag
to complete
the time range selection
As you drag,
the selection area will be
highlighted in the Track,
and shown in white
in the “Selection” timeline
1
2
3b
cursor over the bottom half
of a track to invoke the
‘Buttony Cross’ edit cursor
3a
command-key Delete, Copy, or Cut
to create a Segment of the selected area
and perform the edit command
OR….
click-hold and drag the range to edit
Drag (to move) or Option-Drag (to copy)
Click in the top half of any Track,
hold and drag to select an area
Figure 12.5: Timeline range selection gestures
Time range selections are good for quickly targeting audio from contiguous segments and delet-
ing or copying the audio within that range. Edit actions taken on time range selection will auto-
matically "split" and apply start and end fades at the range boundaries as appropriate to the edit.
Be aware, control-click contextual menu commands currently work only on Segment selections. If
you control-click in a time range selection you will see that the segment you clicked within that
range will highlight, and the menu action will apply only to that segment, not the time range
selection.
•
Segment selections
are the usual selection of one or more segments - a segment being any portion
of audio waveform with a start fade and an end fade ("no fade" butt-splices included - those are
just fades with zero duration).


