The MIOConsole3d Application
196
Once your selections have been made, you can proceed to the next step by clicking the “Next”
button.
Generally, there will be one domain on the left and one on the right, making this step pretty straight-
forward. Since 3d does allow for advanced systems with multiple domains, this is how they are han-
dled.
Note: at any point in the process you may accept the defaults that will be applied in the
subsequent mapping steps and commit the mapping by clicking the “Finish” button.
If you decide you need to back up and change a setting in a previous step, click the
“Prev” button to go back.
If you want to stop the mapping process without making any changes to your existing
configuration, click the “Cancel” button or the window’s ‘Close’ button.
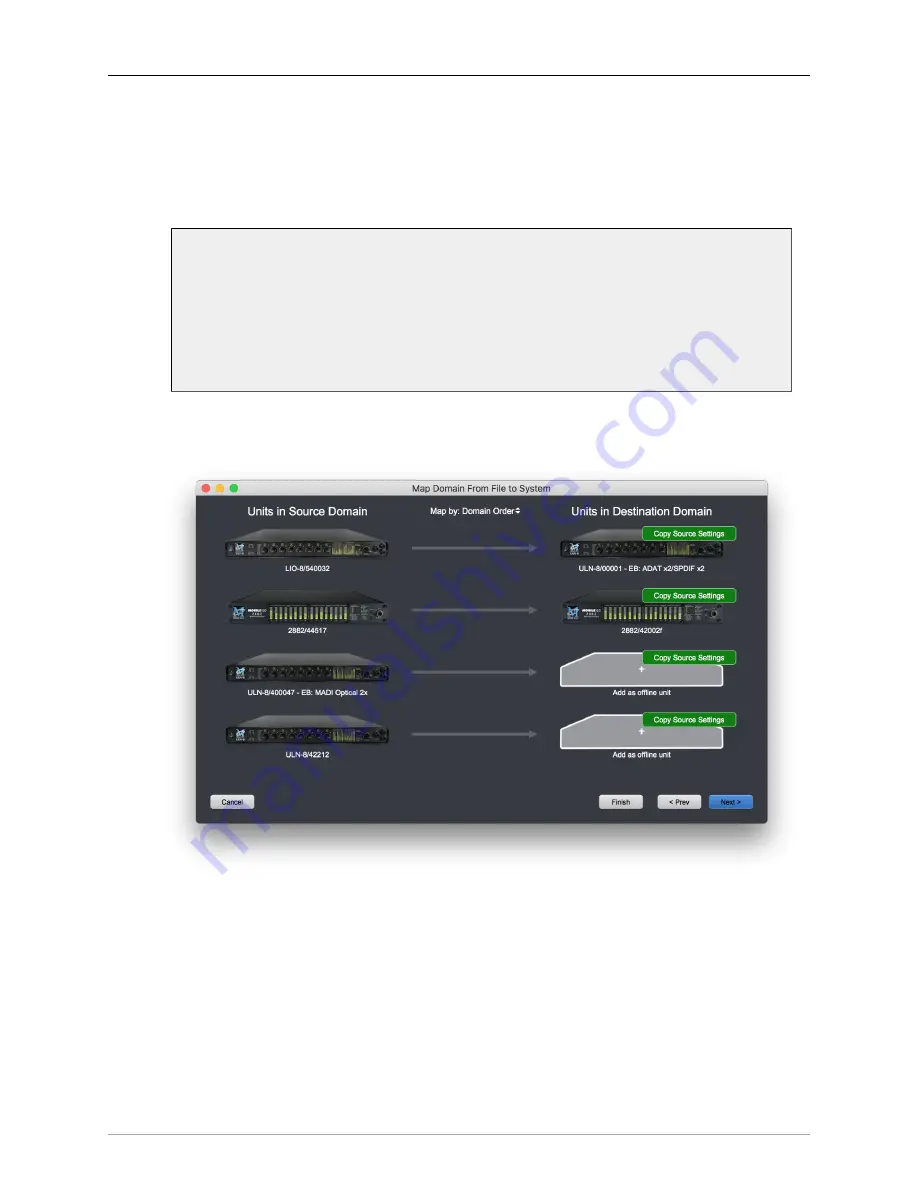
After you click the “Next” button, you will see the Box Mapping pane:
Figure 10.9: Map Domain: Source Boxes To System Boxes
The
Box Mapping
pane allows you to choose how the saved boxes in the file are mapped to the
actual boxes you have in your system. You can click and drag the boxes in the right hand column
(drag them up and down) to set the mapping from a given source box to a destination box.
The analog (including level trims) and digital I/O configurations (including SCP USB) will be applied
from the source to the destination. Any channels that are routed in the mixer that connect to the
physical I/O of the source box will be mapped to the closest corresponding physical I/O on the
destination box.


