ENGLISH
145
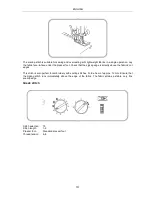
Change direction of the seam
Sew up to the point where you want to change the direction of the seam. Stop the sewing machine and
turn the handwheel towards you to lower the needle down into the fabric. Lift the presser foot. Turn the
fabric to change the direction of the seam. The needle remains in the fabric at all times. Lower the
presser foot and continue sewing in the new direction.
Use the stitch plate’s markings
1.
Line markings
2.
Corner markings
3.
Stitch plate
4.
Hole in stitch plate
The stitch plate’s line markings are a useful aid for maintaining an even distance between the seam and
the edge of the fabric.
The figures at the front of the stitch plate correspond to the metric system, and the figures at the back are
in inches. The following table shows the link between the figures on the stitch plate and the seam
allowance in cm.
Number on the stitch plate
Seam allowance
10
1 cm
15
1.5 cm
20
2 cm
3/8
0.9 cm
4/8
1.3 cm
5/8
1.6 cm
6/8
1.9 cm


