background image


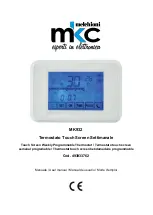
MK932 

Termostato Touch Screen Settimanale 

Touch Screen Weekly Programmable Thermostat / Termostato touch screen 

semanal programable / Thermostat touch screen hebdomadaire programmable


Cod. 493933762 


Manuale / User manual / Manual de usuario /


Mode d'emploi 


Summary of Contents for MK932

Page 1: ... Screen Settimanale Touch Screen Weekly Programmable Thermostat Termostato touch screen semanal programable Thermostat touch screen hebdomadaire programmable Cod 493933762 Manuale User manual Manual de usuario Mode d emploi ...

Page 2: ......

Page 3: ...a nella presa del timer Se è necessaria la pulizia del timer togliere l alimentazione elettrica e pulire il timer con un panno asciutto NON IMMERGERE IL TEMPORIZZATORE IN LIQUIDI DI NESSUN TIPO Tenere fuori dalla portata di bambini In caso di surriscaldamento anomalo disconnettere dalla rete elettrica Conforme alle direttive 2014 30 CE e 2014 35 CE TERMOSTATO MK932 TOUCH SCREEN SETTIMANALE PROGRAM...

Page 4: ...atura 20 Simbolo COPY copia caratteristiche 21 Simbolo temperatura ROOM stanza 22 Simbolo OFF spento 23 Tasto touch SELECT seleziona 24 Tasto touch PROGramma 25 Tasto touch SET imposta 26 Tasto touch impostazione TEMPeratura 27 Tasto touch OK e MANUALe 28 Tasto touch HOLD mantenimento e COPY copia 29 Tasto touch per diminuire 30 Tasto touch per aumentare 2 Impostazione orologio e caratteristiche P...

Page 5: ...iva Minuto premere i tasti freccia SU o GIU per selezionare Premere SELECT per tornare all Anno Premere OK per salvare ed uscire B Impostazione funzioni Utilizzare il tasto SELECT per scegliere tra Holiday vacanze e Heat Cool caldo freddo Ho per vacanze Ht o CL per caldo freddo come da figura sotto riportata Premere SET per entrare nell impostazione Vacanze Controllo caldo freddo a Vacanze questa ...

Page 6: ...reddamento Ht per riscaldamento e CL per raffreddamento come da figura Riscaldamento Raffreddamento Premere SET per confermare ed entrare nella selezione avvio ritardato abilitato o disabilitato Utilizzare il tasto SELECT per il ritardo abilitato d oN o ritardo disabilitato d oF come da figura Premere OK per salvare ed uscire Controllo riscaldamento Controllo condizionamento ...

Page 7: ... prima è l impostazione del programma Premere il tasto SELECT per selezionare la modalità di programmazione come sotto descritto a I programmi giornalieri della settimana sono differenti Sulla parte bassa del display appare 7dY b Programma per giorni della settimana e weekend Sul display appare 5 2 c Programma per giorni della settimana sabato e domenica Sul display appare 5 1 1 d I programmi per ...

Page 8: ...il giorno successivo 5 Per impostare il programma per un nuovo giorno si può utilizzare la funzione Copy copia per copiare il medesimo programma su un altro giorno All inizio dell impostazione del nuovo giorno premere il tasto Copy Il simbolo relativo lampeggerà sul display Premere OK per confermare Tornare indietro alla procedura sopraindicata per selezionare la programmazione del giorno successi...

Page 9: ...ndi Premere i tasti UP o DOWN per impostare il tempo desiderato da 1 a 99 ore Premere OK per salvare ed uscire Sul display appare il simbolo HOLD mantieni di impostazione temporanea D Impostazione manuale AUTO OFF Antigelo premere e tenere premuto il tasto MANUAL per 3 secondi Premere SELECT per selezionare a AU Auto modalità di controllo programmata b AF Antigelo c oF OFF il sistema è spento d oN...

Page 10: ...30 C Alimentazione 2 batterie alcaline AA AM3 LR6 MANUALE DI INSTALLAZIONE MK932 MK932 è formato da due parti pannello di controllo e base di commutazione Pannello di controllo Base di commutazione INSTALLAZIONE BASE DI COMMUTAZIONE A MURO 1 Per fissare la base di commutazione utilizzare le 2 viti fornite e i fori più adatti alla vostra installazione a muro ...

Page 11: ...Rimuovere il coperchio 3 Estrarre i fili Seguire lo schema per la connessione dei fili 4 Riavvitare il coperchio INSTALLARE LE BATTERIE E IL PANNELLO DI CONTROLLO 1 Installare due batterie AA nel pannello di controllo come indicato in figura rispettando la polarità ...

Page 12: ...utilizzare i lati Alto e Basso RESET In caso il sistema debba essere resettato afferrare i lati sinistro e destro del pannello di controllo ed estrarlo Togliere una o due batterie ed attendere un minuto circa Reinserire quindi le batterie CONNESSIONI NC uscita fase contatto Normalmente Chiuso COM ingresso fase NO uscita fase contatto Normalmente Aperto ...

Page 13: ...mediante raccolta separata Lo smaltimento effettuato in maniera non separata può costituire un potenziale danno per l ambiente e per la salute Tale prodotto può essere restituito al distributore all atto dell acquisto di un nuovo apparecchio L uso improprio dell apparecchiatura o di parti di essa può costituire un potenziale pericolo per l ambiente e per la salute Lo smaltimento improprio dell app...

Page 14: ...er outlet If cleaning of the timer is required remove from mains power and wipe timer with a dry cloth DO NOT IMMERSE TIMER IN WATER OR ANY OTHER LIQUID Heaters and similar appliances should never be left unattended during operation The manufacturer recommends such appliances not be connected to timers Conform to directive 2014 30 CE e 2014 35 CE MK932 TOUCH SCREEN WEEKLY PROGRAMMABLE THERMOSTAT I...

Page 15: ...on 24 PROGram Touch Button 25 SET Touch Button 26 TEMPerature setting Touch Button 27 OK and MANUAL operation Touch Button 28 HOLD and COPY Touch Button 29 Decrease Touch Button 30 Increase Touch Button 2 Clock and Feature setting Press and hold the SET button for 3 seconds to enter the Clock and Feature settings Press SELECT button to select tI for Clock St for feature setting and as figure shown...

Page 16: ...eature setting Use SELECT button to choice the Holiday and Heat Cool control setting Ho for Holiday Ht or CL for Heat Cool control setting and as figure shown below Press SET to enter the selected setting Holiday Heat Cool Control a Holiday this feature allows the current temperature setting been kept for 1 to 199 days of holiday period Press UP or DOWN button to increase or decrease the days for ...

Page 17: ...utton to select the system starting delay d oN enable or d oF disable and as figure shown below Press OK button to save quit this setting Heating Control Cooling Control 3 Temperature Setting This Unit allow 4 preset temperatures Comfort Semi Comfort Economic and Anti Frozen Please refer the figures shown as below Press and hold TEMP button for 3 seconds to enter Use TEMP Button to select preset t...

Page 18: ... the bottom of the display Press PROG to confirm this selecting and to the next step 7 days program Weekdays Saturday Sunday Weekdays Weekend Daily Program B Then select day for Program Setting Press SELECT button to select For example select Monday for the first day program of 7 days program mode Press PROG to the next step C Then set the day program selected 1 The program setting is from 0 00 of...

Page 19: ...day program for setting 6 Repeat procedure B and C to finish all the day program setting 7 Press OK button to save quit this setting 5 Manual Operations A Manual Overriding the current Program Temperature Status Press TEMP button to override different temperature status This overriding will be continued to the next hour The Temporary Manual Control symbol appears on the display B Manual Temperatur...

Page 20: ...UAL button for 3 seconds to enter Press SELECT button to select a AU Auto program control mode b AF Anti Frozen c oF OFF system turn OFF d oN system will be ON continuously Press OK button to save and quit this setting 6 Battery low alarm when battery is low the battery low Symbol displays and flashes You need to replace the battery 7 Specifications Power Rating 230Vac 50Hz 8A Resistive Load Therm...

Page 21: ... Panel Switching Base INSTALL SWITCHING BASE TO WALL AND WIRING IT 1 Use the 2 screws supplied and choice the screw holes suitable for your wall installation to screws the Switching base to the wall 2 Unscrews the 2 screws on the terminal cover of switching base The remove the terminal cover ...

Page 22: ... Following the wiring label on top of terminals to screw the wires to it 4 Screws back the terminal cover INSTALL BATTERY AND CONTROL PANEL 1 Install 2 AA size batteries onto back side of control panel following the polarities symbol on it ...

Page 23: ...OM side RESET When reset needed take the right and left side of control panel and pull it out Take 1 or 2 batteries of it and Wait about 1 minute Then press the batteries back WIRING SPECIFICATIONS Power Rate 230V 50Hz 8A Resistive Load Thermal Rate Measurement Temperature Range 0 C to 35 C Setting Temperature Range 5 C to 30 C Power 2 x AA Alkaline Battery Operated not included ...

Page 24: ... EU To prevent possible harm to the environment or human health from uncontrolled waste disposal recycle it responsibly to promote the sustainable reuse of material resources To return your used device please use the return and collection systems or contact the retailer where the product was purchased They can take this product for environmental safe recycling ...

Page 25: ...en la salida del temporizador Si es necesario limpiar el temporizador apague la alimentación y limpie temporizador con un paño seco NO SUMERJA CONTADOR DE TIEMPO EN NINGÚN TIPO DE LÍQUIDO Mantener fuera del alcance de los niños En caso de desconexión sobrecalentamiento anormal de la red eléctrica En cumplimiento de las directivas 2014 30 CE y 2014 35 CE TERMOSTATO MK932 TOUCH SCREEN SEMANAL PROGRA...

Page 26: ...OM entorno 22 Símbolo OFF apagado 23 Tasto touch SELECT selecciona 24 Tasto touch PROGrama 25 Tasto touch SET establece 26 Tasto touch impostación TEMPeratura 27 Tasto touch OK y MANUALe 28 Tasto touch HOLD mantenimiento y COPY copia 29 Tasto touch para disminuir 30 Tasto touch para aumentar 2 Impostación reloj y características Comprimir y tener comprimido la tecla SET por 3 segundos para entrar ...

Page 27: ... Comprimir SELECT para volver al año Comprimir OK para salvar y salir B Impostación funciones Utilizar la tecla SELECT para elegir entre Holiday vacaciones y Heat Cool calefacción refrigeración Ho por vacaciones Ht o CL por calefacción refrigeración como de figura a continuación Comprimir SET para entrar en la impostación Vacaciones Calefacción refrigeración a Vacaciones esta función permite de pr...

Page 28: ...dicionamiento Ht por calefacción y CL por refrigeración como de figura Calentamiento Condicionamiento Comprimir SET para confirmar y entrar en la selección encamino retardado habilitado o inhabilitado Utilizar la tecla SELECT por el retraso habilitado d oN o retraso inhabilitado d oF como de figura Comprimir OK para salvar y salir Controlo Calentamiento Controlo enfriamento ...

Page 29: ...ograma A El primero es la impostación del programa Comprimir la tecla SELECT para seleccionar la modalidad de programación como fondo descrito a Los programas diarios de la semana son diferentes Sobre la parte baja del display aparece 7dY b Programa por días de la semana y week end Sobre el display aparece 5 2 c Programa por días de la semana sábado y domingo Sobre el display aparece 5 1 1 d Los p...

Page 30: ...miento para seleccionar el día siguiente 5 Para programar el programa por un nuevo día se puede utilizar la función Copy copia para copiar el mismo programa sobre un otro día Al principio de la impostación del nuevo día comprimir la tecla Copy El símbolo relativo relampagueará sobre el display Comprimir OK para confirmar Volver atrás al procedimiento antedicho para seleccionar la programación del ...

Page 31: ...mprimir las teclas UP o DOWN para programar el tiempo deseado de 1 a 99 horas Comprimir OK para salvar y salir Sobre el display aparece el símbolo HOLD mantienes de impostación temporal D Impostación manual AUTO OFF Anticongelante comprimir y tener comprimido la tecla MANUAL por 3 segundos Comprimir la tecla SELECT para seleccionar a AU Auto modalidad de control programada b AF Anticongelante c oF...

Page 32: ...table 5 C 30 C Alimentación 2 baterías alcalinas AA AM3 LR6 MANUAL DE INSTALACIÓN MK932 MK932 es formado por dos partes panel de control y base de conmutación Panel de control Base de conmutación INSTALACIÓN BASE DE CONMUTACIÓN A MURO 1 Para fijar la base de conmutación utilizar las 2 vides dotadas y los agujeros más aptos a vuestra instalación a muro ...

Page 33: ...ación Remover la tapadera 3 Extraer los hilos Seguir el esquema por la conexión de los hilos 4 Atornillar de nuevo la tapadera INSTALAR LAS BATERÍAS Y EL PANEL DE CONTROL 1 Instalar dos baterías AA en el panel de control como indicado en figura respetando la polaridad ...

Page 34: ...erdo y derecho del panel de control y extraerlo Quitar una o dos baterías y esperar un minuto acerca de Reinsertar por lo tanto las baterías CONEXIONES NC salida fase contacto Normalmente Cerrado COM entrada fase NO salida fase contacto Normalmente Abierto ESPECIFICACIONES Capacidad de potencia 230 Vac 50Hz carga resistiva 8A Relación térmica Excursión mide temperatura 0 C 35 C Excursión temperatu...

Page 35: ...rada puede ser un daño potencial para el medio ambiente y para la salud Este producto puede ser devuelto al distribuidor al comprar un nuevo dispositivo El uso inadecuado de los equipos o partes de ellos puede ser un peligro potencial para el medio ambiente y la salud humana La eliminación inadecuada de la unidad es fraudulenta y es objeto de sanciones por parte de las autoridades Mantener lejos d...

Page 36: ... orifice de sortie de la minuterie S il est nécessaire de nettoyer la minuterie coupez l alimentation et essuyez minuterie avec un chiffon sec NE PAS PLONGER MINUTERIE DANS QUELQUE NATURE QUE CE LIQUIDE Tenir hors de portée des enfants En cas de déconnexion échauffement anormal du secteur Conformément aux directives 2014 30 CE et 2014 35 CE THERMOSTAT MK932 TOUCH SCREEN HEBDOMADAIRE PROGRAMMABLE M...

Page 37: ...COPY copie paramètres 21 Symbole température ROOM chambre 22 Symbole OFF éteint 23 Bouton touch SELECT seleziona 24 Bouton touch PROGramme 25 Bouton touch SET configure 26 Bouton touch configuration TEMPerature 27 Bouton touch OK et MANUAL 28 Bouton touch HOLD retiens e COPY copie 29 Bouton touch per diminuer 30 Bouton touch per augmenter 2 Réglage de la montre et fonctions Appuyez et tenir pressé...

Page 38: ...resser les flèches UP ou DOWN pour sélectionner Presser SELECT pour revenir à l Année Presser OK pour sauver et sortir B Réglage des fonctions Utiliser la touche SELECT pour choisir entre Holiday vacances et Heat Cool chaud froid Ho pour vacances Ht ou CL pour chaud froid comme d illustration sous reportée Presser SET pour entrer dans le réglage Vacances Réglage chaud froid a Vacances cette caract...

Page 39: ...Conditionnement Ht pour chauffage et CL pour conditionnement comme d illustration Chauffage Conditionnement Presser SET pour confirmer et entrer dans la sélection achemine retardé qualifié ou désaffecté Utiliser la touche SELECT pour le retard qualifié d oN ou retard désaffecté d oF comme d illustration Presser OK pour sauver et sortir Contrôle chauffage Contrôle refroidissement ...

Page 40: ... position du programme Presser la touche SELECT pour sélectionner la modalité de plan comme dessous décrit a Les programmes quotidien de la semaine sont différents Au bas du display 7dY jour apparaît b Programme pour jours de la semaine et week end Sur le display il apparaît 5 2 c Programme pour jours de la semaine samedi et dimanche Sur le display il apparaît 5 1 1 d Les programmes pour les 7 jou...

Page 41: ...dure pour sélectionner le jour suivant 5 Pour définir le programme pour un nouveau jour on peut utiliser la fonction Copy copie pour copier le même programme sur un autre jour Au début de la position du nouveau jour presser la touche Copy Le symbole relatif clignotera sur le display Presser OK pour confirmer Revenir à la procédure ci dessus pour sélectionner le plan du jour suivant 6 Répéter la pr...

Page 42: ... définir le temps désiré de 1 à 99 heures Presser OK pour sauver et sortir Sur le display apparaît le symbole HOLD maintiens de position temporaire D Configuration manuel AUTO OFF Antigel presser et tenir pressé la touche MANUAL pour 3 secondes Presser la touche SELECT pour sélectionner a AU Auto modalité de contrôle programmée b AF Antigel la température est préétablie à 5 C c oF OFF le système e...

Page 43: ...C 30 C Alimentation 2 batteries alcalines AA AM3 LR6 MANUEL D INSTALLATION MK932 MK932 est formé par deux parties panneau de contrôle et base de commutation Panneau de contrôle Base de commutation INSTALLATION DE BASE DE COMMUTATION AU MUR 1 Pour fixer la base de commutation utiliser les 2 vis fournies et les trous les plus aptes à votre installation au mur ...

Page 44: ... le couvercle 3 Extraire les fils Suivre le schéma pour la connexion des fils 4 Visser de nouveau le couvercle INSTALLER LES BATTERIES EST LE PANNEAU DE CONTRÔLE 1 Installer deux batteries AAA dans le panneau de contrôle comme indiqué en illustration en respectant la polarité ...

Page 45: ...auche et droit du panneau de contrôle et l extraire Enlever une ou deux batteries et attendre une minute environ Réinsérer donc les batteries CONNEXIONS NC sortie phase contact Normalement Fermé COM entrée phase NO sortie phase contact Normalement Ouvert SPÉCIFIQUES Puissance admissible 230Vac 50Hz 8A charge résistive Rapport thermique Excursion mesure température 0 C 35 C Excursion température ré...

Page 46: ...peut constituer un potentiel dommage pour le milieu et pour la santé Tel produit peut être rendu au distributeur à l acte de l acquisition d un nouveau poste L usage impropre du poste ou des parties peut constituer un danger potentiel pour le milieu et pour la santé L écoulement impropre du poste constitue conduite frauduleuse et il est sujet aux sanctions de parte de l Autorité Tendres loin des e...

Page 47: ......

Page 48: ...Made in China MELCHIONI S p A Via P Colletta 37 Milano Italia Tel 02 57941 www melchioni it www b2b melchioni it ...

Reviews: