8-Quart Digital Pressure Cooker | Model MCPR120A | 1
The
PRESSURE COOKER
by
8-QUART DIGITAL PRESSURE COOKER
MCPR120A
OWNER’S MANUAL
SAVE THESE INSTRUCTIONS. FOR HOUSEHOLD USE ONLY.
Page 1: ...8 Quart Digital Pressure Cooker Model MCPR120A 1 The PRESSURE COOKER by 8 QUART DIGITAL PRESSURE COOKER MCPR120A OWNER S MANUAL SAVE THESE INSTRUCTIONS FOR HOUSEHOLD USE ONLY...
Page 2: ...FROM PRESSURE LIMITING VALVE WHILE IN THE EXHAUST POSITION FAILURE TO COMPLY MAY CAUSE SERIOUS INJURY DO NOT RELEASE PRESSURE UNDER HANGING CABINETS WHICH CAN BE DAMAGED BY STEAM Always use an oven m...
Page 3: ...8 Quart Digital Pressure Cooker Model MCPR120A 3 DO NOT ALLOW CHILDREN TO OPERATE UNDER ANY CIRCUMSTANCES CLOSE SUPERVISION IS MANDATORY WHEN THE PRESSURE COOKER IS USED NEAR CHILDREN...
Page 4: ...Make sure you have read the manual before using this product Please use the appliance in accordance with the instructions Please save these instructions This item is intended for household use only I...
Page 5: ...TANT SAFEGUARDS 6 SAFETY WARNING ADDITIONAL SAFETY TIPS 8 ABOUT YOUR PRESSURE COOKER 9 RUBBER SEALING RING ASSEMBLY 9 PARTS IDENTIFICATION 10 BEFORE FIRST USE 11 PREPARING YOUR PRESSURE COOKER 13 OPER...
Page 6: ...pressure cooker containing hot liquids 8 DO NOT use pressure cooker for other than intended use 9 This appliance cooks under pressure IMPROPER USE MAY RESULT IN SCALDING INJURY 10 Ensure that the unit...
Page 7: ...n the appliance to the retailer or contact us directly at 1 800 788 7618 23 Always attach the plug to the appliance first then plug the cord into the wall outlet To disconnect press the KEEP WARM CANC...
Page 8: ...nvironment only and is not intended for commercial use All parts and accessories for this appliance must be used properly according to the instructions and must be the original provided from manufactu...
Page 9: ...of power as compared to a conventional slow cooker Cooking can also be done at high altitudes PRESERVES NUTRIENTS PROMOTES HEALTHY EATING Airtight cooking methods preserve nutrients and original flavo...
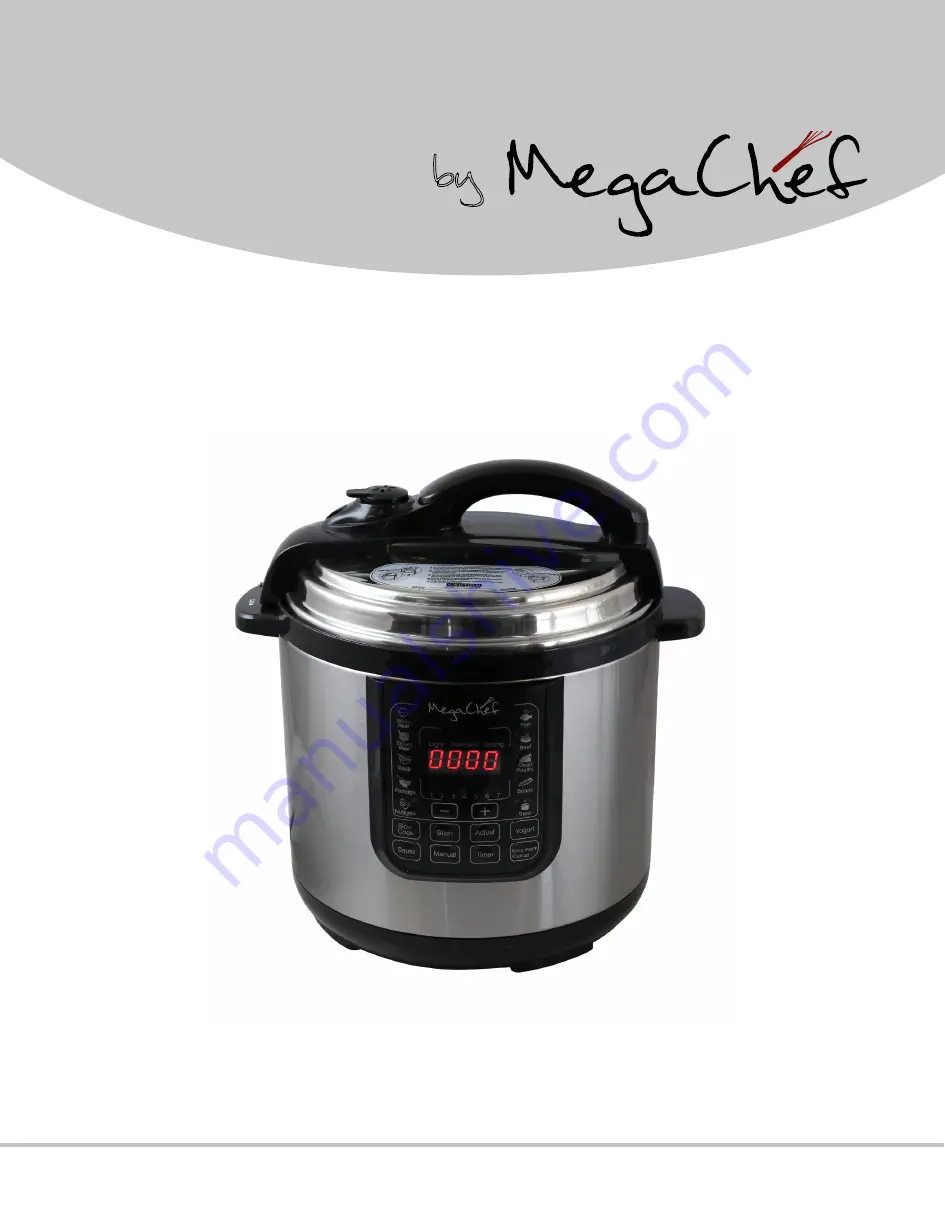
Page 10: ...oat Valve internal view 6 Stainless Steel Inner Pot 7 Outer Pot 8 Side Handles 9 Upper Ring 10 Control Panel 11 Power Cable 12 Main Outer Body 13 Heating Plate 14 Bottom Ring 15 Float Valve Seal Ring...
Page 11: ...X shaped metal ring 18 Make sure the crease in the rubber sealing ring meets with the outside of the X ring all the way around Then place the X ring and rubber seal ring back into the lid 2 making sur...
Page 12: ...escaping around the lid the rubber seal ring may not have completed a tight seal when the lid locked Cancel the cooking process release pressure manually remove the lid and reposition the rubber seal...
Page 13: ...ood and liquid must not exceed 4 5 of the capacity of the stainless steel cooking pot For foods such as dried vegetables and beans or rice and grains the total volume must not exceed 3 5 the capacity...
Page 14: ...tting from the front panel A red light will illuminate next to the selected setting Once a pre programmed setting has been selected the LED display will blink to alert the user that additional adjustm...
Page 15: ...the desired adjustments have been made if any necessary press the START button Red indicators will blink from 1 to 7 on the front panel to indicate that the unit is pressurizing once it has reached t...
Page 16: ...the food CAUTION HOT STEAM RISK OF SCALDING USE TONGS OR LONG UTENSIL TO TURN THE VALVE KEEP HANDS AND FACE AWAY FROM PRESSURE LIMITING VALVE WHILE IN THE EXHAUST POSITION ALWAYS MAKE SURE THAT THE PR...
Page 17: ...LED will display a letter P followed by numbers This represents the amount of time in minutes during which the food will be cooking 7 The timer will increase or decrease by 1 minute with each press o...
Page 18: ...ng the pressure limiting valve to the Exhaust position Once the pressure has released the lid should open easily If the lid feels tight do not force it open and allow additional time for pressure to f...
Page 19: ...time by 30 minutes increments 4 Follow steps 5 6 of the USING PRE PROGRAMMED SETTINGS section 1 Press the TIMER button A green light will indicate that this mode has been selected 2 The timer will app...
Page 20: ...ir or turn food as needed until desired color and consistency is reached 7 Press the KEEP WARM CANCEL button if you want to cancel the SAUT function before the timer finishes counting down 8 If you wo...
Page 21: ...06 00 6 Press the or in order to set the cooking time The timer will increase or decrease by 30 minutes with each press of the or button Hold down the and buttons for faster increase decrease of cook...
Page 22: ...e desired temperature is achieved as this mode can not exceed 8 minutes of cooking time 4 Once the desired temperature has been achieved press the KEEP WARM CANCEL button to discontinue the boiling pr...
Page 23: ...djust the incubation time by 30 minutes increments It is recommended to let the milk incubate for 5 to 10 hours Shorter incubation yields sweeter and thinner yogurt whereas longer incubation will crea...
Page 24: ...lling it up Be careful not to damage the thin wire spring under it 6 Clean the lid with warm soapy water including the rubber seal ring pressure limiting valve filter float valve and let dry thoroughl...
Page 25: ...e reduced because there is very little evaporation in the pressure cooker Remember however there must always be some liquid in the pressure cooker to produce the necessary steam As a rule of thumb add...