background image

13 of 72

2.10. Information about the Touchpad

•  The touchpad is operated with the thumb or another finger and 

reacts to the energy given out by the skin. Do not use pens or 
other objects as these can damage your touchpad.

2.11. Battery

CAUTION!
Danger of explosion if battery is incorrectly replaced. 
Replace only with the same or equivalent type 
recommended by the manufacturer.  
Dispose of used batteries according to the manufacturer‘s 
instructions. Never attempt to disassemble or reassemble. 
Do not heat up above 60°C (140°F). Do not dispose of in 
fire or directly short circuit.

To extend your battery’s performance and lifespan and ensure safe 
operation, you should also observe the guidelines below:
•  Avoid dirt and contact with electrically conductive materials or 

chemical substances and cleaning agents.

•  Use only the supplied mains adaptor to charge the battery. Make 

sure (via the Notebook display or acoustic signal) that the battery 
is fully discharged before charging it again.

•  Always charge the battery until the battery charging light goes 

out. Please also observe the information in “Charging the battery” 
on page 31 to assess the charge status of your battery.

•  Ensure the Notebook is switched off before replacing the battery. 

Summary of Contents for AKOYA C15x

Page 1: ...Instruction Manual 39 6 cm 15 6 Notebook MEDION AKOYA C15x ...

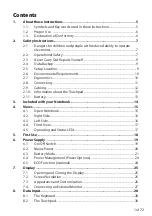
Page 2: ... 10 2 8 Connecting 11 2 9 Cabling 12 2 10 Information about the Touchpad 13 2 11 Battery 13 3 Included with your Notebook 14 4 Views 15 4 1 Open Notebook 15 4 2 Right Side 16 4 3 Left Side 16 4 4 Front View 17 4 5 Operating and Status LEDs 17 5 First Use 18 6 Power Supply 19 6 1 On Off Switch 19 6 2 Mains Power 20 6 3 Battery Mode 21 6 4 Power Management Power Options 24 6 5 ECO Function optional ...

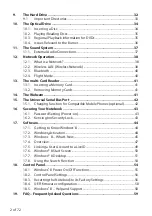
Page 3: ... 41 15 The Universal Serial Bus Port 42 15 1 Charging function for Compatible Mobile Phones optional 42 16 Securing Your Notebook 43 16 1 Password Setting Power on 43 16 2 Kensington Security Lock 43 17 Software 44 17 1 Getting to Know Windows 8 44 17 2 Windows Activation 44 17 3 Windows 8 What s New 45 17 4 Overview 47 17 5 Linking a User Account to a LiveID 49 17 6 Windows 8 Start Screen 50 17 7...

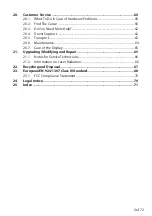
Page 4: ...4 Driver Support 62 20 5 Transport 63 20 6 Maintenance 64 20 7 Care of the Display 65 21 Upgrading Modifying and Repair 65 21 1 Notes for Service Technicians 66 21 2 Information on Laser Radiation 66 22 Recycling and Disposal 67 23 European EN 9241 307 Class II Standard 68 23 1 FCC Compliance Statement 70 24 Legal notice 70 25 Index 71 ...

Page 5: ...Quality We select our components with a close eye to functionality ease of use safety and reliability Thanks to our ideally balanced hardware software concept we are able to offer you a state of the art Notebook that you will enjoy whether you are working or at play Thank you for purchasing our products We are delighted to welcome you as our new customer Trademarks MS DOS and Windows 8 are registe...

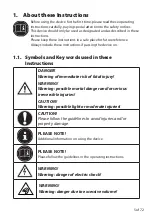
Page 6: ...ructions if passing the device on 1 1 Symbols and Key words used in these Instructions DANGER Warning of immediate risk of fatal injury WARNING Warning possible mortal danger and or serious irreversible injuries CAUTION Warning possible light or moderate injuries CAUTION Please follow the guidelines to avoid injuries and or property damage PLEASE NOTE Additional information on using the device PLE...

Page 7: ...es which we have supplied or approved Follow all the instructions in this instruction manual especially the safety information Any other use is deemed improper and can cause personal injury or damage to the product Do not use the device in extreme environmental conditions 1 3 Declaration of Conformity This device is supplied with the following wireless features Wireless LAN optional Bluetooth opti...

Page 8: ... risk of suffocation 2 2 Operational Safety Please read this section carefully and follow all instructions given The instructions will help you to operate the Notebook reliably and in crease its service life Never open the housing of the Notebook battery or mains adapter This could result in an electric shock or even ignite a fire which will damage your Notebook Optical drive CD CDRW DVD constitut...

Page 9: ... the display firmly by the middle when folding it back adjusting the position and closing it Failure to do so may damage the display Never use force to open the display To avoid damaging the screen do not touch it with fingers or sharp objects Never lift the Notebook up by the display as this could break the hinges Should the below occur switch the Notebook off immediately do not switch the Notebo...

Page 10: ...nd direct sunlight Non compliance with these instructions can lead to faults or damage to the Notebook Do not use the Notebook outdoors because external elements such as rain snow etc could damage it Set up and operate all components on a stable level and vibration free surface to prevent the Notebook from falling down Do not operate the Notebook or power adaptor for long periods on your lap or an...

Page 11: ...reflections and strong bright dark contrast in order to protect your eyes The Notebook should never be placed next to a window because this is the brightest part of the room in daylight This brightness can make it more difficult for the eyes to adjust to the darker display The Notebook should always be positioned so that the direction of vision is parallel to the window front Setting up the Notebo...

Page 12: ...ptor pull the mains plug from the power outlet Plug the Notebook s mains adapter into AC 100 240 V 50 60 Hz earthed sockets only If you are not sure about the power supply at the set up location please ask your power supplier Use only the mains adapter and power cable supplied For extra safety we recommend using an overvoltage protection device to prevent your Notebook from sustaining damage as a ...

Page 13: ...oss Please note that only shielded cables that are shorter than 3 metres may be connected to the external interfaces of this Notebook Please only use double shielded cables for printer cable connections Do not exchange the supplied cable for another one Use only the supplied cable as this cable has been extensively tested in our laboratory In addition when connecting your peripherals only use the ...

Page 14: ...0 C 140 F Do not dispose of in fire or directly short circuit To extend your battery s performance and lifespan and ensure safe operation you should also observe the guidelines below Avoid dirt and contact with electrically conductive materials or chemical substances and cleaning agents Use only the supplied mains adaptor to charge the battery Make sure via the Notebook display or acoustic signal ...

Page 15: ... Li Ion Battery AC Adapter with Power Cord AC DC adapter Manufacturer FSP Technology Inc China Model FSP065 RHC Required mains voltage 100 240 V 50 60 Hz AC input 100 240V 2 0 A 50 60 Hz DC output 19 V 3 42 A OEM version of operating system Instruction Manual DANGER Keep packaging material such as plastic film away from children There is a risk of suffocation if used improperly ...

Page 16: ...9 3 1 Webcam 2 Webcam led 3 Microphone 4 LCD Display 5 Stereo loudspeakers 6 Keyboard 7 Touchpad 8 Device Indicators 9 Touchpad Lock The touchpad lock is deactivated or activated by a double tap on the symbol and the display will light up 10 Power ON OFF ...

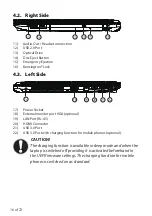
Page 17: ...2 17 Power Socket 18 External monitor port VGA optional 19 LAN Port RJ 45 20 HDMI Connector 21 USB 3 0 Port 22 USB 3 0 Port with charging function for mobile phones optional CAUTION The charging function is available in sleep mode and when the laptop is switched off providing it is activated beforehand in the UEFI firmware settings The charging function for mobile phones is switched on as standard...

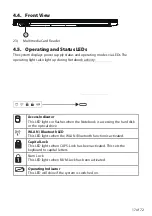
Page 18: ...ss Indicator This LED lights or flashes when the Notebook is accessing the hard disk or the optical drive WLAN Bluetooth LED This LED lights when the WLAN Bluetooth function is activated Capital Lock This LED lights when CAPS Lock has been activated This sets the keyboard to capital letters Num Lock This LED lights when NUM Lock has been activated Operating Indicator This LED will shine if the sys...

Page 19: ...to power the Notebook and charge the battery Set this switch to 0 to stop the power supply Open up the display to the desired position using your thumb and forefinger The display should not be folded back by more than 120 Always hold the display firmly by the middle when folding it back adjusting the position and closing it Failure to do so may damage the display Never use force to open the displa...

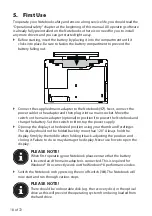
Page 20: ...s 8 start up screen appears PLEASE NOTE The initial installation may take a few minutes Do not unplug the Notebook from the mains or switch it off during the initial installation This may adversely affect the installation Do not switch off the Notebook until after the installation has been completed successfully and the startup screen appears 6 Power Supply 6 1 On Off Switch Open the Notebook and h...

Page 21: ... adapter has an on off switch optional When the switch is set to OFF 0 no power is being consumed and no power is being supplied to the Notebook The adapter supplies the Notebook with power in the ON position I and also charges the battery The operating lights on the Notebook provide information about the operating mode Your battery will also be charged while you work on your Notebook with the mai...

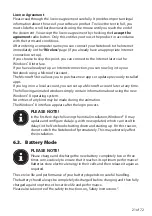
Page 22: ...on a local account you can set up a Microsoft account later at any time The following animated windows simply contain information about using the new Windows 8 operating system No entries of any kind may be made during the animation The Windows 8 interface appears after the login process PLEASE NOTE In the first few days following the initial installation Windows 8 may update and configure data e ...

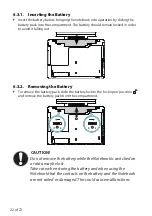
Page 23: ... 6 3 2 Removing the Battery To remove the battery pack slide the battery lock to the lock open position and remove the battery pack from the compartment 1 1 2 CAUTION Do not remove the battery while the Notebook is switched on or data may be lost Take care when storing the battery and when using the Notebook that the contacts on the battery and the Notebook are not soiled or damaged This could cau...

Page 24: ... on battery power until it turns itself off due to low battery charge PLEASE NOTE Be sure to save your open files promptly to prevent any data loss 6 3 5 Battery Performance The actual operating time varies depending on the configuration of the power saving functions You can configure these to suit your requirements in the Control Panel under System and Security Power Options Note your Notebook co...

Page 25: ... costs 6 4 1 Sleep Mode With this setting the content of your Notebook s RAM is preserved while practically all other components of your Notebook are disabled or their power consumption reduced to a minimum For example if you flip the Notebook shut it puts it into sleep mode and it is automatically restarted upon opening PLEASE NOTE Changes can be made to the sleep settings at any time in the powe...

Page 26: ...the display Dem Schließen und Öffnen des Displays können über die Energieverwaltung unterschiedliche Funktionen zugewiesen werden 7 2 Screen Resolution The integrated monitor can display up to 1366 x 768 pixels If you change to a display with different settings in the Windows 8 Control Panel Appearence and Personalisation wizard the display may not in certain circumstances fill the entire screen a...

Page 27: ...Windows desktop and left click on Personalise or Via Settings Personalisation Display by double clicking with the left mouse button Move the mouse pointer into the top right or bottom corner of the display and click Settings Then click Personalisation First select the Display option from the dialogue box The following settings options are available Set resolution Set brightness Calibrate colour Ch...

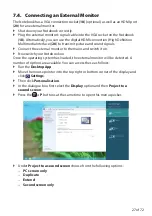
Page 28: ... monitor to the mains and switch it on Now switch your Notebook on Once the operating system has loaded the external monitor will be detected A number of options are available You can access these as follows Run the Desktop App Move the mouse pointer into the top right or bottom corner of the display and click Settings Then click Personalisation In the dialogue box first select the Display option ...

Page 29: ...sa The screen resolution and colour quality can be configured individually for each of the display devices under Settings Personalisation Display 7 4 3 PC Screen Only The desktop will only be shown on main monitor 1 7 4 4 Second Screen Only The desktop will only be shown on the second external monitor 8 Data Input 8 1 The Keyboard The double assignment of certain keys means that the range of funct...

Page 30: ...ighting for the integrated display to save power The lighting is turned back on by pressing Fn F7 Fn F8 Display Switches the screen display between LCD external display and duplicate display Fn F9 Touchpad Switches the touchpad on and off Fn F10 Mute Switches the sound on or off Fn F11 Quieter Decreases the playback volume Fn F12 Louder Increases the playback volume Num Lk Numeric key block This k...

Page 31: ...ge your touchpad The left and right mouse buttons are found in the lower section of the touchpad and can be used in the same way as those on a conventional mouse You can also perform a click or a double click on the touchpad directly by tapping the touchpad surface once or twice briefly In the Windows 8 control panel under the Mouse item you will find a number of useful settings to simply your day...

Page 32: ...finger Rotate an object anti clockwise Swipe from left to right from right to left with two fingers simultaneously Page forward page back Swipe down or up with two fingers simultaneously Scroll function This function is used in most applications to scroll up and down the screen without having to move the cursor Swipe from top to bottom on the touchpad Opens the context menu on the start screen and...

Page 33: ...een the UEFI firmware configuration and the operating system display The Notebook s operating system other applications and security data are located on the hard drive meaning that the full capacity is already reduced The first partition C contains the operating system the applications and the Documents folder for the configured user The second partition D is used for the data backup and also cont...

Page 34: ... contains important files required for Windows 8 startup On delivery these files are hidden for security reasons C Programs As the name suggests software programs install the files required for running the application into this directory C Windows The main Windows 8 directory The operating system saves its files here D Drivers You will find all the preinstalled drivers required for your Notebook i...

Page 35: ...e mount can cause it to be damaged when closing the drive drawer With the device switched on press the eject button on the optical drive to open the drawer Carefully pull the drawer out fully Remove the disc from its case where possible without touching the unprinted side Insert the disc into the drawer with the label up and carefully press it down The disc now lies flat in the drawer and audibly ...

Page 36: ...er 10 3 Regional Playback Information for DVDs Playback of DVD film titles includes decoding MPEG2 video digital AC3 audio data and decoding CSS protected content CSS sometimes also referred to as Copy Guard is the name of a data protection program used by the film industry to protect against illegal copying Among the many controls for CSS licensees the most important of the playback restrictions ...

Page 37: ... 10 4 1 Blank CDs and DVDs Normal CDs are pressed by a glass master and then sealed With blank discs digital information is burned onto them using the drive s laser They are therefore more sensitive then conventional discs Because of this it is essential to avoid particularly in the case of unused blanks exposure to direct sunlight UVA UVB radiation scratches and damage extreme temperatures ...

Page 38: ...g Excessive volume when using headphones or earphones can damage your hearing Before pressing play set the volume to the lowest setting Start playback and increase the volume to a comfortable level Changing the basic settings of the equaliser can also increase the volume and thus cause permanent damage to your hearing Changing the drivers software equaliser operating system etc can also lead to an...

Page 39: ...ta 12 1 1 Network Connection RJ45 Connect one end of a cable with a RJ45 connection western jack to your Notebook s network interface 19 and the other to a different computer or hub switch You can find more details about the network in the Windows 8 help 12 2 Wireless LAN Wireless Network Wireless LAN is an optional feature This function enables you to establish a network connection to a correspon...

Page 40: ...ection to the existing DSL Internet connection and the wireless LAN A connection can also be established to another end device with wireless LAN functionality without an access point Without a router however the network is restricted to those devices directly connected to it The wireless network connection works in accordance with the IEEE 802 11n standard and is compatible with the IEEE 802 11b g...

Page 41: ...walls jacket pockets and briefcases using a Bluetooth device The transfer between Bluetooth devices occurs at the high frequency of 2 4 Gigahertz GHz For Bluetooth high speed data transfer WLAN must be enabled and the partner station must also support the high speed mode CAUTION Do not operate the Bluetooth function in locations e g hospitals aeroplanes etc where there is sensitive equipment Do no...

Page 42: ... the list below Inserting a card incorrectly may damage the card reader and or the card Card Type Connection Contacts SD Secure Digital pointing downwards MMC MultiMediaCard pointing downwards 13 1 Inserting a Memory Card PLEASE NOTE The memory cards can only be inserted in one direction Please observe the instructions in the section above Slide the card in as far as it will go 13 2 Removing Memor...

Page 43: ...Notebook 22 to charge a compatible mobile phone 5 volts max 1 5A The charging function is available in sleep mode and when the Notebook is switched off This function is disabled by default and can be enabled in the BIOS under the Advanced USB3 Charger option Restart your Notebook and hold down the F2 key during the boot process until the UEFI firmware configuration opens or Move the mouse pointer ...

Page 44: ...lace If you forget your password you have no way of deleting it If this happens contact your service centre You can also use the Windows 8 security options to protect your data against unauthorised access 16 2 Kensington Security Lock you can use a so called Kensington security lock to protect your Notebook against theft This security lock complete with cable is usually available as an accessory i...

Page 45: ...d supplied with the Notebook must be activated to enable you to use of all Windows 8 functions To do this you require simply an Internet connection The activation process is fully automatic no personal data will be transmitted If no Internet connection is available select telephone activation as follows Move the mouse pointer into the top right or bottom corner of the display and click Settings Ne...

Page 46: ... status updates for your friends from services such as Hotmail Facebook Twitter and LinkedIn will be updated automatically as soon as you run these services using your Microsoft account You can also access and share your photos documents and other files via SkyDrive Facebook and Flickr Your personal settings including designs language settings Internet favourites and apps will be synchronised with...

Page 47: ...o access documents that you use frequently in just a few mouse clicks The jump lists for certain programs such as Windows 8 Media Player can be populated in advance with frequently used commands Thus for example you will see options to play all music or to reopen the last playlist in the jump list for Windows 8 Media Player The frequently visited and last visited websites are displayed in the jump...

Page 48: ...dows 8 to the home network group can be done very quickly You can specify precisely what should be shared on each PC with all other PCs in the home network group Sharing files on the various home PCs and on many other devices is then as easy as if all the data were located on a single hard drive Thus you can save digital photos on the computer in the study and then access them easily on a Notebook...

Page 49: ... the display and click Settings Next click Change PC settings Select the User item Click Change your Password and follow the instructions 17 4 3 Setting a PIN for Windows Move the mouse pointer into the top right or bottom corner of the display and click Settings Next click Change PC settings Select the User item Click Create a PIN and follow the instructions 17 4 4 Setting Up an ImageCode for Win...

Page 50: ...corner of the display move the mouse down and click Settings Next select Change PC settings Open the User category Select Switch to a Microsoft account Now enter your Windows Live ID e mail address If you have not yet created a Windows Live ID account or added an e mail address to your Windows Live ID account you can create and edit your Windows Live ID account at http www windowslive com Follow t...

Page 51: ...the following may be displayed here for example Windows 8 App Windows 8 apps are executable programs The Desktop tile opens the traditional Windows display The Internet Explorer tile launches Internet Explorer PLEASE NOTE Apps are applications that are displayed on a desktop with a program thumbnail The app thumbnails are bigger than the standard tiles ...

Page 52: ...he app thumbnails are bigger than the standard tiles The classic Power Recover desktop app launches the system recovery program The classic Microsoft Office desktop app launches the Microsoft Office program Windows 8 apps from third party suppliers are displayed as follows Example Windows 8 apps from third party suppliers These Windows 8 apps are executable programs from third party suppliers This...

Page 53: ...ht hand corner of the display Linking apps to the Start screen Right click on the Start screen Click All Apps in the bottom right hand corner of the display Right click on the desired app to highlight it Click Pin to Start in the bottom left hand corner of the display Linking apps to the taskbar Right click on the Start screen Click All Apps in the bottom right hand corner of the display Right cli...

Page 54: ...desktop apps Right click the desired app Now click Run as administrator on the bottom edge of the display Running an app in a new window Only possible with desktop apps Right click the desired app Click Open new window at the bottom edge of the display Searching for apps Move the mouse pointer into the top right hand corner of the display move the mouse down and click Search Enter the name of the ...

Page 55: ... display and click Settings Next click Change PC settings Menu Instructions Activate Windows Activate Windows 8 by telephone or over the Internet Customise Set the background image for the lock screen and the Start screen here Select a profile image here User Create and update user accounts here Set or modify the PIN or image code Notifications Set the various program instructions to On or Off her...

Page 56: ...nd files shared within it Windows Update Allow Windows 8 to search the Internet for any necessary Windows 8 updates 18 1 Windows 8 Power On Off Functions The new Windows 8 allows you to restart your Notebook put it into sleep mode or shut it down Changes can be made to the sleep settings at any time in the power options In sleep mode the content of your Notebook s RAM is preserved while practically...

Page 57: ...n the category view you must hold the mouse pointer over the icon or category name and read the text shown there To run one of these elements click on the associated icon or category name A list with executable tasks and a selection of individual control panel elements opens for some of these elements To launch the control panel proceed as follows Move the mouse pointer into the top right or botto...

Page 58: ...tebook will be permanently deleted The factory settings will be restored Restore to HDD with backed up user data The factory settings will be restored and all user data under C USER will be backed up PLEASE NOTE Always perform any type of recovery using mains power CAUTION The recovery process takes a long time when you select the option to back up user data Only the data located in the folder C U...

Page 59: ... UEFI firmware configuration You can only run the configuration program upon system startup If the Notebook has already started up switch it off and restart it Press the F2 key to run the UEFI firmware configuration 18 5 Windows 8 Help and Support Here you will find a comprehensive collection of instructions help sections and troubleshooting suggestions This help covers the entire spectrum of the ...

Page 60: ...instructions in the section Windows Activation to activate Windows 8 by telephone When is restoring factory settings recommended This method should only be selected as a last resort Read about the alternatives in the System recovery section How do I perform a data backup Perform a backup or backup synchronisation of selected data onto external media to familiarise yourself with the technology A ba...

Page 61: ...upply If you are in battery mode connect the Notebook to the mains adapter and check that the battery is charged If you wish to operate the Notebook using the mains adapter disconnect the mains adapter from the socket and connect an electrical appliance such as a lamp to the same socket to test it If the lamp does not work either seek the advice of an electrician Turn off the Notebook and check al...

Page 62: ...any key The Notebook turns itself off during operation The battery may be flat Plug the Notebook in using the mains adapter and charge the battery The Notebook cannot be switched on If you are running the Notebook on batteries check that they have been inserted correctly and are fully charged No data can be read by the optical drive Check whether the disc has been inserted correctly The WLAN Bluet...

Page 63: ...ny appear What software were you using when the problem occurred What steps have you already taken to try and rectify the problem 20 4 Driver Support The system has been thoroughly and successfully tested with the installed drivers in our test laboratory It is normal in the computer sector however for the drivers to need updating from time to time This is because there may be compatibility problem...

Page 64: ...iginal cardboard packaging to ship your Notebook and obtain advice on this from your carrier Always charge your battery and any spare batteries fully before embarking on longer trips and do not forget to take along your mains adapter Find out about the power and communication options available in your destination before travelling Where necessary purchase the required power or communication adapte...

Page 65: ...use CD ROM cleaning discs or similar products that clean the lens of the laser to clean your optical drive Dust or grease on the touchpad can affect its sensitivity Remove the dust or grease from the surface of the touch pad with a strip of adhesive tape Over time dust can collect inside the Notebook which then blocks the vents This can lead to an increase in the fan speed and therefore also incre...

Page 66: ...LEASE NOTE The surfaces of the device are covered in protective film to prevent scratching during production and transport Remove the film once the device has been set up properly and before you use it 21 Upgrading Modifying and Repair Upgrades and modifications to your Notebook should only be carried out by qualified specialists If you do not have the necessary qualifications have the work carrie...

Page 67: ...hing an earthed metallic object We will charge for any repairs to damage caused by incorrect handling 21 2 Information on Laser Radiation The Notebook can contain laser equipment classified as laser class 1 to laser class 3b The equipment meets the requirements for laser class 1 By opening the housing of the optical drive you will have access to laser equipment classified up to laser class 3b The ...

Page 68: ...portation damage Packaging is raw material and can be re used or added to the recycling system Device At the end of its life the device should not be disposed of in household rubbish Enquire about the options for environmentally friendly and appropriate disposal Batteries Do not dispose of used or defective batteries in the household rubbish They should be taken to a collection point for used batt...

Page 69: ...number of pixel defects However these approaches were mostly very complicated and varied from one manufacturer to the next When handling warranty issues for all of its display products MEDION therefore adheres to the strict and transparent requirements of the standard ISO 9241 307 Class II which has been briefly summarised below The EN 9241 307 standard defines amongst other things the generally a...

Page 70: ...pixel e g permanently illuminated at half brightness one colour not illuminated flashing or flickering but not type 1 or 2 Supplement Type 3 cluster failure of two or more sub pixels within a 5 x 5 pixel block A cluster is a field of 5 x 5 pixels 15 x 5 sub pixels EN 9241 307 error class II Resolution Type 1 Type 2 Type 3 Cluster Type 1 type 2 Cluster Type 3 1024 x 768 2 2 4 0 2 1280 x 800 3 3 6 0...

Page 71: ...ation between the equipment and receiver Connect the equipment into an outlet on a circuit different from that to which the receiver is connected Consult the dealer or an experienced technician for help Changes or modifications not expressly approved by the party responsible for compliance could void the user s authority to operate the equipment Shielded interface cables if any must be used in ord...

Page 72: ...claration of Conformity 6 Driver Support 62 E Energy Star 70 Ergonomics 10 European Standard 68 External Audio Connections 37 F Factory Settings 56 FAQ 59 H Help and Support 58 Home Group 47 I Improved Desktop 46 Improved Device Management 47 J Jump Lists 46 K Kensington Security Lock 43 L Logging in to Windows 48 Setting a PIN for Windows 48 Setting Up an Image Code for Windows 48 Setting Up a Pa...

Page 73: ...askbar 45 Touchpad 15 30 Two Finger Touchpad Operation 31 Transport 63 U Upgrades Modifications 65 Information on laser radiation 66 Notes for service technicians 66 W Webcam 15 41 Windows 8 Desktop 50 Desktop apps 51 Windows 8 Start Screen 49 Windows 8 app 50 Wireless LAN 38 Flight Mode 40 Requirements 39 Working With Apps 52 ...

Reviews:

Related manuals for AKOYA C15x