Customer Service 1-888-707-1880
Dyaco Canada Inc. 2015
Email:
30
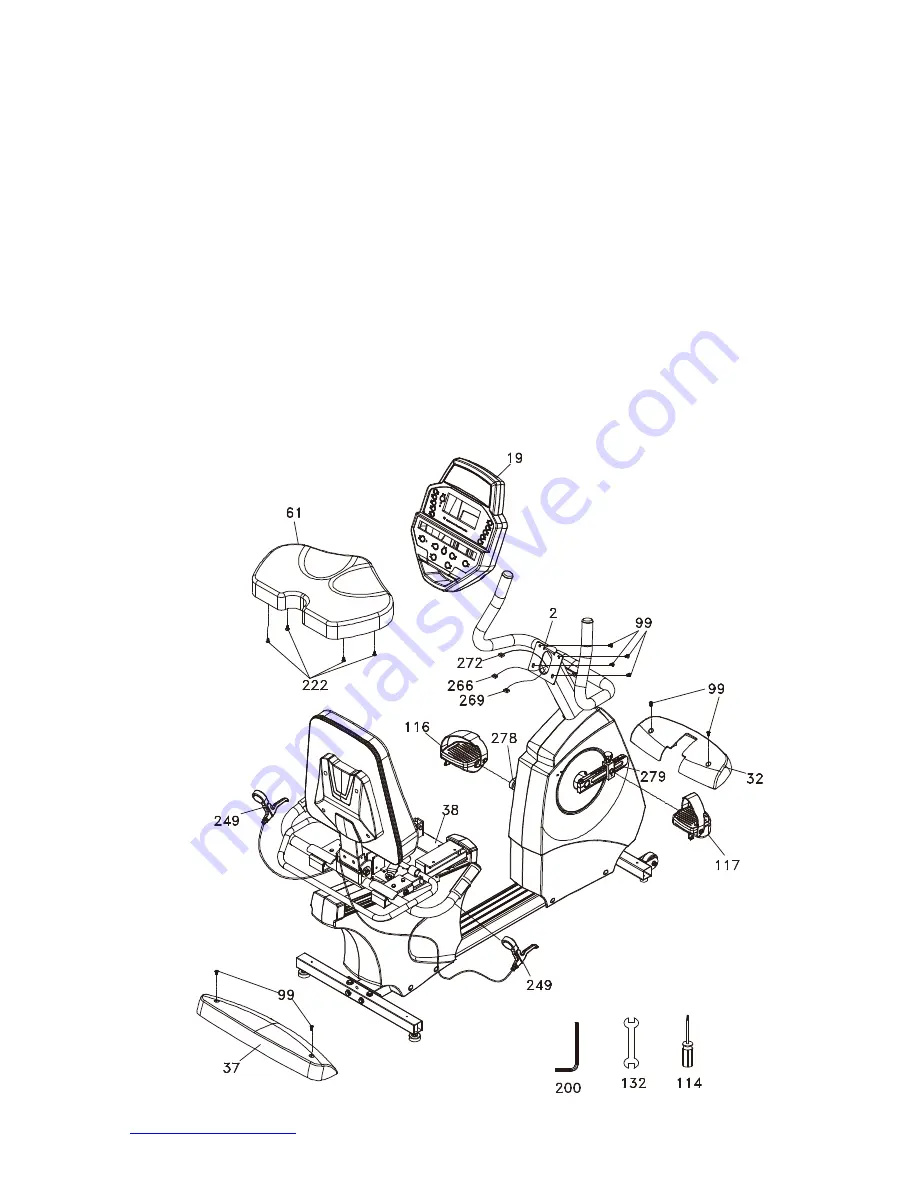
STEP 5: CONSOLE, SEAT, PEDALS AND COVERS ASSEMBLY
1. Install the front and rear stabilizer covers (32 & 37) with the four 5mm screws (99).
2. Install the seat cushion (61) with the four M6 x 25mm bolts (222).
3. Plug in all the connectors in their mating sockets in the back of the console. Install the console
onto the mounting plate and secure with the four 5mm screws (99). Make sure to store the
excess wire into the console mast and check that no wire is caught between the back of the
console and the mounting plate before installing and tightening the screws. If the wires get
pinched between the console and plate, damage could occur to the electronics.
4. Install the left (116) and right (117) pedals onto the crank arms. Remember that the left pedal
has a reverse thread and will be screwed into the crank in the opposite rotation from normal
threads. There is an “L” stamped into the end of the threaded post of the left pedal and an “R” in
the right. Make sure to tighten the pedals as much as you possibly can. It may be necessary to
re-tighten the pedals if you feel a thumping during pedaling the bike. A noise or feeling such as
a thumping or clicking is usually caused by the pedals not being tight enough.
5. Remove the Allen screws from the lever clamps (249), fit them onto the Handle Bar (6) and
secure with the Allen screws. Make sure the levers are positioned under the hand position and
they are adjusted so the patient can comfortably reach them during use. The release levers are
labeled Left and Right; the left lever with gray cable is for the fore/aft seat adjustment and the
right lever with black cable is for the seat back angle.


