MODEL: 1651901
Blain's
ASSEMBLY INSTRUCTIONS
TM
ATTENTION
DO NOT RETURN
TO THE STORE
Contact
MD Sports
Customer Service
* For additional resources and Frequently
Ask Questions, please visit us at
themdsports.com
Page 1: ...EL 1651901 Blain s ASSEMBLY INSTRUCTIONS TM ATTENTION DO NOT RETURN TO THE STORE Contact MD Sports Customer Service For additional resources and Frequently Ask Questions please visit us at themdsports com ...
Page 2: ...hts which vary from one State province to another A PURCHASE RECEIPT or other proof of purchase will be required before any warranty service is initiated For all requests for warranty service please feel free to contact our Consumer Service Department at Please be aware of your product s Limited Warranty for the return refund policy from the store We at Medal Sports can not handle the product whic...
Page 3: ...e figures or drawings may not look exactly like your product Please read and understand the text before beginning each assembly step CAUTION Electric Screwdrivers may be helpful during assembly however please set a low torque and use extreme caution CAUTION Changes or modifications not expressly approved by the party responsible for compliance could void the user s authority to operate the equipme...
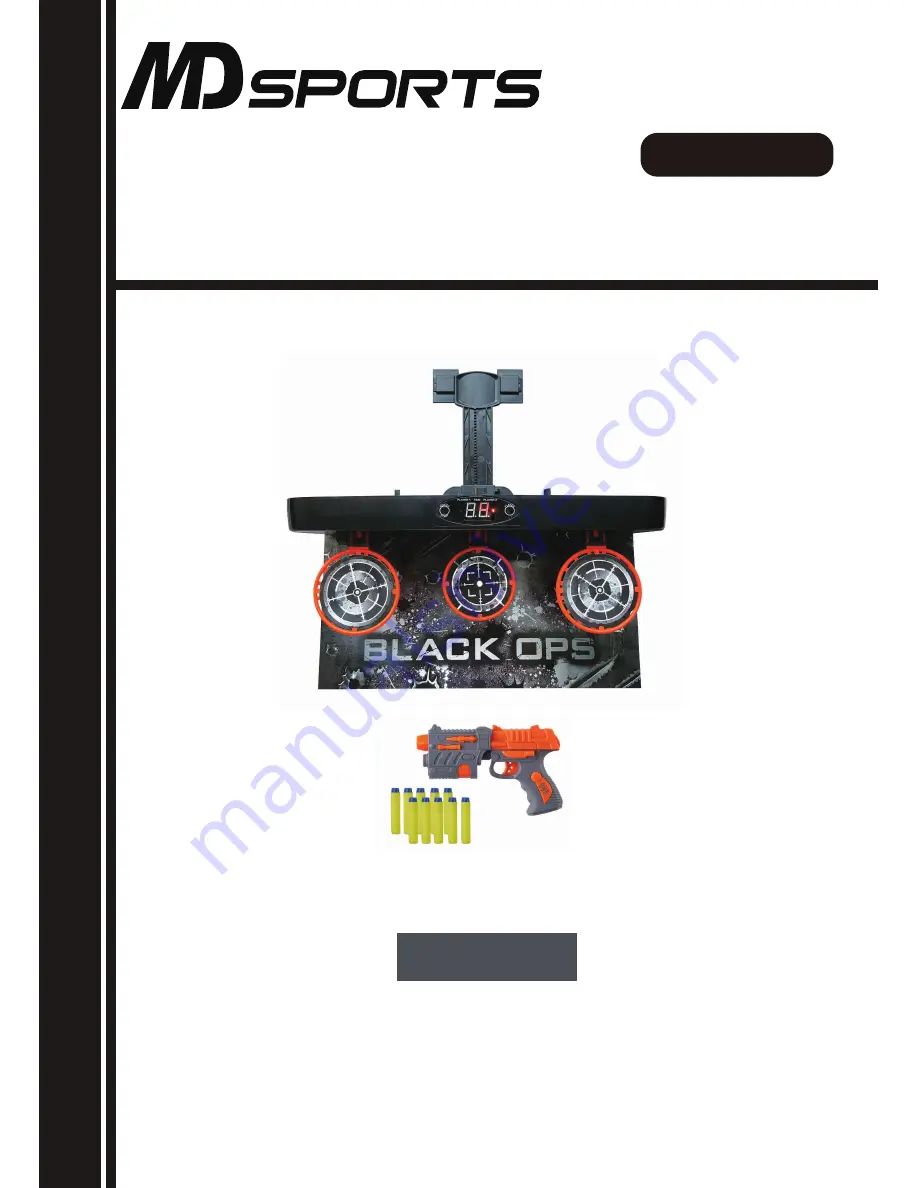
Page 4: ...ist page Carefully cut or tear the four corners of the box so that the bottom of the box can be used as your work surface 2 3 4 1 x1 x1 x2 x1 1 x x10 6 5 1651901 PRE INSTALLED PARTS P1 x2 Target A Target B P2 x1 Target Board Bolt Mainframe Hanger Blaster Dart ON OFF START PLAYER PLAYER 1 TIME PLAYER 2 Note Mainframe 1 and Darts 6 is not available as a replacement part www themdsports com 1651901 3...
Page 5: ... Hanger 2 to the Mainframe 1 using two Bolts 4 as shown in FIG 2 FIG 1 3 Attach the Target Board 4 to the Mainframe 1 as shown in FIG 1 FIG 1 X 1 X 1 1 4 6 ON OFF START PLAYER PLAYER 1 TIME PLAYER 2 FIG 2 X 2 X 1 2 4 X 10 6 X 1 5 5 4 1 1 2 4 Phillips Screwdriver Not Included 6 ...
Page 6: ... next page FIG 3 5 Hang the Skeet Shooting set on the door press the spring lock and pull the support of the Hanger 2 to adjust the height as shown in FIG 3A FIG 3A FIG 3 X 1 X 1 P1 P2 ON OFF START PLAYER PLAYER 1 TIME PLAYER 2 Spring Lock P1 P2 P1 ...
Page 7: ... and the target will move into position After the sound finishes the LED will countdown from 60 seconds Each time the target is shot successfully a sound is heard PLAYER 1 s turn ends after the target has been shot 3 times or the 60 seconds have elapsed Then the LED displays a 5 second countdown the target moves into position and the game begins again If the target is not shot within 2 minutes the...