MODEL: 1538410
VM Innovations
ASSEMBLY INSTRUCTIONS
TM
Register Now on
themdsports.com
and Earn a One-Year Warranty for Free!
Please contact us before returning the product to the store.
Page 1: ...MODEL 1538410 VM Innovations ASSEMBLY INSTRUCTIONS TM Register Now on themdsports com and Earn a One Year Warranty for Free Please contact us before returning the product to the store ...
Page 2: ...D WARRANTY Give Us Your Opinion and Receive A Write a review for a recently purchased item on TheMDSports com and receive an extended full year limited warranty valued at 150 00 See TheMDSports com for additional details TM ...
Page 3: ...our product s Limited Warranty for the return refund policy from the store We at Medal Sports can not handle the product which is out of product s limited warranty since we only provide available parts Thank you PLEASE CONTACT US BEFORE RETURNING THE PRODUCT TO THE STORE WEBSITE www themdsports com NOTICE STAPLE YOUR RECEIPT HERE 1 Please leave your name address phone number model number parts nee...
Page 4: ...red ASSEMBLY TIPS 1 Please read the instructions carefully and follow all assembly operation and safety instructions properly in order to avoid damage or injury For the assembly at least fwo adults are required 2 Some figures or drawings may not look exactly like your product Please read and understand the text before beginning each assembly step 1 This product is intended for INDOOR use only 2 Pl...
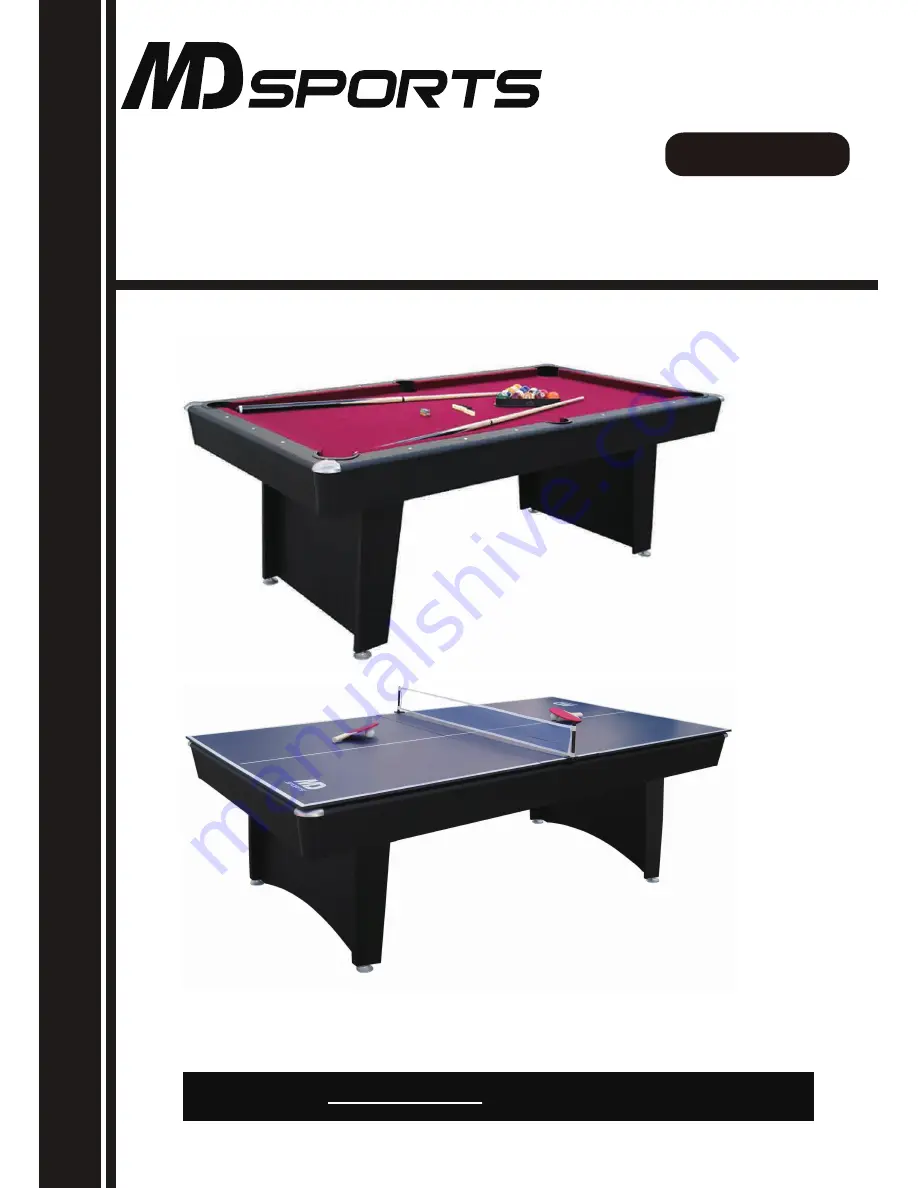
Page 5: ...Leg Right Leg End Leg Panel 2 3 4 Mainframe 1 x1 x2 x2 x2 6 7 8 5 x1 x12 x12 x4 x2 x2 x1 x1 x1 x2 x1 x12 Table Tennis Support 18 19 20 Table Tennis Paddle Table Tennis Post Table Tennis Ball x2 x2 x2 21 Table Tennis Net x1 EVA Pad 22 x12 17 x2 Apron Corner Rail Corner Side Pocket Cap P1 P2 x4 x4 x2 P3 Corner Pocket Cap P4 x4 Square Nut with Screws P5 P6 x4 T Nut x12 1538410 PRE INSTALLED PARTS 153...
Page 6: ...listed parts as shown on the parts list page Carefully cut or tear the four corners of the box so that the bottom of the box can be used as your work surface ASSEMBLY INSTRUCTIONS FIG 1 3 Attach the Right Legs 3 and Left Legs 2 to the Mainframe 1 using three Bolts 6 and three Washers 7 per Leg See FIG 1 4 Screw the Leg Levelers 9 into the bottom of each Leg See FIG 1A 1 2 3 6 7 X 1 X 2 X 2 X 12 X ...
Page 7: ...dults are recommended to turn the table over as shown 1 Lift the table off the ground 2 Turn the table over 3 Place it on all four feet at the same time on the ground DO NOT LEAN THE TABLE ON ITS LEGS HOLD TABLE HOLD TABLE DO NOT HOLD THE LEGS NOTE DO NOT lift the table by the pockets If you move the table do not lift it by placing your hands beneath the pockets and do not lean or put pressure on ...
Page 8: ...m of the Table Tennis Tops 15 and 16 See FIG 4 FIG 5 8 Place the Table Tennis Supports 17 onto the playfield and place the Table Tennis Tops 15 16 onto the billiards surface Then insert the Net Posts 18 and Net 21 onto the Table Tennis Top See FIG 5 X 2 X 1 X 12 16 15 22 15 FIG 5 17 18 21 X 2 X 2 X 1 YOU ARE NOW READY TO PLAY 21 18 17 15 15 16 ...