4/8/16Ch H.264 Network DVR Series- Ver2.2
116
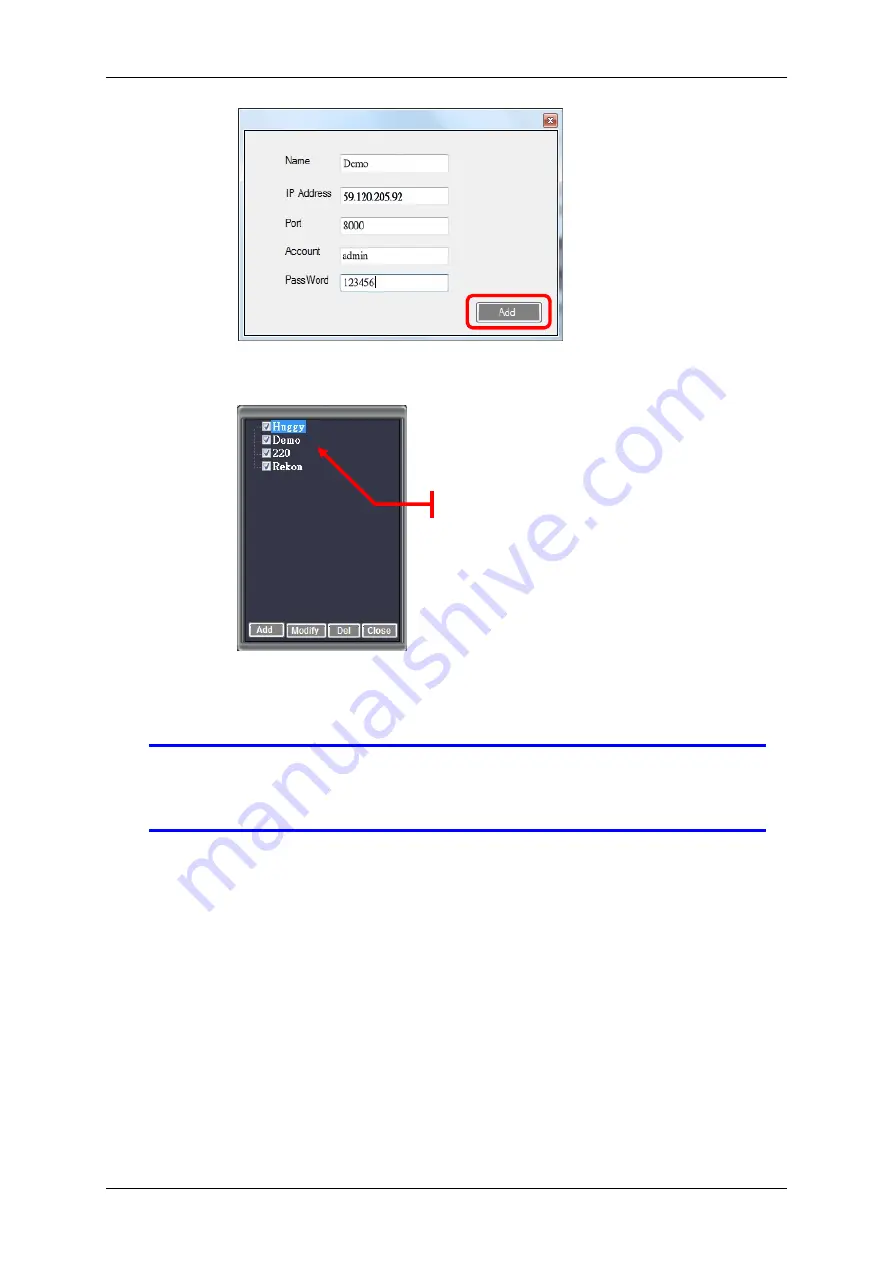
Step 4
Once you close the “Add” menu, the DVR list will show the new
DVR connections.
Step 5
Tick on the box beside the DVR name. The check mark indicates
that the DVR will be displayed on the PC Viewer. Click on the
“
Close
” button to close
NOTE
To modify or delete a DVR from the list, click on the DVR name
and allow for the
blue
highlight to appear. This highlight marks the
DVR you have chosen to operate on.
8.1.4 Switching the Channel Displays
The PC Viewer can easily switch viewing between the digital recorders connected
to it. As seen from the main screen, the display is divided into quadrants (four
areas). Each quadrant is associated to one DVR.
This section briefly illustrates how to:
switch display on the quadrant from multiple channels (4, 8, or 16) to a single
channel
switch display on the quadrant from a single channel to multiple channels (4,
8, or 16)
switch display on the screen from multiple DVRs to one DVR
New Connections
Summary of Contents for dvr
Page 1: ...4 8 16Ch H 264 Network DVR Series Ver2 2 4 8 16 Channel H 264 Network DVR Series User Guide ...
Page 2: ...4 8 16Ch H 264 Network DVR Series MU Ver2 2 ii ...
Page 8: ...4 8 16Ch H 264 Network DVR Series MU Ver2 2 viii ...
Page 12: ......
Page 13: ...4 8 16Ch H 264 Network DVR Series MU Ver2 3 1 Chapter 1 1 Overview ...
Page 23: ...4 8 16Ch H 264 Network DVR Series MU Ver2 3 11 Chapter 2 2 Installation ...
Page 39: ...27 Chapter 3 3 Getting Started ...
Page 97: ...85 Chapter 4 4 Playback and Data Backup ...
Page 109: ...4 8 16Ch H 264 Network DVR Series MU Ver2 3 97 Chapter 5 5 PTZ Control ...
Page 114: ...102 Chapter 6 6 System Information ...
Page 118: ...106 Chapter 7 7 Network Connectivity ...
Page 125: ...4 8 16Ch H 264 Network DVR Series MU Ver2 3 113 Chapter 8 8 PC Viewer ...
Page 140: ...4 8 16Ch H 264 Network DVR Series Ver2 2 128 Chapter 9 9 Remote Viewers ...


