background image

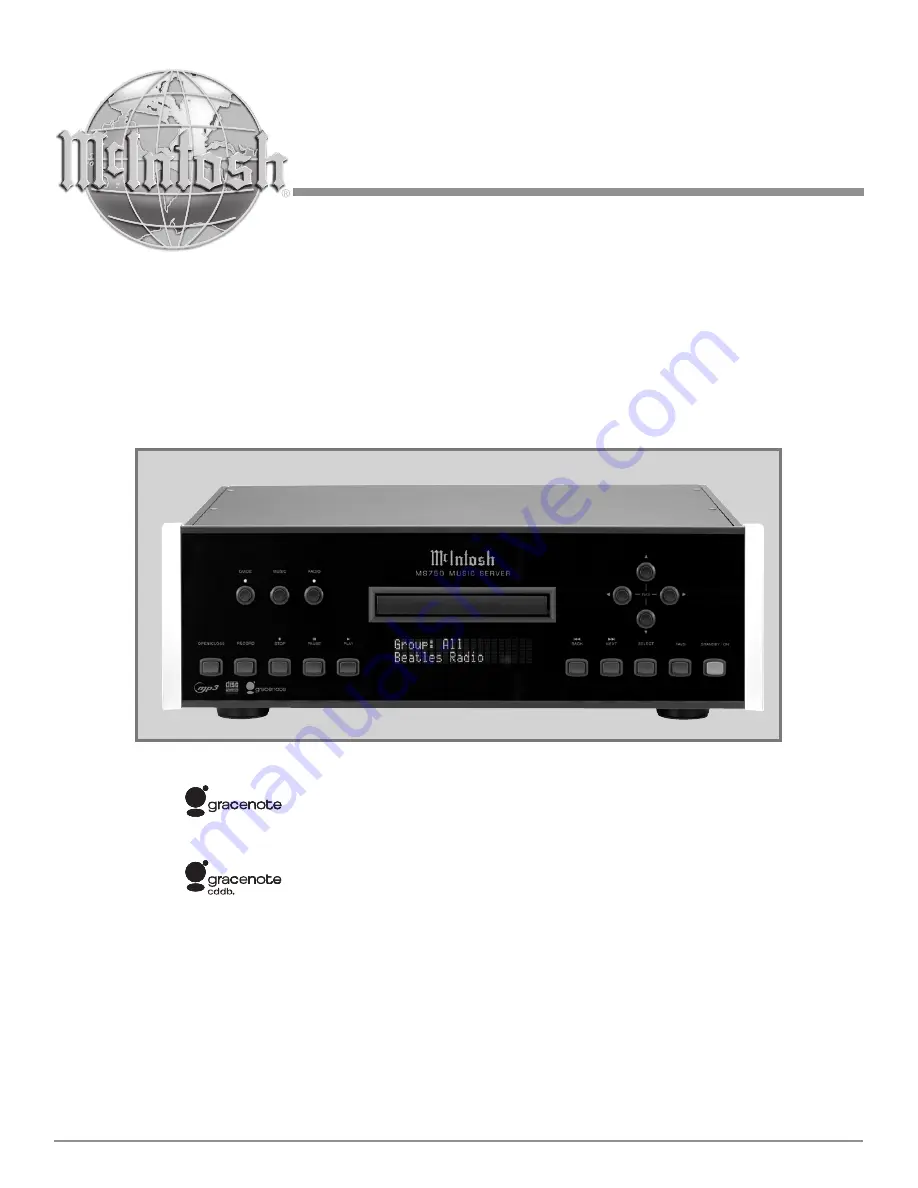
MS750

Owner’s Manual

Music Server

McIntosh Laboratory, Inc.    2 Chambers Street Binghamton, New York    13903-2699 Phone: 607-723-3512    FAX: 607-724-0549

Gracenote CDDB® Client Software, copyright 2000-2006 Gracenote. This product and service 

may practice one or more of the following U.S. Patents: #5,987,525; #6,061,680; #6,154,773, 

#6,161,132, #6,230,192, #6,230,207, #6,240,459, #6,330,593, and other patents issued or 

pending.

Gracenote and CDDB are registered trademarks of Gracenote. The Gracenote logo and

logotype, and the “Powered by Gracenote” logo are trademarks of Gracenote.

M

Summary of Contents for MS750

Page 1: ...opyright 2000 2006 Gracenote This product and service may practice one or more of the following U S Patents 5 987 525 6 061 680 6 154 773 6 161 132 6 230 192 6 230 207 6 240 459 6 330 593 and other patents issued or pending Gracenote and CDDB are registered trademarks of Gracenote The Gracenote logo and logotype and the Powered by Gracenote logo are trademarks of Gracenote M ...

Page 2: ...IED PERSONNEL To prevent the risk of electric shock do not remove cover or back No user serviceable parts inside CAUTION Invisible Laser Radiation when open DO NOT stare into the beam or view directly with optical instruments Use of controls or adjustments or performance of proce dures other than those specified in the Owners Manual may result in Hazardous Radiation Exposure LUOKAN 1 LASERLAITE KL...

Page 3: ...ies specified by the manufacturer 12 Use only with the cart stand tripod bracket or table specified by the manufacturer or sold with the apparatus When a cart is used use caution when mov ing the cart apparatus combination to avoid injury from tip over IMPORTANT SAFETY INSTRUCTIONS PLEASE READ THEM BEFORE OPERATING THIS EQUIPMENT 13 Unplug this apparatus during lightning storms or when unused for lo...

Page 4: ...s determined that your McIntosh product is in need of repair you can return it to your Dealer You can also return it to the McIntosh Laboratory Service Department For assistance on factory repair return procedure contact the McIntosh Service Department at McIntosh Laboratory Inc 2 Chambers Street Binghamton New York 13903 Phone 607 723 3515 Fax 607 723 1917 Copyright 2007 by McIntosh Laboratory In...

Page 5: ...ons Pin Number Pin Number Pin Number Pin Number 1 1 6 6 2 2 7 7 3 3 8 8 4 4 9 9 5 5 RS232 Cable Null Modem Connections Pin Number Pin Number Pin Number Pin Number 1 1 6 4 2 3 7 8 3 2 8 7 4 6 9 9 5 5 Ethernet RJ45 Socket 1 Tranceive Data 5 N C 2 Tranceive Data 6 Receive Data 3 Receive Data 7 N C 4 N C 8 N C Ethernet Cable Straight Thru Connections Pin Number Wire Color Pin Number Wire Color 1 Orang...

Page 6: ...on Sonance Marantz Xantech 7 The Ethernet Connector on the MS750 allows for con nection to a computer network for accessing the Inter net and adding a second MS750 to the Audio Video System If there is no computer network available an external modem may be connected to the MS750 for access to the Internet In both cases please refer to Owner s Manuals supplied with the external equipment to be conn...

Page 7: ... with you by recording CDs from your favorite play lists and or groups Introduction and Performance Features Expand the Music Server System Multiple MS750s may be connected together with access to any two MS750s at one time This provides for unlimited music storage capacity Digital Audio Inputs and Outputs There are Coaxial and Optical Digital Audio Inputs Out puts for connection to other componen...

Page 8: ...rma tion on the next page pertaining to installing the MS750 into cabinets 17 1 2 44 45cm 4 5 8 11 75cm 6 15 24cm 14 1 2 36 83cm 15 7 8 40 32cm 3 16 0 48cm 4 13 16 12 22cm 10 1 2 26 67cm 13 1 4 33 65cm 17 43 18cm Front View of the MS750 Rear View of the MS750 Side View of the MS750 5 3 8 13 69cm 13 16 2 06cm 2 5 08cm 1 15 16 4 92cm ...

Page 9: ...he required panel cutout ventilation cutout and unit dimensions are shown Always provide adequate ventilation for your MS750 Cool operation ensures the longest possible operating life for any electronic instrument Do not install the MS750 directly above a heat generating component such as a high powered amplifier If all the components are installed in a single cabinet a quiet run ning ventilation ...

Page 10: ...ects to the PB CB Component Input of the TV Monitor or other video com ponent PR CR OUTPUT connects to the PR CR Component Input of the TV Monitor or other video com ponent S VIDEO OUTPUTS supply video signals to a S Video Input of an A V Control Center or other video component ANALOG AUDIO OUTPUT connects to the Analog Input of an A V Control Center S LINK sends operating data to external CD Chan...

Page 11: ...e manner connect a second and or third CD Changer to MS750 COMMUNICATION PORTS 2 and 3 respec tively Refer to page 6 Important Information note number 5 for additional information Ethernet Connection 6 Optionally connect an appropriate cable from the MS750 ETHERNET connector to an Ethernet based network Hub Switch or Router If no network is available a modem may be connected to the MS750 for downl...

Page 12: ...e disc tray for load ing or unload ing discs Starts disc playback Use to Pause during play back Stops disc playback Move rapidly Forward through a track during playback Move rapidly Backward through a track during playback Selects the MUSIC Listen Mode Selects the Internet RADIO Listening Mode Starts disc recording Used to Select the highlight ed On Screen item Used to move the On Screen cursor Up...

Page 13: ...13 Notes ...

Page 14: ... power On and Off to the MS750 Press to access various music play modes such as Normal Random and Repeat Press to access the MS750 Setup Mode Press to access various On Screen Menus Use to stop or pause the music play back Press to access various Repeat Play back Modes Press to advance to the next selection Notes Push buttons whose function is not identified above are for use with other McIntosh C...

Page 15: ...tton Select from the Options Menu Edit Disc Info Enter the first character of the name by selecting the appropriate push button and then press the push button once for the first character in upper case Repeated rapid presses of the same push button will scroll through the other upper case characters assigned to the push button followed by lower case versions of the same characters Finally the nume...

Page 16: ...e MS750 and loaded with CDs all you have to do is close the changer door and in a few seconds the MS750 will begin looking up the disc information from each disc in each changer Quick Lookup checks each previously empty slot in the changers to see if any new discs were added and then checks each previously occupied slot in the changer to see if any discs were removed One by one the Table of Conten...

Page 17: ...tions and preferred system settings Press SETUP the SETUP push button on the remote control to display the Setup Menu Use the navigation push buttons on the remote control up down left and right to highlight and select any menu item Selecting Your Language The MS750 supports 5 different languages for its on screen menus and text Fol low these steps to set the language of your choice Refer to figur...

Page 18: ...hese steps to set your Time Zone 1 Press the SETUP push button on the remote to display the Setup menu 2 Select the Gen eral Menu Refer to figure 1 3 Select the Time Zone Menu Re fer to figure 2 4 Select your select your Time Zone Warning Some televisions and plasma monitors are more susceptible to screen burn in than others therefore we recommend using a low activation time like 1 minute to reduc...

Page 19: ...ccess to the Setup Menus This is useful to lockout the ability to change the global user settings and preferences Setting a System Password Follow these steps to setup a new system password 1 Press the SETUP push button on the remote 2 Select the General menu Refer to figure 1 3 Select password protection 4 Using the remote control enter a 4 to 8 digit code into the password field 5 Press the SE L...

Page 20: ...second Server is merged into the Music Guide of the MS750 to create one seamless Music Guide for browsing and playing all of your music This effectively can increase the capacity of your MS750 by using additional McIntosh Music Severs Note For more information on connecting together an ad ditional McIntosh Music Server contact your McIntosh Dealer or McIntosh Customer Service You can connect toget...

Page 21: ...lk recording allowing you to insert disc after disc automatically recording then ejecting each one Follow these steps to set the Disc Insert Prefer ences 1 Press the SETUP push button on the remote to display the Setup menu Refer to figure 1 2 Select the Audio menu Refer to figure 5 3 Select the Disc Insert Prefer ences menu 4 Select Display and Play or Re cord and Eject Record and Eject will use ...

Page 22: ...ast which is sometimes called Picture of their TV using the TV s Contrast or Picture controls This setting helps reduce video blooming and create a clearer more readable user interface Follow these steps to adjust the contrast on your TV 1 Press the SETUP push button on the remote to display the Setup menu 2 Select the Video menu Refer to figure 6 3 Select the Contrast menu Refer to figure 7 4 Tur...

Page 23: ...ssible without the use of special software and hardware 5 Press SELECT to return to the previous menu Adjusting your TV s Color and Tint Color Bars are used to test the TV monitor s ability to reproduce the proper color values Follow these steps to adjust the Color and Tint on your TV 1 Press the SETUP push button on the remote to display the Setup menu 2 Select the Video menu Refer to figure 6 3 ...

Page 24: ...nect to your MS750 s IP address and look under Setup Direct Access Codes Play List Hot Push buttons When the MS750 is controlled by an External Control System creating Play List Hot Push buttons will provide a Using Your Touch Panel The Touch Panel Overlay should now be displayed around the edges of your screen These buttons duplicate the func tions found on the remote control and allow you to int...

Page 25: ...c Collection using any of these five push button combinations Control Backspace Control Insert Control Delete Control Top Control Bottom Follow these steps to assign a Play List to one of the five available Remote Control Push button or Touch Panel combinations 1 Press the Setup push button on the remote to dis play the MS750 setup menu Refer to figure 6 2 Select the Exter nal Control menu item Re...

Page 26: ...DBY ON LED on the Front Panel is On no longer flashing the MS750 is ready to use 6 Press the STANDBY ON Push button to turn On the MS750 Updating the Software The MS750 will automatically check the Update Server once a week for any MS750 software updates and auto matically install them You can also manually check for a software update Follow these steps to manually update the software 1 Press the ...

Page 27: ...27 Notes ...

Page 28: ...g There are several ways to get your music into the MS750 Record CDs using the internal CD Drive Record CDs using optional external CD DVD changers Record from an external source such as a tape LP or other real time source Transfer Music files from your PC using a network You may choose to use any or all of these methods at any time Each is described on the following pages Recording from the Inter...

Page 29: ... record as many CDs as you want directly from your external chang ers The advantage of recording multiple discs from your changers is that you don t have to sit there and unload load each disc after it s recorded however there is the disad vantage that external recording must occur in real time at 1x record speeds taking up to several weeks to complete for large music collections External Changer ...

Page 30: ...with out having to re record everything The MS750 will import each audio file extract the song information and add it to your Music Library There are some rules to follow to make sure your files are transferred correctly Please make sure your audio files follow these guidelines before importing them into your MS750 System Requirements 10 100 Ethernet network PC or Mac connected to the same local e...

Page 31: ...avigate up and 4 Click on the Content pop up menu and select the Im port directory 5 Next an authentication dialog will appear You can ignore this dialog and just click the OK button 6 You will then have a new drive mounted on your desk top called Import 7 Drag and drop your audio files onto the Import folder The MS750 will automatically import add and catalog each file into your Music Guide Recor...

Page 32: ...e remote control and it begins to play from track 1 Note If you press SELECT with a Track highlighted you will start playback from the selected Track You ll notice that a new screen appears with a list of the songs or tracks on the current Title this is the Music Player screen The Music Player displays the artist name album name album cover art and track list for the current Title Changing the Gui...

Page 33: ...the cur rent group and then repeat them until you press stop Random Title randomly select and play a track from within the current title Continue until you press stop or every track in the current title is played Random Group randomly select and play a track from any title in the current group Continue until you press stop or every track in the current group is played To change the current Play Mo...

Page 34: ...e end of the Jukebox Queue Note Use the ADD FAVORITES and PLAY FAVORITES push buttons on the remote control instead of Jukebox push buttons Use these push buttons to add and play your Jukebox Queue The Jukebox Queue has a limit of 1000 songs which would play non stop for almost 3 days straight so the MS750 will automatically balance and adjust the contents of the queue as you select items into it ...

Page 35: ...ts Party mixes Workout mixes Follow these steps to create your own custom Play List 1 Press the MUSIC push button to make sure you are in the Music source mode 2 Press the OPTIONS push button to display the Music Options Menu 3 Select the Play List New Play List menu item 4 Using the remote control or push buttonboard enter a name for your Play List 5 Select the CONTINUE button on screen to advanc...

Page 36: ...e checkmark 7 When you have selected all of the Titles or Stations you want to include in the group press the RECORD but ton on the remote control to save the Group When you are finished creating your Group the Guide is displayed highlighting the newly created Group Notice that a custom Group is added to the Group Bar along with the System Groups The custom Group will always be sorted alphabetical...

Page 37: ...ation for the new station including station name location URL the bit rate of the stream the genre the stream type MP3 or WMA and the number of chan nels mono or stereo The default cover art will be set according to which genre you select 5 Select the SAVE button to save the new station When you are finished creating your new station the Radio Guide is displayed highlighting the newly created Stat...

Page 38: ...next track 7 Select the SAVE button to save your changes and re turn to the previous screen Automatically Lookup Information for This Disc The Lookup This Disc button will initiate a disc lookup for only this disc The MS750 will connect to the Grace note Music Recognition Service to locate and download the disc information Follow these steps to lookup informa tion for the current disc 1 Highlight ...

Page 39: ... mation screen Refer to figure 26 4 Select the Select a Cover button to display the Select Cover Art screen 5 Using the arrow and page push buttons on the remote control locate the name of the Title corresponding to the cover you wish to use for the current Title Notice that a preview of the selected cover appears on the right of the list as you highlight each name 6 Press the SELECT push button o...

Page 40: ... name of a Group add Music Titles or Radio Stations to the Group or remove Music Titles or Radio Stations from the Group Follow these steps to edit a Group 1 Press the MUSIC push button if you want to edit the Music Groups or press the RADIO push button if you want to edit the Radio Groups 2 Highlight the Group you want to edit within the Group Bar 3 Press the OPTIONS push button to display the Op...

Page 41: ... can not delete physical CDs from the Music Library You must remove the discs from your changers if you want the CDs to be removed from the Music Guide Deleting Play Lists You may delete entire Play Lists from the Music Guide Follow these steps to permanently delete one or more Play Lists from the Music Guide 1 Press the MUSIC push button to make sure you are in the Music source mode 2 Press the O...

Page 42: ...IC push button to make sure you are in the Music source mode 2 Press the RECORD push button to display the Music Record Options menu Refer to figure 29 3 Select the Duplicate a Disc Button to display the Music Record Select Guide Refer to figure 30 4 For each Group you want to delete highlight the Group and press the SELECT push button on the remote A checkmark appears to the right of each selecte...

Page 43: ...rding you are about to make You can use these default settings or edit them The default recording length is 30 minutes Enter a differ ent number to increase or decrease the recording time 5 When you are finished editing the default settings press the RECORD push button again to start record ing from the external analog inputs to the internal hard drive 6 The MS750 will record from the external ana...

Page 44: ...p at this time The MS750 Server Name entered on the Server Settings Menu in the SETUP NETWORK menus is used for the web address to access the MS750 web interface To access the MS750 web server simply open the web browser on your PC or Mac and enter the MS750 name in the ad dress bar To access the PDA web interface enter the MS750 name fol lowed by pda in the address bar For example MyMS750 pda Usi...

Page 45: ...ting to the Internet to lookup disc information try these possible fixes before calling McIntosh Tech Support Make sure that your MS750 is properly connected to your home network and that all cables are in working order The MS750 communicates using TCP IP and UDP over Ethernet networks using ports 80 443 and 1755 If you have a router installed on your network make sure that these ports are open fo...

Page 46: ...e any and all use of the Gracenote Data the Gracenote Database and Grace note Embedded Software Gracenote reserves all rights in the Gracenote Data Gracenote Database and Gracenote Embedded Software including all ownership rights You agree that Gracenote may enforce its rights under this Agreement against you directly in its own name The Embedded Software and each item of Gracenote Data are licens...

Page 47: ...47 Notes ...

Page 48: ...48 Notes ...

Page 49: ...49 Notes ...

Page 50: ...ed the panel clearance required in front of mounting panel is 6 3 4 inches 17 2cm Weight 28 1 pounds 12 8Kg net 44 5 pounds 20 2Kg in ship ping carton Shipping Carton Dimensions Width is 26 1 2 inches 67 3cm Depth is 24 1 4 inches 62 2cm Height is 11 3 4 inches 29 9cm Signal System NTSC PAL Component Video Output Level Y Output Level 1 0Vp p 75 OHM PB CB Output Level 0 648Vp p 75 OHM PR CR Output ...

Page 51: ...lt in shipping damage Use the original shipping carton and interior parts only if they are all in good serviceable condition If a shipping carton or any of the interior part s are needed please call or write Customer Service Department of McIntosh Laboratory Refer to page 4 Please see the Part List for the correct part numbers Quantity Part Number Description 1 033838 Shipping carton only 4 033837...

Page 52: ...f its products is the policy of McIntosh Laboratory Incorporated who reserves the right to improve design without notice Printed in the U S A McIntosh Laboratory Inc 2 Chambers Street Binghamton NY 13903 McIntosh Part No 04101900 ...

Reviews: