


Quick Guide of HD TVI Recorder
17
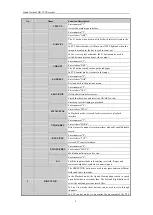
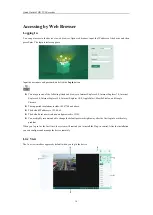
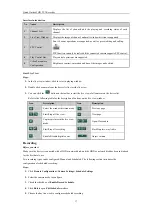
Interface Introduction
No.
Name
Description
1
Channel List
Displays the list of channels and the playing and recording status of each
channel.
2
Live View Window
Displays the image of channel, and multi-window division is supported.
3
PTZ Control
Pan, tilt, zoom operations are supported, as well as preset editing and calling.
PTZ function can only be realized if the connected camera supports PTZ control.
4
Play Control Bar
Play control operations are supported.
5
Video Parameters
Configuration
Brightness, contrast, saturation and hue of the image can be edited.
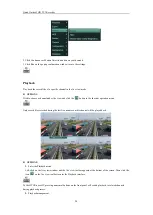
Start Live View
Steps:
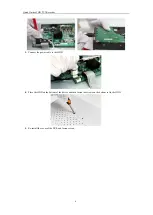
1.
In the live view window, click to select a playing window.
2.
Double click a camera from the device list to start the live view.
3.
You can click the
button on the toolbar to start the live view of all cameras on the device list.
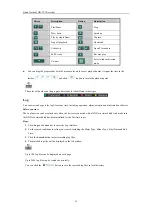
Refer to the following table for the description of buttons on the live view window:
Icon
Description
Icon
Description
Select the window-division mode
Previous page
/
Start/Stop all live view
Next page
Capture pictures in the live view
mode
/
Open/Close audio
/
Start/Stop all recording
/
Start/Stop two-way Audio
Enable/Disable digital zoom
Adjust volume
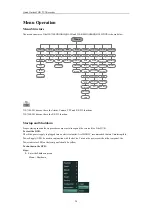
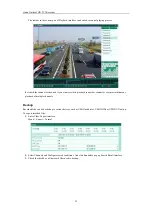
Recording
Before you start
Make sure the device is connected with a HDD or network disk, and the HDD or network disk has been initialized
for the first time to use.
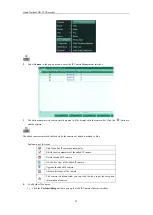
Two recording types can be configured: Manual and Scheduled. The following section introduces the
configuration of scheduled recording.
Steps:
1.
Click
Remote Configuration> Camera Settings> Schedule Settings
.
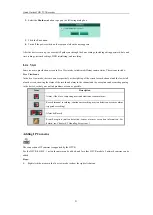
2.
Select the camera needs to configure.
3.
Check the checkbox of
Enable Record
Schedule
.
4.
Click
Edit
to open
Edit Schedule
interface.
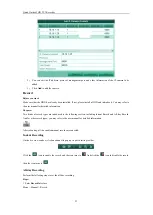
5.
Choose the day in a week to configure scheduled recording.


