background image


Saim SCT Series 

Thermal Imaging Riflescope 

Summary of Contents for Saim SCT Series

Page 1: ...Saim SCT Series Thermal Imaging Riflescope ...

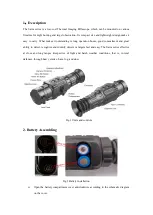
Page 2: ...peration hours good concealment and great ability to detect recognize and identify objects or targets fast and easy The Saim series effective at close and long ranges irrespective of light and harsh weather conditions that is in total darkness through heavy smoke haze fog and dust Fig 1 Units and controls 2 Battery Assembling Fig 2 Battery installation Open the battery compartment cover anticlockw...

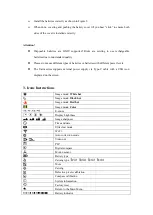
Page 3: ...es or batteries with different power levels The Saim series supports external power supply via Type C cable with a USB icon displayed on the screen 3 Icons Instructions Image mode White hot Image mode Black hot Image mode Red hot Image mode Color E zoom Display brightness Image sharpness Time and date Ultraclear mode Wi Fi Auto correction mode Video out PIP Digital compass Motion sensor Battery ty...

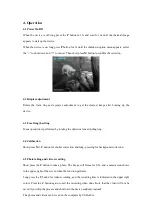
Page 4: ...tion is performed by rotating the objective lens adjusting ring 4 4 Calibration Short press M C button for shutter correction and long pressing for background correction 4 5 Photo taking and video recording Short press the C button to take a photo The image will freeze for 0 5s and a camera icon shows in the upper right of the screen when the function performs Long press the C button for video rec...

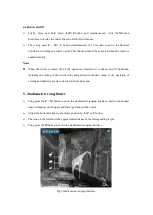
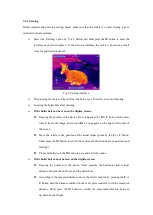
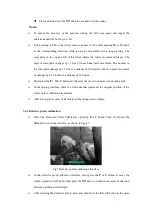
Page 5: ...d to it in the menu will be hidden including the setting of the reticle color and pattern in shortcut menu 3 the operation of zeroing and defective pixels correction in the main menu 5 Stadiametric rangefinder Long press the P M button to enter the stadiametric ranging interface and two horizontal lines will appear on the upper and lower positions of the cursor Adjust the horizontal lines to the t...

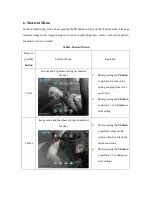
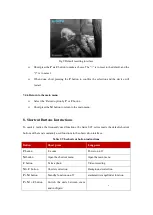
Page 6: ...utton Shortcut Menu Operation 1 time E zoom and brightness setting in shortcut menu1 Short pressing the P button to perform E zoom value setting ranging from level one to four Short pressing the C button to perform 1 to 4 brightness level setting 2 times Image mode and sharpness setting in shortcut menu2 Short pressing the P button to perform image mode setting white hot black hot red hot and colo...

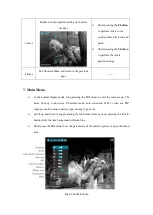
Page 7: ...age 7 Main Menu In the normal display mode long pressing the M button to enter the main menu The items from up to down are Ultraclear mode auto correction Wi Fi video out PIP compass motion sensor battery type zeroing type more Scroll up and down to toggle among the functional items by short pressing the P or C button while the item background will turn blue Short press the M button to set the par...

Page 8: ...tion The initial password is 12345678 And then the device can be controlled through APP such as taking pictures and recording Meanwhile photos and videos will be stored in the external device 7 3 Battery Type 3 7v is selected for rechargeable batteries and 3V is for normal dry batteries 7 4 More advanced Under the main menu interface select the More option click M button to enter the secondary men...

Page 9: ...he M C button at the same time to freeze the image and a snowflake icon appears on the upper left corner of the screen Move the reticle to the position of the actual impact point by the P or C button Short press the M button to switch the movement direction between up down and left right Press and hold down the M button to save and exit when done If the bullet hole cannot be seen on the display sc...

Page 10: ...by 0 62 inches at a distance of 100 yards Short press the P M C buttons at the same time to switch units cm m inch yard In the zeroing interface there is a white dot that represents the original position of the reticle before calibration implement After zeroing the center of all reticle will be changed accordingly 7 4 2 Defective pixels calibration Select the Defective Pixels Calibration option by...

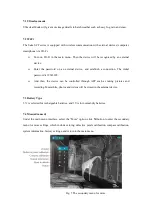
Page 11: ...button and short press the M button to enter the compass calibration interface as shown in figure 8 Rotate the device in three axial directions in 30 seconds according to the shown direction to complete the calibration Fig 8 Compass calibration interface 7 4 4 System Information Select the System Information option by P or C button and short press the M button to bring up information about the sof...

Page 12: ...ut Buttons Instructions To quickly realize the frequently used functions the Saim SCT series made the default shortcut buttons of the most commonly used functions in the observation interface Table 2 The shortcut button instructions Button Short press Long press P button E zoom Power on off M button Open the shortcut menu Open the main menu C button Take a photo Video recording M C button Shutter ...

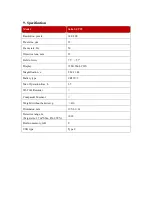
Page 13: ...e lens mm 35 Field of view 7 5 5 7 Display 1280 960 LCOS Magnification x 2 86 11 44 Battery type CR123 2 Max Operation time h 3 5 Wi Fi Recorder Compass Msensor Weight without batteries g 410 Dimension mm 195 61 61 Detective range m Target size 1 7m 0 5m P n 99 1818 Built in memory GB 8 USB type Type C ...

Reviews: