


Making your own open-wire power supply cable 25
3. Apply the tip of your soldering iron to each wire for a second; then, apply solder
to the wire. The solder should flow freely onto the wire and coat it. Clean off any
excess solder, if necessary.
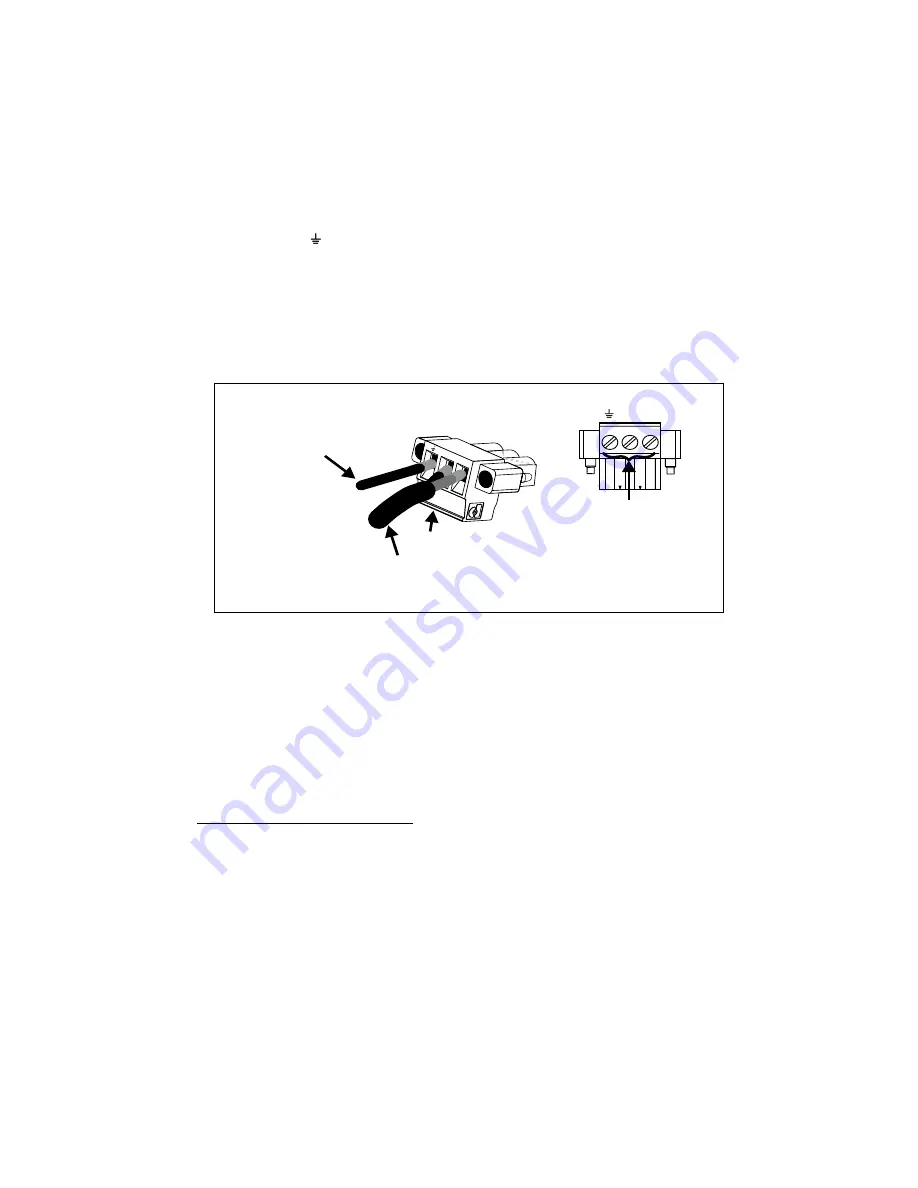
4. Connect the exposed ends of your power supply cable into the power connector
latch. To do so, push the red wire into the positive (+) wire-terminal slot and the
black wire into the negative (-) wire-terminal slot.
1
Connect the chassis ground
wire-terminal (
)
to earth ground.
Warning
To ensure EMC conformity, you must connect the chassis ground wire-terminal
of your Matrox 4Sight EV6 unit to earth ground.
5. Secure the wires into their wire-terminal slots by tightening the screw associated
with the wire, at the bottom of the power connector latch.
6. Return to the
Operating your Matrox 4Sight EV6 for the first time
section for
instruction on how to connect the power connector latch to the power connector
of your unit.
1. Be aware that some power supplies might have different colors, verify the
polarity of your wires before attaching them.
o
Connection to
earth-ground
Power
supply
cable
+
-
- +
Power connector latch
Bottom
Screws to tighten
the wires in-place
Bottom
Summary of Contents for 4Sight EV6
Page 1: ...Matrox 4Sight EV6 Installation and Hardware Reference Manual no Y11469 101 0110 June 22 2021 ...
Page 6: ...Index Regulatory Compliance Limited Warranty ...
Page 20: ...20 Chapter 1 Before you begin ...
Page 50: ...50 Chapter 2 Getting started with your Matrox 4Sight EV6 unit ...
Page 64: ...64 Appendix A Hardware glossary ...
Page 84: ...84 Appendix B Technical reference ...
Page 96: ...96 Appendix C Operating system recovery ...
Page 108: ...108 Appendix E Listing of Matrox 4Sight EV6 units ...
Page 112: ...T temperature control 14 U USB See connectors USB W website support 19 Windows 10 ...
Page 116: ...Limited Warranty Refer to the warranty statement that came with your product ...


