Retain manual for further reference.
Before using the BBQ, remove any packaging material within and around the BBQ supplied for protection during transit.
GB0350
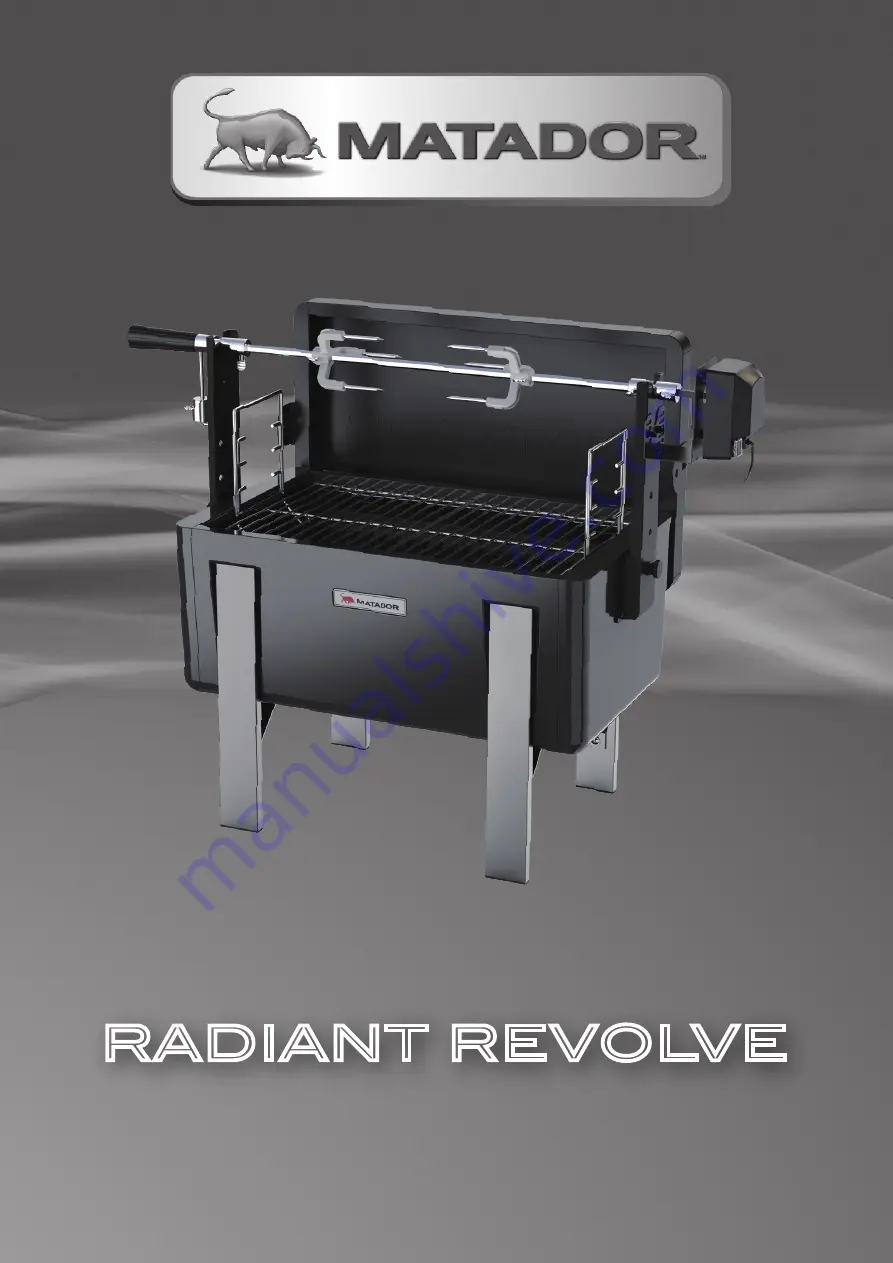
RADIANT REVOLVE
Page 1: ...Retain manual for further reference Before using the BBQ remove any packaging material within and around the BBQ supplied for protection during transit GB0350 RADIANT REVOLVE ...
Page 2: ...are com au or call 1300 360 211 AUS 09 415 6240 NZ Features Benefits 3 Important safety information 4 Do s Don ts 5 Positioning the BBQ 6 Before you cook 7 Using the BBQ 7 Regulating temperature 8 Adding fuel during cooking 8 After use safety 8 Proper care maintenance 8 Exploded parts diagram 9 Part diagrams 10 Hardware list 11 Assembly instructions 12 21 Warranty 22 24 ...
Page 3: ...mm 20kg Motor Charcoal Cast Fork Assemblies Rotisserie Handle And Counterweight Rotisserie support post Grate Chrome Plated Cooking Grate Enamel Firebowl Assembly Charcoal Grate Handle Grate Lifter Metal Fixing Screw Easy Windbreak Attachment Tidy Storage Charcoal Grate With ash tray ...
Page 4: ...and common sense when operating your BBQ Never leave hot coals and ashes in the BBQ unattended Use caution when lifting or moving the BBQ to prevent strains and back injuries Wait for the BBQ to cool down prior to moving Ensure BBQ is cool before cleaning and placing into the provided storage bag With a garden hose completely wet the surface beneath and around the BBQ to extinguish any ashes coals...
Page 5: ...similar products could cause an explosion possibly leading to severe bodily injury Never add charcoal lighter fluid to hot or even warm coals as flashback may occur causing severe burns Never use charcoal that has been pre treated with lighter fluid Use only high grade charcoal briquettes or charcoal lump wood Do not leave the BBQ unattended when in use Do not store or use the BBQ near flammable l...
Page 6: ...e and remain open and unrestricted The BBQ must not be installed under or on any combustible material Minimum clearance from any combustible materials on ALL sides of the BBQ is 1000mm and 1000mm overhead BBQ MUST BE ASSEMBLED IN ACCORDANCE WITH THE MANUFACTURER S INSTALLATION INSTRUCTIONS The following figures are diagrammatic representations of outdoor areas described Rectangular areas have been...
Page 7: ...the heat source towards or charcoal grate is a way of regulating the cooking temperature To adjust the height place the grate handles on the positions to choose from Ensure that both handles are on the same position to prevent an uneven charcoal grate Rotisserie Supports The supports can be assembled at 3 different height positions to give your food clearance and also allow you to adjust the dista...
Page 8: ...lace remaining coals and ashes in a non combustible metal container and completely saturate with water Allow coals and water to remain in metal container for 24 hours prior to disposing Extinguished coals and ashes should be placed a safe distance from all structures and combustible materials With a garden hose completely wet surface beneath and around the BBQ to extinguish any ashes coals or embe...
Page 9: ...9 MATADOR INSTRUCTION MANUAL 1 2 3 4 5 6 7 8 9 10 11 12 13 14 15 16 17 18 19 20 21 Exploded Parts Diagram 22 ...
Page 10: ...2 Cast Forks 3 Spit Rod 4 Rod RH Support 5 Spit Rod Extension 6 Spit Rod Bolt 7 Rod LH Support 8 Rotisserie Handle 9 Counterweight 10 Lid Bracket 11 Lid Windbreak 12 Motor 13 Motor Mount 14 Support Post 15 Thumb screw 16 Firebowl 17 Charcoal Grate 18 Charcoal grate handle 19 Ash tray 20 Leg 21 Leg Bracket 4pcs 22 Grate Lifter 1pcs ...
Page 11: ...Hardware list Part Name Hardware Image Quantity A BOLT HEX M5 X 12 2 B BOLT M6 X 12 18 C WASHER Ø5 12 2 D WASHER Ø6 12 14 E HEX NUT M5 2 F HEX NUT M6 6 11 MATADOR INSTRUCTION MANUAL ...
Page 12: ...fully before assembling or operating your BBQ Inspect contents of the box to ensure all parts are included and undamaged The following tools are required for assembly and are not included Phillips head Screwdriver Adjustable Wrench or Socket Set Symbol The following symbols will be shown in each procedure for indication of tightening the bolt and nut if necessary Tighten with Tools at this stage P...
Page 13: ...N MANUAL Assembly Instructions Step 1 Attach legs to firebowl Hardware Needed B BOLT HEX M6 X 12 8 D WASHER Ø6 12 8 NOTE This stage will require a Phillips head screwdriver to help tighten the securing hardware 16 B D 20 x4 ...
Page 14: ... 2 Attach leg supports Hardware Needed B BOLT M6 X 12 8 D WASHER Ø6 12 4 F HEX NUT M6 4 NOTE This stage will require a Phillips head screwdriver and a socket set or adjustable wrench to tighten the securing hardware 21 x4 B D F ...
Page 15: ...Step 3 Attaching rotisserie supports Hardware Needed A BOLT HEX M6 X 12 2 C WASHER Ø5 12 2 E HEX NUT M5 2 NOTE This stage will require a Phillips head screwdriver and a socket set or adjustable wrench to tighten the securing hardware 15 x2 13 14 x2 C E A ...
Page 16: ...Assembly Instructions Step 4 Assemble spit rod Step 5 Assemble charcoal tray 8 9 7 3 4 5 2 6 x5 18 x2 19 17 ...
Page 17: ...17 MATADOR INSTRUCTION MANUAL Step 7 Attach rotisserie rod assembly Assembly Instructions Step 6 Insert charcoal tray 12 1 x2 22 ...
Page 18: ...2 D WASHER Ø5 12 2 F HEX NUT M5 2 NOTE This stage will require a Phillips head screwdriver and a socket set or adjustable wrench to tighten the securing hardware Assembly Instructions Step 8 Assemble lid windbreak F D B 10 x2 11 ...
Page 19: ...19 MATADOR INSTRUCTION MANUAL Step 10 Assembly Instructions Step 9 1 2 ...
Page 20: ...STORAGE STEPS Step 1 Remove components ...
Page 21: ...21 MATADOR INSTRUCTION MANUAL STORAGE STEPS Step 2 Store components inside firebowl and secure lid 1 2 ...
Page 22: ...AIR OR REPLACEMENT THIS WARRANTY EXCLUDES DAMAGE CAUSED BY ABUSE OR NEGLECT ALL ELECTRICAL COMPONENTS ARE WARRANTED FOR A PERIOD OF 12 MONTHS CONDITIONS OF THE WARRANTY The BBQ must be operated and maintained in accordance with the instructions supplied in the operating manual Any repair does not extend the warranty period Any parts other than original Matador parts will void this warranty THIS WA...
Page 23: ...ceptable quality and the failure does not amount to a major failure The warranty excludes damage resulting from product misuse or product neglect The warranty covers domestic use only and does not apply to commercial applications WHAT IS NOT COVERED Removal or re location costs Liability will only be accepted for loss or damage during transit if at the time the product was being transported by Bun...
Page 24: ...below to be taken to our online registration page We recommend you register your Matador BBQ for potential warranty claims You can also register your Matador BBQ by emailing us a copy of your BBQ s details Page 22 of this manual together with a copy of your purchase receipt to matador mayohardware com au RETAIN A COPY OF YOUR RECEIPT AND THE ABOVE INFORMATION FOR YOUR RECORDS AS WELL Registering y...
Page 25: ...25 MATADOR INSTRUCTION MANUAL Notes ...
Page 26: ...matadorbbqs com au For technical and warranty support call 1300 360 211 AUS 09 415 6240 NZ Your purchase receipt will be required for warranty claims For spares parts contact your local Bunnings Warehouse PB0161a ...