headline bars
continuation tabs
notes
warnings
model no. 058-0051-2 | contact us 1-800-689-9928
13
12
OPERA
TING INSTRUCTIONS
OPERA
TING INSTRUCTIONS
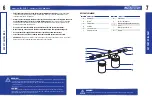
4. Do not hold the air brush too close to
the paper or hold the finger lever all the
way back and down. This action will
cause “puddles” to form and spread.
(fig. 7 & 8)
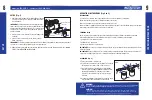
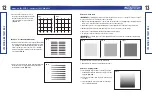
Exercise 3 - freehand (Straight lines)
1. Distance from work surface controls line width. Holding
the air brush close to the work surface produces a thin
line. Holding the air brush further away from the work
surface produces a thicker line. Practice controlling
distance from the work surface until consistent lines
are sprayed.
(fig. 9)
2. Release more material and lift the air brush away from
the work surface to spray parallel lines graduating
from narrow to broad.
(fig. 10)
Fig. 7
Fig. 8
Fig. 9
Fig. 10
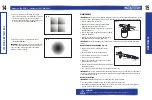
Exercise 4 - Even Tones
IMPORTANT:
Use masking tape to mask off several square areas on a piece of paper for Exercises 4 and 5.
Be sure not to spray over or under the edge of the mask.
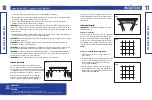
1. Hold the air brush approximately 4" (10 cm) from the work surface. Using triggering technique practiced
in Exercise 1, air brush a light coat of material at the top of masked area.
2. Allow some spray to cover part of masking tape so no unpainted area shows when tape is removed.
3. Overlap the air brush strokes (from right to left) to create a consistent coat of material.
4. Do not create a line pattern with the air brush and avoid overspray.
5. Re-spray the entire area until an even tone is achieved.
IMPORTANT:
Do not attempt to cover entire paper with a heavy coat all at once. Build the tone gradually.
(fig. 11, 12, 13)
6. Allow work surface to dry before removing mask.
7. Carefully remove mask to avoid tearing work surface.
Exercise 5 - Varying shades
1a. Start spraying at the bottom of a masked area and
gradually fade into the white at the top. Do not fade
abruptly.
(fig. 14)
1b. Spray tone no further than 2/3 or 3/4 of the way up
the page.
1c. Stop spraying the tone shorter with each passage
since overspray will build.
Fig. 11
Fig. 12
Fig. 13
Fig. 14


