157
7.2.
SW update (USB/Radio/DFU)
This chapter describes three general ways of SW update. Regular - using USB
connection, or Radio connection. And SW update for special cases (if SW version gap
is very big, or regular SW update do not work)
– DFU Programming.
SW update via USB
Usually, SW update via USB is used for the very first time you starting up the system. It
allows you to make an update up to actual SW version very quickly before the system
deployment.
Pros:
Quick SW update per beacon.
Cons:
All the devices should be connected to the PC via USB cable. If you already
deployed the system, you will need to unmount it.
How to:
-
Launch the Dashboard
-
Make sure that the beacon is on
-
Connect beacon to your PC via USB cable
-
When beacon connected to the Dashboard, go to
“Firmware” → “Upload firmware” → Choose
.hex SW file for your device
(
Be careful with IA and NIA architectures, do not mix it
)
-
Click
“Next”
-
Wait until beacon update finishes
Note: If it the first time you start the system
– press Default button for every beacon after
SW update
-
Repeat for all your beacons
Be careful: Default button will apply full default settings to this beacon, except it’s
address. If you had some custom Radio settings before, it would be changed to
153kbps Radio profile, 0 Radio channel
SW update via Radio
Usually, SW update via USB is used for the very first time you starting up the system. It
allows you to make an update up to actual SW version very quickly before the system
deployment.
Pros:
Allows you to keep your system on its place and update SW remotely
Cons:
Not as fast as USB SW update
How to:
-
Launch the Dashboard
-
Make sure that the modem connected to the Dashboard (via USB)
-
Ensure that you can see your beacons via radio in the Dashboard
-
Click on the beacon you want to update (In the bottom devices’ list)
-
go to
“Firmware” → “Upload firmware” → Choose .hex SW file for your device
(
Be careful with
IA and NIA architectures, do not mix it
)
-
Click
“Next”
Summary of Contents for Mini-RX
Page 1: ...Marvelmind Indoor Navigation System Operating manual v2020_12_14 www marvelmind com ...
Page 16: ...16 HW v4 9 beacon with Mini TX size comparison Beacon Industrial RX Beacon Industrial Super ...
Page 30: ...30 Figure 6 Two external microphone connection ...
Page 34: ...34 Figure 9 One external microphone soldering Figure 10 Two external microphones soldering ...
Page 60: ...60 Help video https www youtube com watch v NHUnCtJIYXc ...
Page 69: ...69 The system is now fully operational ...
Page 97: ...97 The system is now fully operational ...
Page 106: ...106 The system is now fully operational ...
Page 115: ...115 The system is now fully operational ...
Page 136: ...136 Advanced settings TBD Enabling will allow direction along with location TBD TBD TBD ...
Page 171: ...171 Floor 5 is enabled Floor 4 is enabled ...
Page 175: ...175 Z X ...
Page 190: ...190 Choose color and press OK Color applied Now background matches floorplan ...
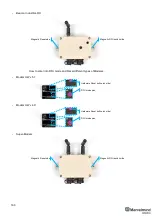
Page 196: ...196 7 18 IMU axis positioning Super Beacon IMU axis positions HW v4 9 IMU axis positions ...
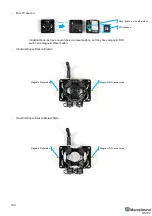
Page 197: ...197 Mini TX IMU axis positions Mini RX beacon IMU axis positions ...
Page 201: ...201 Real time player turned on ...
Page 204: ...204 8 1 Super beacon external interface pinout top view ...
Page 205: ...205 8 2 Beacon HW v4 9 external interface 4x4 pinout top view ...
Page 206: ...206 8 3 Modem HW v4 9 external interface pinout top view ...
Page 240: ...240 Right mouse button on it Set movement path Shift Left mouse click to add point ...
Page 250: ...250 Contacts For additional support please send your questions to info marvelmind com ...

