background image

Marvel: Contest of Champions™


31 

|


P a g e


Electrical and Mechanical Illustrations 


Summary of Contents for Contest of Champions

Page 1: ...0 01 REV 5 Marvel Contest of Champions Operator s Manual 2019 MARVEL MARVEL CONTEST OF CHAMPIONS SOFTWARE 2019 KABAM GAMES INC A NETMARBLE COMPANY ALL RIGHTS RESERVED 2019 Raw Thrills Inc All Rights R...

Page 2: ...This Page Left Blank Intentionally...

Page 3: ...Liquid Sources 6 Connectors 6 Computer 6 Tempered Glass Warning 6 Hazard to Epileptics 6 Manual 6 Specifications 6 Product Specifications 7 Electrical Power 7 Dimensions 7 Operating Temperature 7 Ope...

Page 4: ...s 13 Main Menu 13 Choosing the Right Pricing Adjustments for Your Location 19 Cards and Card Dispensers 20 Refilling Card Dispensers 20 Clearing Card Dispenser Jam 20 Authorizing More Cards 21 PC Hard...

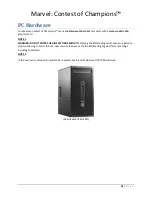
Page 5: ...ing adjustments unless otherwise instructed Installing or repairing components while power is on can damage the components and void the warranty Grounding Avoid electrical shock Do not plug in AC powe...

Page 6: ...broken materials Hazard to Epileptics A small portion of the population has an epileptic condition that may cause seizures Affected persons experience seizures while watching some television pictures...

Page 7: ...eters Width 54 75 1 39 meters Depth 32 50 0 83 meters Operating Temperature 50 F to 104 F 10 C to 40 C Operating Humidity Must not exceed 95 relative humidity Fuse Replacement Guide NOTE FOR CONTINUED...

Page 8: ...coin door 6 Locate the keys for the back doors the cash box door and the card dispenser doors 7 Open the cash box door and remove the cash box 8 Check for shipping damage to the following Marquee and...

Page 9: ...ed Setup ladders next to the cabinet for marquee installation 2 Locate the marquee assembly as well as the following hardware a 6 black tamper proof Torx machine screws 20 thread 1 1 2 long b 6 black...

Page 10: ...o use 1 or 2 card readers in the price settings section of the test menu It is recommended to use 2 card readers for best results and player access There are 2 supplied connections each located under...

Page 11: ...sent and working Startup Game 1 Plug the line cord into an AC outlet 2 Turn the main cabinet power switch on 3 Verify the game and all components are operating normally See Basic Functional Test on In...

Page 12: ...wnloads Test Menu Navigation In addition to the buttons on the Service Panel you can also use the Start and Gameplay buttons to navigate through the Test Menus Navigating the Test Menu Button Action T...

Page 13: ...and verify the coin meter is working properly 6 Enter the Scanner Test and verify both Player 1 and Player 2 card scanners are working properly 7 Enter the Card Dispenser Test and verify the dispenser...

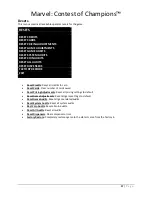
Page 14: ...nputs on the cabinet Hard Drive Check Test hard drive for file integrity Video Test Tests the cabinet s monitor Audio Test Tests cabinet speakers Cabinet Lights Test Tests all lighting on the cabinet...

Page 15: ...Max Credits Allows you to set the maximum number of credits Shared Cashbox Sets whether player s share a cashbox or each have their own Notes Adjusting the number of units per credit will clear any c...

Page 16: ...SYSTEM SETTINGS DATE TIME EXIT Date Time Set the date and time Audits This menu allows you to view a wide variety of statistics and information about the game AUDITS SYSTEM AUDITS COIN AUDITS GAME AU...

Page 17: ...EXIT Reset Credits Reset all credits to zero Reset Cards Clear number of cards owed Reset Pricing Adjustments Reset all pricing settings to default Reset Game Adjustments Reset all game settings to d...

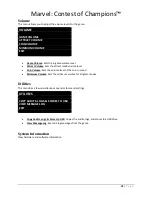
Page 18: ...volume level Coin Volume Sets the volume level of the coin in sound Minimum Volume Sets the minimum volume for all game modes Utilities This menu has a few miscellaneous operator tools and settings U...

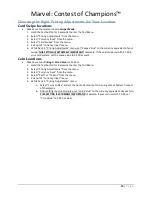
Page 19: ...Example If the card swipe is worth 1 50 in your card system set the swipe value to 1 50 as well Coin Locations Make Sure Your Pricing Coin Value are Correct 1 Hold the Test Button for 2 seconds to en...

Page 20: ...card hopper 3 Add cards to the card hopper making sure to leave enough room for the weight 4 Place the weight back into the card hopper 5 Close the card dispenser door Clearing Card Dispenser Jam 1 O...

Page 21: ...RIZATION from menu 5 Place the RFID card on the Smart Card Reader which can be found near the Service Panel See Image 2 Below 6 Following the directions on the screen press the Start Button to begin t...

Page 22: ...card NOTE 1 WARNING DO NOT ENTER THE BIOS SETTINGS MENU Modifying the BIOS settings will cause your game to stop functioning In order to boot new security features verify the BIOS settings against fa...

Page 23: ...T 1 With game and PC on verify that the RIO board has power If not see Troubleshooting 2 Open the coin door 3 Insert the recovery USB thumb drive included in your game into the USB port on the Test bu...

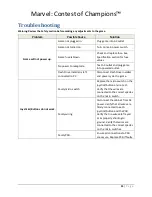
Page 24: ...ash Drive Installer is left connected to PC Disconnect Flash Drive Installer and power cycle the game Joysticks Buttons do not work Faulty micro switch Replace the micro switch on the joystick button...

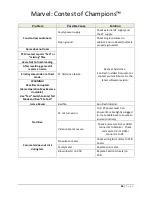
Page 25: ...k connection to speakers Volume set too low Use VOL UP button on Test panel to raise volume Faulty wiring Verify all wires are firmly connected to the speakers PCB and green computer audio port Verify...

Page 26: ...g After resetting game still reports an error Erratic game mode or attract mode WARNING Data files Corrupted Game Operation May Become Unstable Use Test Switch to Enter Test Mode and Run File Test Gam...

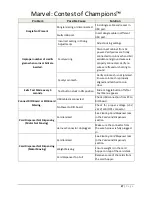
Page 27: ...operly aligned and latched to coin door Exits Test Mode every 3 seconds Test button stuck in ON position Slide or toggle button off after Test Menu appears Connect RIO Board or RIO Board Missing USB c...

Page 28: ...rd Too Far Away Make sure you re physically touching the RFID card to the Smart Card Reader Cards Not Scanning Properly Card Scanner s Unplugged Ensure the Card Scanner s USB cable is securely plugged...

Page 29: ...P a g e Technical Support For an authorized distributor near you check the Raw Thrills website at www rawthrills com Betson s Raw Thrills Technical Support Hotline Phone 1 800 753 2513 FAX 1 201 438 5...

Page 30: ......

Page 31: ...Marvel Contest of Champions 31 P a g e Electrical and Mechanical Illustrations...

Page 32: ...6 4 McMaster Carr 93711A500 Black Oxide 18 8 Stainless Steel Split Lock Washer for 1 4 Socket Head Screws 0 26 ID 0 363 OD 6 5 McMaster Carr 96075A231 Black Oxide Alloy Steel Tamper Resistant Torx Ro...

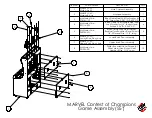
Page 33: ...Cabinet Assembly BOM on next page NOT SHOWN Selective Hardware 380 00005 01 USB NFC Card Reader Writer 500 00131 01 RGB LED Strip Reel 2X 70CM 42 LEDs installed in 24 2X 75CM 45 LEDs installed in 20 2...

Page 34: ...TEM NO PART NUMBER DESCRIPTION QTY 40 McMaster Carr 91102A750 Zinc Plated Steel Split Lock Washer for 1 4 Screw Size 0 26 ID 0 487 OD 4 41 McMaster Carr 91280A326 Medium Strength Class 8 8 Steel Hex H...

Page 35: ...90126A512 Zinc Plated Steel SAE Washer for Number 8 Screw Size 0 188 ID 0 438 OD 5 77 McMaster Carr 90675A009 Steel Locknut with External Tooth Lock Washer Zinc Plated 8 32 Thread Size 11 32 Wide 5 I...

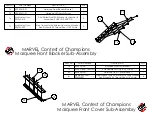
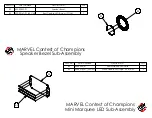
Page 36: ...hampions Speaker Bezel Sub Assembly ITEM NO PART NUMBER DESCRIPTION QTY 82 603 00853 01 Speaker Bezel 1 83 500 00167 01 45 CM Red Flexible LED Tape w FOAM 1 ITEM NO PART NUMBER DESCRIPTION QTY 84 600...

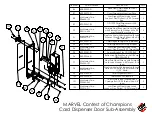
Page 37: ...mm Thread 4 92 600 02061 01 Card Dispenser Right Stop Bracket 1 93 600 02062 01 Card Dispenser Left Stop Bracket 1 94 McMaster Carr 90631A009 Low Strength Steel Nylon Insert Locknut Zinc Plated 8 32 T...

Page 38: ...CIAL legend 2 113 702 00083 01 LED Controlled Pushbutton Red 75 0033 W187 3 114 702 00080 01 LED Controlled Pushbutton Blue 75 0036 W187 3 115 Screw in Ring Nut included with IPBs 12 116 600 02072 01...

Page 39: ...131 500 00162 01 5 CM White Flexible LED Tape w FOAM 1 ITEM NO PART NUMBER DESCRIPTION QTY 132 600 02409 01 Joystick Plate 1 133 606 01653 01 P1 Joystick Plate Decal 1 134 800 00072 01 8 Way Ultimate...

Page 40: ...2A146 Steel Phillips Rounded Head Screws 6 32 Thread Size 3 8 Long 2 147 McMaster Carr 90675A195 Steel Locknut with External Tooth Lock Washer Zinc Plated 10 32 Thread Size 1 ITEM NO PART NUMBER DESCR...

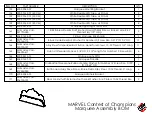
Page 41: ...156 157 158 155 159 160 161 162 163 164 165 166 167 166 168 163 169 170 163 171 163 164 MARVEL Contest of Champions Marquee Assembly BOM on next page...

Page 42: ...Backboard 1 163 McMaster Carr 97416A115 Black Oxide Steel SAE Washer for Number 10 Screw Size 0 219 ID 0 5 OD 19 164 McMaster Carr 96075A187 Alloy Steel Tamper Resistant Button Head Torx Screws 10 32...

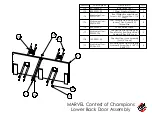
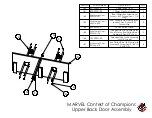
Page 43: ...d Screws 8 32 Thread Size 1 1 4 Long 8 175 McMaster Carr 90631A009 Low Strength Steel Nylon Insert Locknut Zinc Plated 8 32 Thread Size 8 176 600 00043 01 Lock Retainer Plate 1 177 McMaster Carr 90054...

Page 44: ...d Screws 8 32 Thread Size 1 1 4 Long 8 183 McMaster Carr 90631A009 Low Strength Steel Nylon Insert Locknut Zinc Plated 8 32 Thread Size 8 184 600 00043 01 Lock Retainer Plate 1 185 McMaster Carr 90054...

Page 45: ...17 18 19 20 21 22 23 24 25 26 27 28 29 30 31 32 33 34 35 36 37 38 39 40 55917 4010 40 51353 4000 1 39 38 37 36 35 34 33 32 31 30 29 28 27 26 25 24 23 22 21 20 19 18 17 16 15 14 13 12 11 10 9 8 7 6 5 4...

Page 46: ...GND LOW CARD SENSOR 500 00246 01 5VDC GND 2 3 4 5 6 7 8 9 10 11 1 12 39 01 2126 11 10 9 8 7 6 5 4 3 2 1 12 39 01 2120 2 GND 3 P2 CARD JAM 4 P2 CARD VEND OUTP 5 P2 CARD RESET OUTP 6 P2 CARD EMPTY 7 P2...

Page 47: ...LED STRIP 12VDC F4 1 MARQUEE TRANSLITE 2 39 01 3028 2 39 01 2026 1 CA 4797 LED STRIP 12VDC F4 1 MARQUEE TRANSLITE 2 39 01 3028 2 39 01 2026 1 CA 4797 LED STRIP CA 4797 LED STRIP CA 4797 LED STRIP 12V...

Reviews: