background image

Trawl Explorer | V5 | Servicing and Maintenance

5.

Click 

Download Depth Programmer

.

The XML file is downloaded in the 

Downloads

 folder.

6.

Connect the sensor to Mosa2.

7.

From Mosa2, click 

Menu 

 > 

Expert Mode

 and enter the password 

copernic

.

8.

From the tab 

General

, click 

Depth coefficients

.

9.

Click 

Browse

 and select the xml file you downloaded.Click 

Apply

.

The pressure coefficients are updated.

Replacing the Temperature Sensor

Before you begin

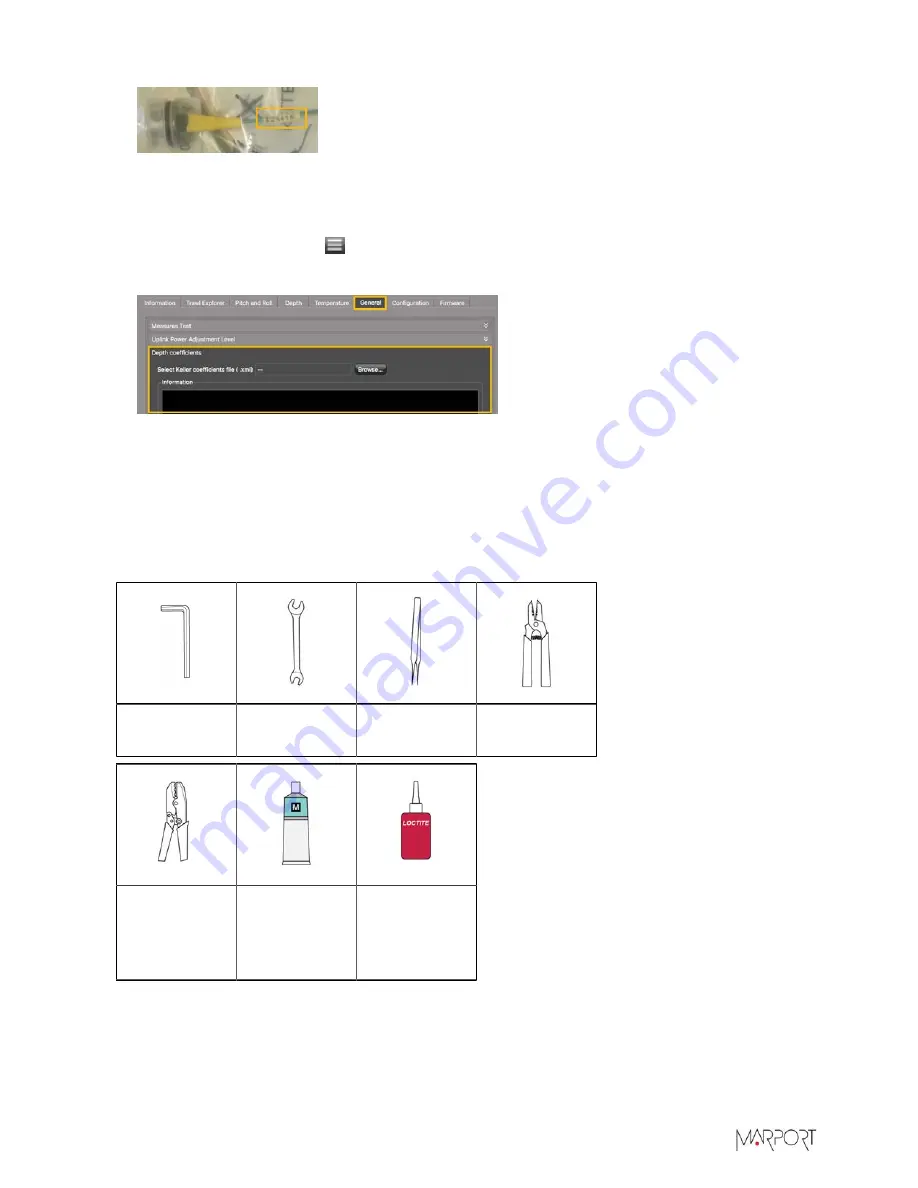
For this task you need the following tools:

Allen keys:

1.5 mm, 1/8"

22 mm

wrench

Tweezers

Wire stripper

Crimping tool

O-ring

lubricant

(Molykote 55

o-ring grease)

Loctite 425

About this task

Only qualified Marport technicians can do this task.

 | 

74

Summary of Contents for Trawl Explorer

Page 1: ...Trawl Explorer Service Manual...

Page 2: ......

Page 3: ...rength 21 About Time Variable Gain 22 Configuring Measurement Sending Sequence and True Mode 23 Configuring the Noise Floor 25 Changing the Transducer and End Cap Orientation 26 Changing the Transduce...

Page 4: ...g the Sensor 62 Maintenance Checklist 63 Replacing Parts 64 Removing and Putting Back the Housing 64 Replacing the Batteries 65 Replacing the Shoulder Bolts 68 Replacing the Pressure Sensor 70 Replaci...

Page 5: ...roved layout and pictures V3 07 06 18 New topic Troubleshooting Sensor cannot connect in wireless connection on page 80 Improved topic Interference Check on page 55 more information about Spectrum pag...

Page 6: ...gistered trademarks of Marport All other brands products and company names mentioned are the trademark and property of its respective owners only Marport is a division of Airmar Technology Corporation...

Page 7: ...and fish entering the net Also on the echogram the distance between the footrope and seabed to see if the gear touches the bottom Depth data Temperature data Pitch and roll data Distance from the sens...

Page 8: ...n and Presentation Applications This is an example of data received from a Trawl Explorer sensor and displayed in Scala Scala2 Trawl Explorer display from the trawl headrope 1 Sea bottom 3 Fish 2 Targ...

Page 9: ...side Never place the product in a hazardous and or flammable atmosphere Product installation and use Install and use this product in accordance with this user manual Incorrect use of the product may c...

Page 10: ...o 80 m V3 5 to 160 m Data update rate Depth 1 8 sec Temp Battery Height Pitch Roll every 6 sec Echogram update rate V1 up to 1 image second V2 V3 up to 3 images second Pitch angle 90 Roll angle V1 90...

Page 11: ...External View 1 Retainer screw 2 Model serial number 3 Metal strap 4 Transducer 5 Stabilizer board 6 Pressure sensor 7 Temperature sensor 8 Positive charge 9 Negative charge 10 Water switch 11 Should...

Page 12: ...Batteries 5 Sensors PCBA Connectors 1 Uplink C 2 Uplink LED 3 Down LED 4 Up LED 5 Pressure and temperature 6 Water switch 7 Up B 8 Down A 9 Battery The name of the sounding channel is labeled on its...

Page 13: ...Trawl Explorer V5 Introduction and Presentation On the transducer up and down sounders are written with the letters A down and B up On older sensors down sounder is marked by a circle 12...

Page 14: ...LED Charging Charger plug is connected Batteries are charging No light Running Sensor is in water or activated with jumper After an initialization phase echo sounder is operating Flashing red Configur...

Page 15: ...xplorer V5 Introduction and Presentation Installation Steps Click an installation step to jump directly to the corresponding section Note You can customize the display of data on Scala Scala2 at any t...

Page 16: ...efault aspx 2 Select Sensors Tools The list of available Mosa2 software versions is displayed The list begins with the latest versions 3 Click Download next to the version you want 4 Click the downloa...

Page 17: ...ivacy b Click the lock icon and enter the password if applicable c At Allow apps downloaded from select Anywhere then close the dialog box d If you are under macOS Sierra Anywhere option is not displa...

Page 18: ...sensor is not detected by Mosa2 the issue might come from the short range wireless connection of the computer 1 Close Mosa2 2 Click the short range wireless symbol in the top right corner of the menu...

Page 19: ...you can see if fish are missing the trawl and passing above the headline This way you can correct the trawl position Fewer pings are sent because they are distributed between the 2 directions As a res...

Page 20: ...there is a green check mark Procedure Click the tab Trawl Explorer Uplink Procedure From TE Uplink Frequency enter a frequency for the signal toward the vessel Important This parameter must be the sa...

Page 21: ...change to 20 m when the bottom is closer 20 m Make sure you only use Down 1 sounding mode Enter the height of the trawl opening It must be lower than 20 m This is to make sure the sensor will search...

Page 22: ...they do not transmit at the same time Important Frequency needs to be between 120 210 kHz Important Ping frequency is an important setting for the calibration of the sensor If you change ping frequenc...

Page 23: ...nal is too much attenuated echoes target strength received from a target might not be as strong as they should be TVG is here to compensate this effect It uses a lower gain level when signals travel t...

Page 24: ...t Mode and enter the password copernic 2 Click the tab Trawl Explorer 3 From Option True Mode select a sequence from True Mode Option Select Config1 default this is the more appropriate sequence for a...

Page 25: ...Trawl Explorer V5 Sensor Configuration 24...

Page 26: ...ed to Mosa2 About this task It is recommended to measure the noise floor in water Important Configure the noise floor before calibrating the sensor Procedure 1 From Mosa2 click Menu Expert Mode and en...

Page 27: ...orientation of the transducer and end cap of the sensor to correctly receive pitch and roll data Changing the Transducer Orientation Before you begin For this task you need the following tools Allen k...

Page 28: ...the retainers that are on the side of PCBA where all the cables are connected 2 Carefully disconnect the up B down A uplink C and uplink LED cable from the PCBA using needle nose pliers 2 Remove the...

Page 29: ...o the uplink LED connector 2 Connect the up B down A and uplink C cables and add silicone glue 3 Reconnect the batteries Tip If you have a doubt the cable types are written on them and their location...

Page 30: ...he picture 2 Ensure the slots for the screws in the end cap are facing those in the housing 3 Put back the end cap 1 Put back the end cap and screw with the 1 8 Allen key torque at 15 in lbs 2 N m 2 W...

Page 31: ...r to check the A1 board orientation It can be checked and configured using Mosa2 About this task The transducer yellow part can be installed in two different positions with a different angle of 90 Whe...

Page 32: ...iven target Before you begin Make sure you have correctly configured the sensor settings especially the noise floor level TVG mode ping length and ping frequency You can calibrate the sensor with or w...

Page 33: ...n this example it is 39 dB target strength value of a ping pong ball of 39 mm diameter 6 Check that the pitch and roll of the sensor is between 5 and 5 to be sure that the beam direction of the sensor...

Page 34: ...or is not correctly placed you may have an error message asking you to correct the pitch and or roll angle The sensor sends a series of 5 pings to calculate if the echo is consistent and constant A ne...

Page 35: ...er tank Then restart the calibration procedure Troubleshooting If the sensor LED do not seem to work correctly right after the calibration procedure it is normal calibrating influences LED display Act...

Page 36: ...in front of the Down or Up sounder The sensor is connected to Mosa2 About this task Ringing is an oscillation of the signal coming from the sensor transducer At shallow depth it can be confused with t...

Page 37: ...low the same curve b The 4th point can be placed at the point where the yellow and gray lines go under the noise floor green line Note Data below the red line will not appear on the echogram and data...

Page 38: ...ery Life 1000 32 Works for most conditions 60 75 hours Trawl Explorer 1800 58 Sensor is far from vessel e g more than 800 m depending on conditions high depth placed on codend High level of interferen...

Page 39: ...Copy to clipboard then press Cmd V on a word processor like Pages to paste the contents 6 Marport offices only To add the test on the DealerWeb a Click Copy to clipboard b From the DealerWeb click Sen...

Page 40: ...number is written on the end cap of the bottle or for some sensors on a plate on the housing The board ID is written on Mosa2 4 From the firmware section a In the first column select Narrow Band Traw...

Page 41: ...range TVG Before you begin You have finished configuring the sensor The sensor is connected to Mosa2 About this task The configuration file is a list displaying the firmware version the board ID and...

Page 42: ...right d From the part Configuration Readings right click in the text area next to Config Read and click Paste to add the text that you copied from Mosa2 e Click Save Config Read Exporting Sensor Conf...

Page 43: ...the contents 5 Change the name of the XML file saved on your computer Note When you export the sensor settings the XML file always has the same name Changing its name will prevent you from overwriting...

Page 44: ...NBTE V1 FIRM121 all all NBTE V2 FIRM126 03 01 23 or later all NBTE V3 FIRM128 04 02 28 or later 01 02 05 or later Adding the Sensor with a Configuration File You can add the sensor to the receiver wi...

Page 45: ...node from the list on the left Nodes in green are already used Note Nodes are numbered locations for the sensor on the trawl gear Refer to the picture of the trawl to know the location of the node We...

Page 46: ...add the sensor to the receiver with an xml configuration file exported from Mosa2 Procedure 1 From Scala Scala2 click Menu Expert Mode and enter the password copernic 2 Click menu again then Receivers...

Page 47: ...lay 8 Click Add Sensor The sensor is added to the receiver and displayed on the left side of the screen The configuration page is displayed Configuring the Sensor Settings Important Make sure the sett...

Page 48: ...tting at Synchro 1 4 Enter the same frequency as the one entered for the uplink frequency in Mosa2 Note The Trawl Explorer uses a 400 Hz bandwidth When configuring other sensors there needs to be a 20...

Page 49: ...in Scala Scala2 For V3 version of the sensor you can also display target strength data that help you identify fish About this task Trawl Explorer measurements are displayed in the control panels under...

Page 50: ...isplay 3 If using Down only mode and if the trawl opening configured for the sensor is under 20 meters the sounding range automatically changes to 20 meters if the distance to the bottom becomes lower...

Page 51: ...e Trawl Explorer name and select Display Target Strength b Hover the mouse over the echogram The target strength of the element where you place your mouse is displayed next to the Trawl Explorer name...

Page 52: ...Trawl Explorer V5 System Configuration and Display 6 Deactivate the Customize mode when you have finished customizing pages click Menu Customize again 51...

Page 53: ...on the headrope in order to see the trawl opening and fish entering the trawl You can also install it on the trawl tunnel to see fish going toward the codend Headrope To install the sensor on the hea...

Page 54: ...Buoys ensure that down looking transducer beam 5 is vertical for footrope 6 detection 5 The signal is oriented toward the vessel 7 We recommend you to use a netting bag placed on a suitable location...

Page 55: ...r V5 Installation Tunnel To install the sensor on the trawl tunnel install it on a location corresponding to nodes 7 8 or 9 on the image below The installation procedure is the same as the one for the...

Page 56: ...nterference 3 Pulses of the sensors PRP 4 Narrow band HDTE signals 5 Door sounder signals 6 Pause spectrum analyzer 7 Select hydrophone 8 Drag to adjust color scale 9 Reset the Max line 10 Marker disp...

Page 57: ...date the list 5 From the top left corner of the screen click Start Spectrum The graph at the bottom of the page shows three levels of noise in dBV 1 RealTime white level of noise recorded in real time...

Page 58: ...Reset Max to reset the dark blue line showing the maximum level of noise 10 To save data recorded by the spectrum in a txt file click Save FFT The FFT file lists for the entire bandwidth used by the h...

Page 59: ...se floor 3 Max dark blue shows the latest highest level of noise recorded It is useful to see on which frequencies are the sensors The acceptable average level of noise depends on the conditions dista...

Page 60: ...line showing the maximum level of noise 10 To check the maximum mean and real time measures of noise level at specific frequencies a Right click the FFT plot and click FFT Marker b Click and drag the...

Page 61: ...scharges and charge the battery whenever possible at any battery level Lithium ion batteries do not have a charge memory so they do not need full discharge cycles Procedure 1 Before charging the senso...

Page 62: ...when you switch off the charger or vessel s power supply If not the contact of the charger s pins with the shoulder bolts switches on the sensor that will run until discharged Results Once charged th...

Page 63: ...ater before you charge or store it Regularly check that the sensor is clean If not Remove any marine life with a piece of wood or screwdriver Wash away mud or debris with warm water CAUTION Do not use...

Page 64: ...that the sensor is clean See Cleaning the Sensor on page 62 for cleaning procedures After use Wash the sensor with fresh water Between uses When the sensor is not in use store in a dry area without hu...

Page 65: ...m wrench About this task Only qualified Marport technicians can do this task Procedure 1 Remove the housing 1 Remove the shackle holding the metal rod 2 Remove the metal rod blocking the bottle 3 Remo...

Page 66: ...n the side of the end cap 4 Put back the housing 1 Put the bottle inside the housing 2 Slide the metal rod to block the bottle 3 Put back the shackle on the rod Replacing the Batteries Before you begi...

Page 67: ...e Mini Trawl Explorer with stubby bottle 1 Connect the new batteries to the battery adaptor board 2 Place the two new batteries one battery for a mini in the internal housing The wires must exit from...

Page 68: ...Trawl Explorer V5 Servicing and Maintenance A End cap B Transducer 1 Main o ring 2 Backup o ring 67...

Page 69: ...ys open the bottle to remove the shoulder bolts from the inside Procedure 1 Remove the end cap 1 Disconnect and remove the batteries to get access to the back of the end cap 2 Remove the screws mainta...

Page 70: ...a flat head screwdriver while tightening the screws White wire water switch Black wire negative charge Red wire positive charge 5 Put back the end cap and reconnect the battery 1 Put back the end cap...

Page 71: ...eplacement kit containing Install tool Metal ring only if pressure relief spring Pressure sensor Small O ring Adapter ring Screw Pressure relief spring if applicable You also need the following tools...

Page 72: ...bles 1 red yellow green and 2 black 3 Remove the end cap Remove the screws maintaining the end cap with the 1 8 Allen key You have now access to the pressure sensor connections 4 Remove the old pressu...

Page 73: ...ents in the same order as on the picture 1 if no pressure relief spring there is no metal ring 3 Insert the install tool into the hole in the end cap and tighten with the flat screwdriver to set the p...

Page 74: ...B Transducer 1 Main o ring 2 Backup o ring 1 Replace the protective tape 2 Install 2 new main o rings and 2 backup o rings on the end cap and transducer as illustrated cross section Inspect and fully...

Page 75: ...he tab General click Depth coefficients 9 Click Browse and select the xml file you downloaded Click Apply The pressure coefficients are updated Replacing the Temperature Sensor Before you begin For th...

Page 76: ...the back of the end cap 2 Disconnect the pressure and temperature connector from the PCBA and remove the temperature sensor cables 2 black and 2 white 3 Remove the end cap Remove the screws maintaini...

Page 77: ...ure screw thread then tighten back into place the temperature sensor with the wrench torque at 60 in lbs 7 N m 5 Connect the white connector to the PCBA 6 Put back the end cap and reconnect components...

Page 78: ...icians can do this task Procedure 1 Disconnect components 1 Up cable on Down PCBA connector 2 Uplink 3 Uplink LED 1 Using a 1 5 mm Allen key remove the four screws holding the retainers that are on th...

Page 79: ...cle on the transducer must be on the same side as the slot for the PCBA For V1 versions the transducer is turned 90 to the right See Changing the Transducer and End Cap Orientation for more details 4...

Page 80: ...kup o ring 1 Replace the protective tape 2 Install 2 new main o rings and 2 backup o rings on the end cap and transducer as illustrated cross section Inspect and fully clean the o ring grooves 3 Check...

Page 81: ...t corner of the Security Privacy dialog box click the lock icon and enter your password if applicable 3 At Allow apps downloaded from select Anywhere 4 If the computer is under macOS Sierra Anywhere o...

Page 82: ...reasons the terminal window will not display anything when you type the password The terminal window displays Process completed when the script is completed Mosa2 is uninstalled from your computer an...

Page 83: ...ram displayed in Scala Scala2 is completely blue There is no yellow line moving on top of the echogram which means that no sonar data is received Sounder frequency may be outside the correct frequency...

Page 84: ...details FRANCE Marport France SAS 8 rue Maurice Le L on 56100 Lorient France supportfrance marport com ICELAND Marport EHF Fossaleyni 16 112 Reykjavik Iceland supporticeland marport com SPAIN Marport...

Page 85: ...you configure boat codes make sure to respect the correct interval between frequencies see table above Codes BC CH Frequency FID Scanmar C 1 CH1 42833 45 C 1 CH2 41548 32 C 1 CH3 41852 35 C 1 CH4 4081...

Page 86: ...CH2 41690 33 C 5 CH3 41285 30 C 5 CH4 41060 28 C 5 CH5 42900 46 C 5 CH6 43400 51 C 6 CH1 39062 3 C 6 CH2 39375 7 C 6 CH3 39688 11 C 6 CH4 40000 15 C 6 CH5 40312 19 C 6 CH6 40625 23 C 7 CH1 38906 1 C 7...

Page 87: ...BTE sensors e g Speed Explorer Trawl Explorer Catch Explorer Door Sounder Example If the frequency of the sensor is 40kHz there should be no sensors between 39 8 40kHz and 40 40 6kHz Figure 4 HDTE nar...

Page 88: ...allocations We recommend to allocate frequencies between 34 and 56 kHz for wideband hydrophones and between 41 kHz and 44 kHz for narrowband hydrophones Echosounders are usually placed around 38 kHz...

Page 89: ...xample of a system with Spread sensors with positioning Catch sensors Trawl Explorer and Catch Explorer Example of a system for purse seining with a Seine Explorer and depth Seine sensors Bandwidth Ma...

Page 90: ...Trawl Explorer V5 Appendix Appendix B Examples of Installations for a Target Strength Calibration Support for sensor Figure 6 Example of support Figure 7 Example of support 89...

Page 91: ...Trawl Explorer V5 Appendix Ping pong ball Figure 8 Fishing line passes through the ball and is fixed with glue Figure 9 Example of installation with counterweights 90...

Page 92: ...Trawl Explorer V5 Appendix 1 50 cm 2 1 m 3 Counterweight 91...

Page 93: ...rength 48 Wrong 81 End cap orientation 26 Examples of applications 7 Exporting configuration txt file 40 XML file 41 F FFT Export 56 Firmware Error message 80 Update 38 Frequency 19 Frequency bandwidt...

Page 94: ...es 65 Pressure sensor 70 Shoulder bolts 68 Temperature sensor 74 Transducer 76 Ringing cancellation 35 S Scala Adding sensor 45 Configuring sensor 45 Displaying in 48 Filters 46 Trawl gear location 45...

Reviews: