Please use this service manual with referring to the user guide ( D.F.U. ) without fail.
Service
Manual
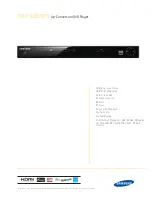
DVD Player
DV4001
DV4001 /
N1B/N1S/U1B
Part no. 90M20CW855010
First Issue 2006.09
MZ
TABLE OF CONTENTS
SECTION
PAGE
1. TECHNICAL SPEC
I FI CA TIONS ........................................................................................... 1
2. SERVICE HINTS AND TOOLS ............................................................................................. 5
3. WARNING AND LASER SAFETY IN STRUC TIONS ............................................................ 6
4. TAKING THE DISC OUT OF EMERGENCY ........................................................................ 7
5. UPDATE BACK END FIRM WARE PRO CE DURE ................................................................ 8
6. THE UPDATE DISC CREATION PROCEDURE .................................................................. 8
7. UPDATES RS-232C MICROPROCESSOR FIRMWARE PROCEDURE ............................. 9
8. SER
VICE MODE .................................................................................................................24
9. WIRING DIAGRAM
............................................................................................................. 25
10. BLOCK DIAGRAM .............................................................................................................. 27
11. SCHEMATIC DIAGRAM ..................................................................................................... 29
12. PARTS LOCATION ............................................................................................................. 45
13. EXPLODED VIEW AND PARTS LIST ................................................................................ 63
D
V
4
0
0
1
STANDBY
POWER
PAUSE
PLAY
OPEN/CLOSE
STOP
DVD PLAYER DV4001
ON/STANDBY
HDMI
AUDIO EX.
Summary of Contents for DV4001
Page 12: ...10 2 Click the Next 3 Check the I accept the terms in the license agreement and click the Next...
Page 22: ...20 8 Click the Auto Programming Auto Programming appears...
Page 24: ...22 10 Click the No 11 Click the Cancel...
Page 40: ...52 51 Sn Ag Cu Lead free Solder When soldering use the Lead free Solder Sn Ag Cu AV PWB A...
Page 41: ...53 54 Sn Ag Cu Lead free Solder When soldering use the Lead free Solder Sn Ag Cu AV PWB B...
Page 44: ...60 59 Sn Ag Cu Lead free Solder When soldering use the Lead free Solder Sn Ag Cu RS232 PWB A...
Page 45: ...61 62 Sn Ag Cu Lead free Solder When soldering use the Lead free Solder Sn Ag Cu RS232 PWB B...