Using Adobe Reader (Windows version)
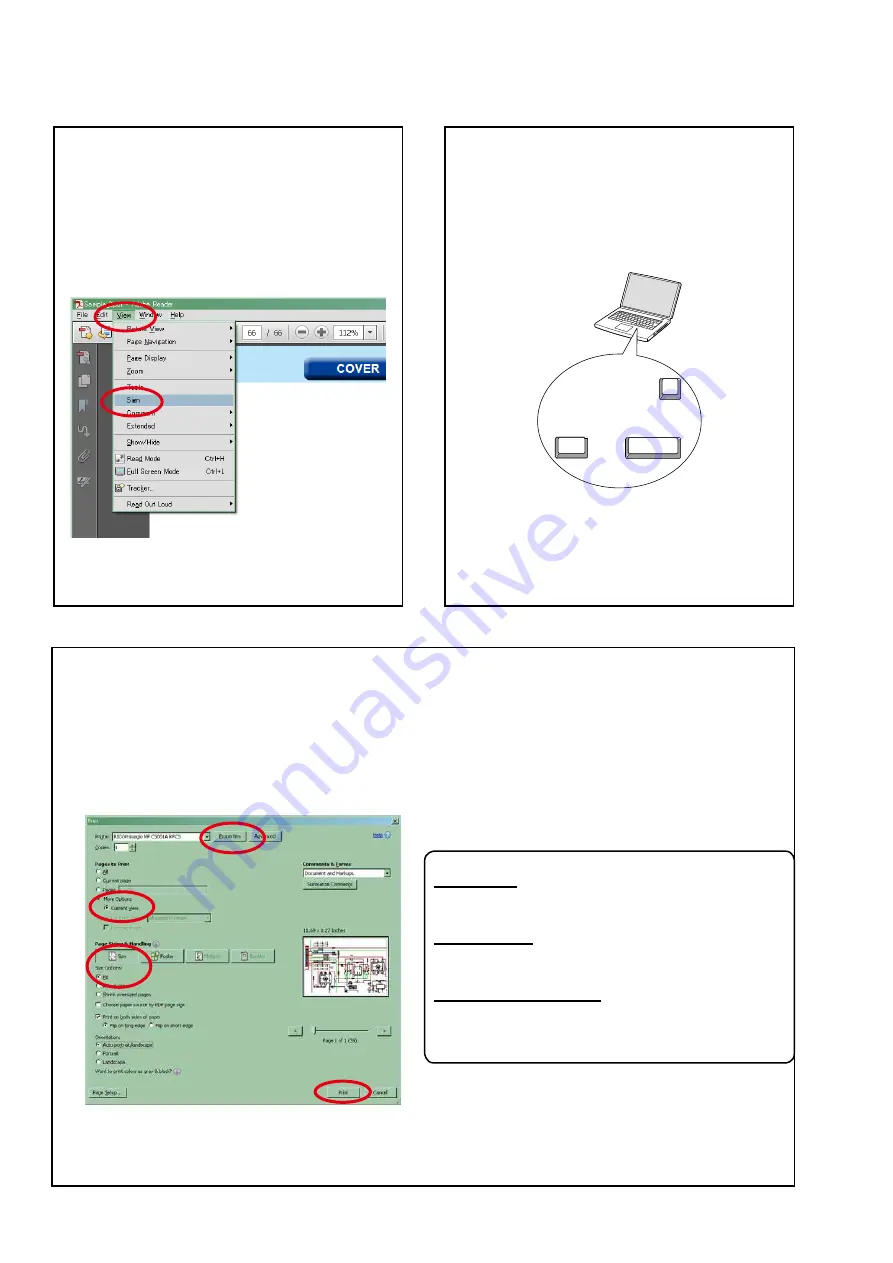
• Properties
Click this button and check that the printer is set to a
suitable paper size.
• Page to print
Select the following checkbox.
"
More Options
" : "
Current View
"
• Page Sizing & Handling
Select the following checkbox.
"
Size
" / "
Size Options
" : "
Fit
"
Add notes to this data (Sign)
TheSignfunctionletsyouaddnotestothedatain
this manual.
Savethefileonceyouhavefinishedaddingnotes.
[Example using Adobe Reader X]
On the
"View"
menu, click
"Sign"
.
• The Sign pane appears.
[Example using Adobe Reader 9]
On the
"Document"
menu, click
"Sign"
.
Magnify schematic / printed wiring
board diagrams - 1
(Ctrl+Space, mouse operation)
Press
Ctrl+Space
onthekeyboardanddragthe
mousetoselecttheareayouwanttoview.
• Theselectedareaismagnified.
• Whenyouwanttomovetheareashown,hold
down
Space
and drag the mouse.
• Whenyouwanttoshowafullpageview,press
Ctrl+0
onthekeyboard.
Ctrl
Space
0
Print a magnified part of the manual
ThePropertiesdialogboxandfunctionswillvarydependingonyourprinter.
1. Dragthemousetomagnifythepartyouwanttoprint.
2. On the
"File"
menu, click
"Print"
.
3. ConfigurethefollowingsettingsinthePrintdialogbox.
4. Click the
button to start printing.
4
Summary of Contents for CD5005
Page 36: ...3 2 DAC Input Signal Waveform MCLK BLK DATA LRCK W5 W6 W7 W8 36...
Page 40: ...Personal notes 40...
Page 41: ...CD5005 Block Diagram NJM2068D BLOCK DIAGRAM 41...
Page 42: ...POWER DIAGRAM 42...
Page 52: ...Personal notes Personal notes 52...
Page 56: ...TC94A92FG IC100 43 DCD 710AE TC94A92FG IC17 56...
Page 63: ...2 FL DISPLAY V F D FUTABA 16ST103GINK U4003 PIN CONNECTION 1 43 63...


