background image

5

ENGLISH (Original instructions)

IMPORTANT SAFETY 

INSTRUCTIONS

WARNING:

When using electric tools, basic safety precautions should 
always be followed to reduce the risk of fire, electric 
shock, and personal injury, including the following:
1. Read this instruction manual and the charger 

instruction manual carefully before use.

2. Clean only with dry cloth.
3. Do not block any ventilation opening. Install in 

accordance with the manufacturer’s instruction.

4. Do not install near any heat sources such as radiators, 

heat registers, stoves, or other apparatus (including 
amplifiers) that produce heat.

5. Only use attachments/accessories specified by the 

manufacturer.

6. Unplug this apparatus during lighting storms or when 

unused for long periods of time.

7. A battery operated radio with integral batteries or a 

separate battery pack must be recharged only with the 
specified charger for the battery. A charger that may 
be suitable for one type of battery may create a risk of 
fire when used with another battery.

8. Use battery operated radio only with specifically 

designated battery packs. Use of any other batteries 
may create a risk of fire.

9. When battery pack is not in use, keep it away from 

other metal objects like: paper clips, coins, keys, nails, 
screws, or other small metal objects that can make a 
connection from one terminal to another. Shorting the 
battery terminals together may cause sparks, burns, 
or a fire.

10. Avoid body contact with grounded surfaces such as 

pipes, radiators, ranges and refrigerators. There is an 
increased risk of electric shock if your body is 
grounded.

11. Under abusive conditions, liquid may be ejected from 

the battery; avoid contact. If contact accidentally 
occurs, flush with water. If liquid contacts eyes, 
additionally seek medical help. Liquid ejected from the 
battery may cause irritation or burns.

SAVE THESE INSTRUCTIONS.

 CAUTION: 

Only use genuine Makita lithium-ion 

batteries. Use of non-genuine Makita batteries, or 
batteries that have been altered, may result in the battery 
bursting causing fires, personal injury and damage.

SPECIFIC SAFETY RULES

FOR BATTERY CARTRIDGE

1. Before using battery cartridge, read all instructions 

and cautionary markings on (1) battery charger, (2) 
battery, and (3) product using battery.

2. Do not disassemble battery cartridge.
3. If operating time has become excessively shorter, stop 

operating immediately. It may result in a risk of 
overheating, possible burns and even an explosion.

4. If electrolyte gets into your eyes, rinse them out with 

clear water and seek medical attention right away. It 
may result in loss of your eyesight.

5. Do not short the battery cartridge:

(1)

Do not touch the terminals with any conductive 
material.

(2)

Avoid storing battery cartridge in a container with 
other metal objects such as nails, coins, etc.

(3)

Do not expose battery cartridge to water or rain. 
A battery short can cause a large current flow, 
overheating, possible burns and even a 
breakdown.

6. Do not store the tool and battery cartridge in locations 

where the temperature may reach or exceed 50°C 
(122°F).

7. Do not incinerate the battery cartridge even if it is 

severely damaged or is completely worn out. The 
battery cartridge can explode in a fire.

8. Be careful not to drop or strike battery. 
9. Do not use dropped or struck battery. (Do not use a 

damaged battery.)

For United States:

 Cautions to the user

The changes or modifications not expressly approved 
by the party responsible for compliance could void the 
user’s authority to operate the equipment.

RF exposure statements
IMPORTANT NOTE:

 To comply with the FCC RF 

exposure compliance requirements, the antenna(s) 
used for this transmitter must be installed to provide a 
separation distance of at least 20 cm from all persons 
and must not be co-located or operating in conjunction 
with any other antenna or transmitter. No change to the 
antenna or the device is permitted. Any change to the 
antenna or the device could result in the device 
exceeding the RF exposure requirements and void 
user’s authority to operate the device.

Note:

 This equipment has been tested and found to 

comply with the limits for a Class B digital device, 
pursuant to part 15 of the FCC Rules. These limits are 
designed to provide reasonable protection against 
harmful interference in a residential installation. This 
equipment generates, uses and can radiate radio 
frequency energy and, if not installed and used in 
accordance with the instructions, may cause harmful 
interference to radio communications. However, there 
is no guarantee that interference will not occur in a 
particular installation. If this equipment does cause 
harmful interference to radio or television reception, 
which can be determined by turning the equipment off 
and on, the user is encouraged to try to correct the 
interference by one or more of the following measures:
• Reorient or relocate the receiving antenna.
• Increase the separation between the equipment and 

receiver.

• Connect the equipment into an outlet on a circuit 

different from that to which the receiver is 
connected.

• Consult the dealer or an experienced radio/TV 

technician for help.

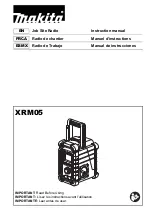
Summary of Contents for XRM05

Page 1: ...truction manual FRCA Radio de chantier Manuel d instructions ESMX Radio de Trabajo Manual de instrucciones XRM05 IMPORTANT Read Before Using IMPORTANT Lisez les instructions avant l utilisation IMPORTANTE Leer antes de usar ...

Page 2: ...2 1 PM 2 3 1 5 9 21 23 24 22 4 6 7 8 10 12 14 13 20 11 L K J A B C D E I H G F ...

Page 3: ...3 2 3 4 5 6 7 11 14 15 15 15 15 16 17 18 19 17 18 19 19 19 ...

Page 4: ...4 8 9 10 11 25 26 10 10 8 9 ...

Page 5: ...electrolyte gets into your eyes rinse them out with clear water and seek medical attention right away It may result in loss of your eyesight 5 Do not short the battery cartridge 1 Do not touch the terminals with any conductive material 2 Avoid storing battery cartridge in a container with other metal objects such as nails coins etc 3 Do not expose battery cartridge to water or rain A battery short...

Page 6: ...tor E Low battery indicator F Preset stations G Sleep and Snooze status H Frequency I Stereo symbol and Volume J Clock K Time set L PM for clock Battery installation Note Keeping back up batteries inside the compartment prevent stored data in preset memories from being lost Back up battery installation 1 Pull out the battery compartment locker to release battery compartment There are main battery ...

Page 7: ...lay are all the signs that the main battery pack needs to replace Note The battery pack can t be charged via the supplied AC power adaptor When low battery sign appears and an E keeps on flashing is the time to replace the back up batteries Indicating the remaining battery capacity Fig 8 Only for battery cartridges with B at the end of the model number Press the check button on the battery cartrid...

Page 8: ...lume control knob will change the frequency in the following increment FM 50 or 100 kHz AM MW 9 or 10 kHz Note If the radio is in volume control status press in the tuning volume control to become Tuning status 4 Keep on rotating the Tuning Volume control knob until the required frequency shown on the display 5 Rotate the Tuning Volume control knob to get required sound level 6 To turn off the rad...

Page 9: ...e snooze symbol and the alarm symbol The snooze function can be repeatedly during one hour that the alarms are active Sleep function The sleep timer will automatically switch off the radio after a preset time has elapsed 1 Press and continue to hold down the Power button for more than 2 seconds followed by a beep tone the display will cycle through the available sleep times in the order 60 45 30 1...

Page 10: ...ttery cartridge kg lbs Without battery 4 0 8 9 BL0715 4 1 9 1 BL7010 BL1014 4 2 9 3 BL1016 BL1021B BL1415 4 3 9 5 BL1415N BL1041B 4 4 9 7 BL1815 BL1815N BL1820 BL1820B BL1430 4 5 10 0 BL1430B BL1440 BL1450 BL1460B BL1830 4 6 10 2 BL1830B BL1840 BL1840B BL1850 BL1850B BL1860B ...

Page 11: ...lectrique 11 Dans des conditions d utilisation inadéquates de la batterie il peut y avoir fuite d électrolyte En cas de contact accidentel rincez avec beaucoup d eau Si du liquide entre en contact avec les yeux consultez un médecin Le liquide qui gicle de la batterie peut provoquer des irritations ou des brûlures CONSERVEZ CE MODE D EMPLOI ATTENTION Utilisez uniquement des batteries au lithium ion...

Page 12: ...t des batteries de secours et insérer 2 batteries UM 3 dimension AA Vérifier que les batteries sont installées en respectant Pour les États Unis Attention à l intention de l utilisateur Tout changement ou modification non expressément approuvés par la partie responsable de la conformité peut entraîner l annulation du droit de l utilisateur à utiliser cet appareil Énoncé sur l exposition aux RF NOT...

Page 13: ...appuyer sur les boutons situés des deux côtés de la batterie Installation ou retrait de la batterie pod Fig 6 et 7 Retirer la barre de soutien pour pouvoir insérer entièrement la batterie Pour insérer la batterie aligner sa languette sur la rainure qui se trouve à l intérieur du carter puis glisser la batterie pour la mettre en place Relâcher la barre de soutien Pour retirer la batterie retirer la...

Page 14: ...Volume pour sélectionner la minute 7 Appuyer de nouveau sur le bouton pour terminer le réglage de l heure Utilisation de la radio Cette radio est équipée de trois méthodes de recherche recherche automatique recherche manuelle et stations présélectionnées Recherche automatique 1 Appuyer sur le bouton de mise en marche pour activer la radio 2 Sélectionner la bande de fréquence en appuyant sur le bou...

Page 15: ...mbole de l alarme radio clignote 3 Pendant que le symbole de l alarme radio clignote appuyer sur le bouton pendant plus de 2 secondes suivi d un bip 4 L heure à l écran clignote tourner le bouton de commande Réglage Volume pour sélectionner l heure puis appuyer de nouveau sur le bouton pour confirmer l heure choisie 5 Procéder de la même façon que pour l heure pour régler les minutes Appuyer sur l...

Page 16: ...st possible de l améliorer en appuyant sur le bouton Mono pendant 2 secondes Le son n est plus en stéréo et l indicateur Stéréo disparaît Comment faire jouer d autres appareils audio ATTENTION Débrancher cet appareil avant d y raccorder d autres appareils audio Il y a 2 prises d entrée AUX La prise AUX 1 se trouve sur le panneau avant et la prise AUX 2 dans le compartiment des batteries Raccorder ...

Page 17: ...e 4 0 8 9 BL0715 4 1 9 1 BL7010 BL1014 4 2 9 3 BL1016 BL1021B BL1415 4 3 9 5 BL1415N BL1041B 4 4 9 7 BL1815 BL1815N BL1820 BL1820B BL1430 4 5 10 0 BL1430B BL1440 BL1450 BL1460B BL1830 4 6 10 2 BL1830B BL1840 BL1840B BL1850 BL1850B BL1860B ...

Page 18: ...iciones abusivas se fugue líquido de la batería evite tocarlo Si lo toca accidentalmente enjuague con agua Si hay contacto del líquido con los ojos acuda por atención médica Puede que el líquido expulsado de la batería cause irritación o quemaduras CONSERVE ESTAS INSTRUCCIONES PRECAUCIÓN Use solamente baterías de iones de litio originales de Makita El uso de baterías no originales de Makita o de b...

Page 19: ...ía para liberarlo Se cuenta con un compartimento para paquete de baterías principal así como un compartimento para pilas de respaldo Fig 2 y 3 Para Estados Unidos Precauciones para el usuario Los cambios o modificaciones que no hayan sido expresamente autorizados por la entidad responsable por el cumplimiento de las regulaciones podrían anular la autoridad del usuario de utilizar este equipo Decla...

Page 20: ...enta mientras desliza el botón sobre la parte delantera del cartucho o presione los botones en ambos lados del cartucho Instalación o desinstalación del cartucho del paquete de baterías Fig 6 y 7 Jale la barra de apoyo para permitir la inserción de la batería al terminal Para insertar el cartucho de batería alinee la lengüeta sobre el cartucho de batería con la ranura en la carcasa y deslice en su...

Page 21: ...n para ajustar a el minuto requerido 7 Presione el botón de nuevo para completar el ajuste de la hora Operación de la radio Esta radio cuenta con tres métodos de sintonización sintonía por exploración sintonía manual y memoria de sintonía preajustada Sintonía por exploración 1 Presione el botón de encendido de la radio para encenderla 2 Seleccione la banda de frecuencia requerida al presionar el b...

Page 22: ...radio la radio se encenderá y reproducirá la estación de radio elegida en la hora establecida de la alarma La alarma de radio continuará sonando durante una hora salvo que sea apagada mediante el botón de encendido Al presionar el botón de encendido mientras la alarma se encuentra sonando cancelará su funcionamiento por un periodo de 24 horas Nota Cuando la radio se encuentre en estado de batería ...

Page 23: ...uido de la emisión de un pitido y la pantalla mostrará los intervalos de apagado automático en el orden 60 45 30 15 120 90 60 Suelte el botón de encendido cuando el tiempo deseado de apagado automático se muestre en pantalla El símbolo se mostrará en la pantalla y la radio permanecerá encendida en la última estación seleccionada 2 Para cancelar la función de apagado automático presione el botón de...

Page 24: ... 3 8 Peso Cartucho de batería kg lbs sin batería 4 0 8 9 BL0715 4 1 9 1 BL7010 BL1014 4 2 9 3 BL1016 BL1021B BL1415 4 3 9 5 BL1415N BL1041B 4 4 9 7 BL1815 BL1815N BL1820 BL1820B BL1430 4 5 10 0 BL1430B BL1440 BL1450 BL1460B BL1830 4 6 10 2 BL1830B BL1840 BL1840B BL1850 BL1850B BL1860B ALA Makita Corporation 3 11 8 Sumiyoshi cho Anjo Aichi 446 8502 Japan XRM05 DMR107 NA3 1610 www makita com ...

Page 25: ...iende su signifi cado antes de usarla Fast Charger Chargeur rapide Cargador rápido Ready to charge Prêt à recharger Preparación para la carga Charging En charge Cargando Charging complete Recharge terminée Completada la carga Delay charge Battery cooling or too cold battery Charge différée Batterie en cours de refroidissement ou batterie trop froide Retraso de la carga La batería se está enfriando...

Page 26: ...atteries Ne jamais court circuiter les bornes d une batterie No provoque un cortocircuito en las baterías IMPORTANT Read Before Using IMPORTANT Lire ce qui suit avant d utiliser cet outil IMPORTANTE Leer antes de usar ...

Page 27: ...not play with the battery charger 15 Do not charge battery cartridge when room temperature is BELOW 10 C 50 F or ABOVE 40 C 104 F When the battery temperature is under 0 C 32 F charging may not start 16 Do not attempt to use a step up transformer an engine generator or DC power receptacle 17 Do not allow anything to cover or clog the charger vents Charging 1 Plug the battery charger into the prope...

Page 28: ... to enable the battery to prove its own performance Sound of cooling air comes out during cooling which means no trouble on the charger Yellow light will flash for warning in the following cases Trouble on cooling fan Incomplete cool down of battery such as being clogged with dust The battery can be charged in spite of the yellow warning light But the charging time will be longer than usual in thi...

Page 29: ...ter tout danger 12 Évitez d utiliser ou démonter le chargeur après qu il ait reçu un choc violent ait été échappé ou ait subi quelque dommage que ce soit Portez le chez un réparateur qualifié Une utilisation ou un remontage maladroit peut entraîner un risque de choc électrique ou d incendie 13 Ce chargeur ne doit pas être utilisé sans supervision par les jeunes enfants et par les personnes handica...

Page 30: ...ature de la batterie est supérieure à environ 70 C deux témoins de charge peuvent clignoter en rouge tandis qu à une température d environ 50 C à 70 C un seul témoin clignote en rouge Si le témoin de charge clignote alternativement en vert et en rouge la charge n est pas possible Les bornes du chargeur ou de la batterie sont alors bloquées par la poussière ou bien la batterie est soit usée soit en...

Page 31: ... charge d entretien Tension 9 6 V 12 V 14 4 V Capacité Ah Temps de charge en minutes Nombre de cellules 8 10 12 Cartouche de batterie au Ni MH 1 7 20 BH9020A 2 0 20 BH1220 C BH1420 2 0 15 2 7 20 BH9033A 3 3 30 BH1233 C BH1433 3 3 22 Tension 14 4 V 18 V 14 4 V 18 V Temps de charge en minutes Nombre de cellules 4 5 8 10 Cartouche de batterie au Li ion BL1415 BL1815 15 BL1430 BL1830 22 ...

Page 32: ...a dañado de cualquier otra forma llévelo a un técnico cualificado para que se lo arregle Una utilización o montaje de sus piezas incorrecto podrá acarrear un riesgo de descarga eléctrica o incendio 13 El cargador de baterías no ha sido pensado para ser utilizado por niños pequeños ni personas frágiles sin supervisión 14 Los niños pequeños deberán ser supervisados para asegurarse de que no juegan c...

Page 33: ...tería alcance el grado al cual es posible cargar Si la temperatura de la batería es de más de aproxima damente 70 C podrán parpadear dos luces de carga en color rojo y si es de aproximadamente 50 C 70 C podrá parpadear una luz de carga en rojo Si la luz de carga parpadea alternativamente en color verde y rojo la batería no se podrá cargar Los terminales del cargador o de la batería estarán obstrui...

Page 34: ... de mantenimiento Tensión 9 6 V cc 12 V cc 14 4 V cc Capacidad Ah Tiempo de carga minutos Número de celdas 8 10 12 Cartucho de batería Ni MH 1 7 Ah 20 min BH9020A 2 0 Ah 20 min BH1220 C BH1420 2 0 Ah 15 min 2 7 Ah 20 min BH9033A 3 3 Ah 30 min BH1233 C BH1433 3 3 Ah 22 min Tensión 14 4 V cc 18 V cc 14 4 V cc 18 V cc Tiempo de carga minutos Número de celdas 4 5 8 10 Cartucho de batería Li ion BL1415...

Page 35: ...11 ...

Page 36: ...Makita Corporation 3 11 8 Sumiyoshi cho Anjo Aichi 446 8502 Japan www makita com 884676H946 IDE ...

Page 37: ...D Flashlight Instruction manual F Lampe Torche LED Manuel d instructions LS Linterna LED Inalámbrica Manual de instrucciones DML807 IMPORTANT Read Before Using IMPORTANT Lire avant usage IMPORTANTE Lea antes de usar ...

Page 38: ...2 1 2 3 4 1 2 3 4 5 6 7 8 ...

Page 39: ...ep it away from other metal objects like paper clips coins keys nails screws or other small metal objects that can make a connection from one terminal to another Shorting the battery terminals together may cause sparks burns or a fire 7 After charging or before attempting any maintenance or cleaning unplug the charger from the power source 1 Battery 2 Battery release button 3 Red indicator 4 Switc...

Page 40: ...y and fire 8 If operating time has become excessively shorter stop operating immediately It may result in a risk of overheating possible burns and even an explosion 9 Do not use a damaged battery 10 Charge the battery cartridge before completely discharged Always stop luminaire operation and charge the battery cartridge when you notice less luminaire power 11 Never recharge a fully charged battery...

Page 41: ...st by any possibility The luminaire may not supply power to some USB devices Wait for 10 seconds before charging another device consecutively When not using or after charging remove the USB cable and close the cover MAINTENANCE To maintain product safety and reliability repairs and maintenance should be carried out by a Makita Authorized Service Center CAUTION Never use gasoline benzine thinner al...

Page 42: ...ie à une température ambiante variant de 10 C à 40 C 50 F à 104 F Si la batterie est chaude laissez la refroidir avant de la recharger 6 Lorsque la batterie n est pas utilisée tenez la à distance des objets métalliques tels que trombones pièces de monnaie clés clous vis ou autres petits 1 Batterie 2 Bouton de dégagement de la batterie 3 Indicateur rouge 4 Interrupteur 5 DEL principale 20 unités 6 ...

Page 43: ... Ne démontez ni le chargeur ni la batterie apportez les chez un réparateur agréé lorsqu ils ont besoin d entretien ou d une réparation Un remontage incorrect peut entraîner une décharge électrique ou un incendie 7 N utilisez le luminaire qu avec ses batteries spécifiques D autres batteries risqueraient de vous blesser ou de provoquer un incendie 8 Cessez immédiatement l utilisation si le temps de ...

Page 44: ...re avec la batterie sauvegardez toujours les données du dispositif USB Autrement les données pourraient être perdues de façon permanente Le luminaire n est pas adapté à tous les dispositifs USB Attendez 10 secondes avant de passer au chargement d un autre dispositif Lorsqu il n est pas utilisé ou après le chargement retirez le câble USB et fermez le couvercle MAINTENANCE Pour assurer le fonctionne...

Page 45: ...como un generador motor o un receptáculo de corriente continua CC 5 Recargue el cartucho de batería a temperatura ambiente a 10 C 40 C 50 F 104 F Deje que un cartucho de batería caliente se enfríe antes de recargarlo 1 Batería 2 Botón de liberación de la batería 3 Indicador rojo 4 Interruptor 5 LED principal 20 piezas 6 LED secundario 1 pieza 7 Gancho de metal 8 Puerto USB de alimentación eléctric...

Page 46: ...gares donde la temperatura pueda alcanzar o exceder los 50 C 122 F 3 Evite los impactos a la linterna por dejarla caer golpeándola etc 4 No exponga la luz de manera continua a los ojos Esto podría lastimarlos 5 No cubra ni obstruya la linterna encendida con trapos cartones etc Cubrirla u obstruirla puede encender en fuego 6 No desarme el cargador ni el cartucho de batería acuda a un técnico de ser...

Page 47: ...uerto de alimentación eléctrica del portabatería Luego conecte el otro extremo del cable al dispositivo El puerto USB de alimentación eléctrica con la batería suministra CC5V 2 1A NOTA Antes de conectar un dispositivo USB a la linterna con la batería prepare siempre una copia de respaldo de la información de su dispositivo USB De lo contrario puede que por alguna posibilidad su información se pier...

Page 48: ...ALA Makita Corporation 3 11 8 Sumiyoshi cho Anjo Aichi 446 8502 Japan DML807 NA3 0815 www makita com ...

Page 49: ...GB L E D Flashlight Instruction manual F Lampe Torche à L E D Manuel d instructions LS Linterna Luminiscente Manual de instrucciones DML802 ...

Page 50: ...2 1 2 3 4 5 2 3 1 4 5 6 5 6 ...

Page 51: ...rtridge in a container with other metal objects such as nails coins etc 3 Do not expose battery cartridge to water or rain A battery short can cause a large current flow overheating possible burns and even a breakdown 10 If electrolyte gets into your eyes rinse them out with clear water and seek medical attention right away It may result in loss of your eyesight 11 Be careful not to drop or strike...

Page 52: ...y CAUTION Always install the battery cartridge fully until the red indicator cannot be seen If not it may accidentally fall out of the tool causing injury to you or someone around you Do not install the battery cartridge forcibly If the cartridge does not slide in easily it is not being inserted correctly Lighting up the LED light Fig 2 CAUTION Do not look in the LED light or see the source of lig...

Page 53: ...l rincez avec beaucoup d eau Si du liquide entre en contact avec les yeux consultez un médecin Le liquide qui gicle de la batterie peut provoquer des irritations ou des brûlures 9 Ne court circuitez pas la batterie 1 Ne touchez pas les bornes avec un matériau conducteur 2 Évitez de ranger la batterie dans un conteneur avec tout objet métallique tel que des clous des pièces de monnaie etc 3 N expos...

Page 54: ...lic Si vous pouvez voir le témoin rouge situé sur le dessus du bouton la batterie n est pas complètement verrouillée ATTENTION Installez toujours la batterie à fond jusqu à ce que vous ne puissiez plus voir le témoin rouge Dans le cas contraire elle pourrait tomber de l outil et entraîner des blessures Ne forcez pas sur la batterie pour l installer Si la batterie ne glisse pas facilement c est qu ...

Page 55: ...diciones abusivas podrá escapar líquido de la batería evite tocarlo Si lo toca accidentalmente enjuague con agua Si hay contacto del líquido con los ojos acuda por atención médica Puede que el líquido expulsado de la batería cause irritación o quemaduras 9 No cierre el circuito entre las terminales del cartucho de batería 1 No toque las terminales con ningún material conductor 2 Evite guardar el c...

Page 56: ...e que resulte en que el cartucho resbale de sus manos y se dañe la herramienta y la batería así como ocasionar lesiones personales Para quitar el cartucho de batería deslícelo de la herramienta mientras desliza el botón sobre la parte delantera del cartucho Para colocar el cartucho de batería alinee la lengüeta sobre el cartucho de batería con la ranura en la carcasa y deslice en su lugar Inserte ...

Page 57: ...accesorio o aditamento puede conllevar el riesgo de lesiones personales Los accesorios o aditamentos deben solamente ser utilizados para el propósito con el que fueron hechos Batería y cargador originales de Makita NOTA Algunos de los artículos mencionados en éste manual pueden ser incluidos o no junto con el paquete de la herramienta Puede que estos accesorios varíen de país a país ...

Page 58: ...10 ...

Page 59: ...11 ...

Page 60: ...ALA Makita Corporation 3 11 8 Sumiyoshi cho Anjo Aichi 446 8502 Japan DML802 NA3 1113 www makita com ...

Reviews: