background image


INSTRUCTION MANUAL


MANUEL D'INSTRUCTION


MANUAL DE INSTRUCCIONES


IMPORTANT: 

Read Before Using. 

IMPORTANT: 

Lire avant usage. 

IMPORTANTE: 

Leer antes de usar. 

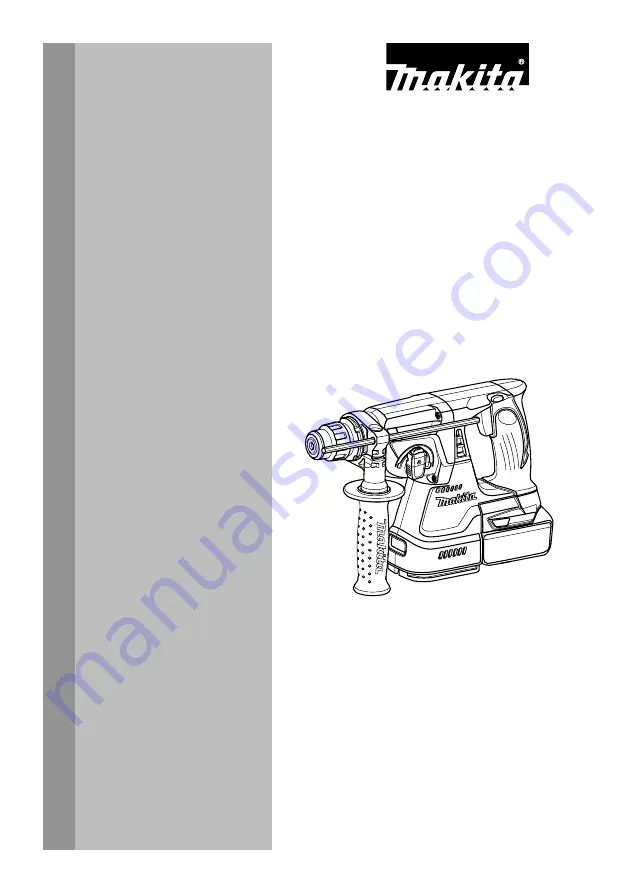
Cordless Combination Hammer

Marteau Combiné sans Fil 

Martillo Rotativo Combinado 

Inalámbrico 

XRH01 
XRH02 
   

012621 

Summary of Contents for XRH01

Page 1: ...INSTRUCTION MANUAL DE INSTRUCCIONES IMPORTANT Read Before Using IMPORTANT Lire avant usage IMPORTANTE Leer antes de usar Cordless Combination Hammer Marteau Combiné sans Fil Martillo Rotativo Combinado Inalámbrico XRH01 XRH02 012621 ...

Page 2: ...lugs with earthed grounded power tools Unmodified plugs and matching outlets will reduce risk of electric shock 5 Avoid body contact with earthed or grounded surfaces such as pipes radiators ranges and refrigerators There is an increased risk of electric shock if your body is earthed or grounded 6 Do not expose power tools to rain or wet conditions Water entering a power tool will increase the ris...

Page 3: ...o account the working conditions and the work to be performed Use of the power tool for operations different from those intended could result in a hazardous situation Battery tool use and care 24 Recharge only with the charger specified by the manufacturer A charger that is suitable for one type of battery pack may create a risk of fire when used with another battery pack 25 Use power tools only w...

Page 4: ...rkings on 1 battery charger 2 battery and 3 product using battery 2 Do not disassemble battery cartridge 3 If operating time has become excessively shorter stop operating immediately It may result in a risk of overheating possible burns and even an explosion 4 If electrolyte gets into your eyes rinse them out with clear water and seek medical attention right away It may result in loss of your eyes...

Page 5: ...protection system Lithium ion battery with star marking 1 012128 Lithium ion batteries with a star marking are equipped with a protection system This system automatically cuts off power to the tool to extend battery life The tool will automatically stop during operation if the tool and or battery are placed under one of the following conditions Overloaded The tool is operated in a manner that caus...

Page 6: ...rn in the direction of the arrow until the change cover line moves from the symbol to the symbol Pull forcefully in the direction of the arrow Attaching the quick change drill chuck 1 2 3 4 012689 Check the line of the quick change drill chuck shows the symbol Grasp the change cover of the quick change drill chuck and set the line to the symbol Place the quick change drill chuck on the spindle of ...

Page 7: ...ctuates switch off the tool immediately This will help prevent premature wear of the tool Hole saws cannot be used with this tool They tend to pinch or catch easily in the hole This will cause the torque limiter to actuate too frequently ASSEMBLY CAUTION Always be sure that the tool is switched off and the battery cartridge is removed before carrying out any work on the tool Side grip auxiliary ha...

Page 8: ... 2 3 4 012626 The depth gauge is convenient for drilling holes of uniform depth Loosen the side grip and insert the depth gauge into the hole in the side grip Adjust the depth gauge to the desired depth and tighten the side grip NOTE The depth gauge cannot be used at the position where the depth gauge strikes against the gear housing Dust cup 1 012636 Use the dust cup to prevent dust from falling ...

Page 9: ...ry 1 002449 After drilling the hole use the blow out bulb to clean the dust out of the hole Chipping Scaling Demolition 012686 Set the action mode changing knob to the symbol Hold the tool firmly with both hands Turn the tool on and apply slight pressure on the tool so that the tool will not bounce around uncontrolled Pressing very hard on the tool will not increase the efficiency Drilling in wood...

Page 10: ...in a vise or similar hold down device MAINTENANCE CAUTION Always be sure that the tool is switched off and the battery cartridge is removed before attempting to perform inspection or maintenance Never use gasoline benzine thinner alcohol or the like Discoloration deformation or cracks may result To maintain product SAFETY and RELIABILITY repairs carbon brush inspection and replacement any other ma...

Page 11: ...GES FROM THE SALE OR USE OF THE PRODUCT THIS DISCLAIMER APPLIES BOTH DURING AND AFTER THE TERM OF THIS WARRANTY MAKITA DISCLAIMS LIABILITY FOR ANY IMPLIED WARRANTIES INCLUDING IMPLIED WARRANTIES OF MERCHANTABILITY AND FITNESS FOR A SPECIFIC PURPOSE AFTER THE ONE YEAR TERM OF THIS WARRANTY This Warranty gives you specific legal rights and you may also have other rights which vary from state to stat...

Page 12: ...rieux ne s approche pendant que vous utilisez un outil électrique Vous risquez de perdre la maîtrise de l outil si votre attention est détournée Sécurité en matière d électricité 4 Les fiches d outil électrique sont conçues pour s adapter parfaitement aux prises de courant Ne modifiez jamais la fiche de quelque façon que ce soit N utilisez aucun adaptateur de fiche sur les outils électriques avec ...

Page 13: ...oc piles de l outil électrique avant d effectuer tout réglage de changer un accessoire ou de ranger l outil électrique De telles mesures préventives réduisent les risques de démarrage accidentel de l outil électrique 20 Après l utilisation d un outil électrique rangez le hors de portée des enfants et ne laissez aucune personne l utiliser si elle n est pas familiarisée avec l outil électrique ou le...

Page 14: ... pendant une longue période faites le réchauffer pendant quelques minutes en le faisant fonctionner à vide Cela réchauffera le lubrifiant Sans un réchauffement adéquat le martelage s effectue difficilement 8 Adoptez toujours une position de travail vous assurant d un bon équilibre Assurez vous qu il n y a personne plus bas lorsque vous utilisez l outil en position élevée 9 Tenez l outil fermement ...

Page 15: ...service de la batterie 3 Rechargez la batterie à une température ambiante comprise entre 10 ゚ C et 40 ゚ C 50 ゚ F 104 ゚ F Si la batterie est chaude laissez la refroidir avant de la recharger 4 Rechargez la batterie tous les six mois si l appareil n est pas utilisé pendant de longues périodes DESCRIPTION DU FONCTIONNEMENT ATTENTION Assurez vous toujours que l outil est hors tension et que sa batteri...

Page 16: ...r relâchez la gâchette Frein électrique Cet outil est équipé d un frein électrique Si à plusieurs reprises l outil ne s arrête pas rapidement après le relâchement de la gâchette faites le réparer dans un centre de service après vente Makita Inverseur 1 A B 012628 L outil possède un inverseur qui permet de changer le sens de rotation Enfoncez le levier inverseur du côté A pour une rotation dans le ...

Page 17: ...tilisez une pointe à béton un ciseau à froid un ciseau à écailler etc ATTENTION Ne tournez pas le bouton de changement de mode pendant que l outil tourne Cela endommagerait l outil Pour éviter toute usure prématurée du mécanisme de changement de mode veillez à ce que le bouton de changement de mode soit toujours bien réglé sur l un des trois modes Lorsque vous passez du symbole de mode à le bouton...

Page 18: ...possible d enfoncer le foret retirez le Tirez vers le bas le couvercle du mandrin à quelques reprises Réinsérez ensuite le foret Tournez le foret puis enfoncez le jusqu à ce qu il soit engagé Après l installation vérifiez toujours que le foret est solidement fixé en essayant de le sortir Pour retirer le foret tirez le couvercle du mandrin à fond vers le bas puis dégagez le foret 1 2 012625 Orienta...

Page 19: ...é par des copeaux ou des particules Au contraire laissez le moteur tourner au ralenti puis retirez en partie le foret du trou Si vous répétez cette opération plusieurs fois de suite le trou se débouchera et vous pourrez reprendre le perçage normalement ATTENTION Une force énorme s exerce sur le foret et l outil lorsque le foret émerge sur la face opposée lorsque le trou est encombré de copeaux ou ...

Page 20: ...glez le bouton de changement de mode sur le symbole Vous pouvez percer des trous d un diamètre allant jusqu à 13 mm dans le métal et jusqu à 32 mm dans le bois ATTENTION N utilisez jamais la rotation avec martelage lorsque le mandrin à adaptateur rapide est posé sur l outil Vous risqueriez d endommager le mandrin à adaptateur rapide De plus le mandrin se détacherait lors de l inversion de l outil ...

Page 21: ... Ils peuvent varier suivant les pays GARANTIE LIMITÉE D UN AN MAKITA Politique de garantie Chaque outil Makita est inspecté rigoureusement et testé avant sa sortie d usine Nous garantissons qu il sera exempt de défaut de fabrication et de vice de matériau pour une période d UN AN à partir de la date de son achat initial Si un problème quelconque devait survenir au cours de cette période d un an ve...

Page 22: ... Las herramientas eléctricas crean chispas que pueden prender fuego al polvo o los humos 3 Mantenga a los niños y curiosos alejados mientras utiliza una herramienta eléctrica Las distracciones le pueden hacer perder el control Seguridad eléctrica 4 Las clavijas de conexión de las herramientas eléctricas deberán encajar perfectamente en la toma de corriente No modifique nunca la clavija de conexión...

Page 23: ...zada 19 Desconecte la clavija de la fuente de energía y o la batería de la herramienta eléctrica antes de realizar ajustes cambiar accesorios o guardar las herramientas eléctricas Dichas medidas de seguridad preventivas reducen el riesgo de que la herramienta se inicie accidentalmente 20 Guarde la herramienta eléctrica que no use fuera del alcance de los niños y no permita que las personas que no ...

Page 24: ...tar la herramienta durante un rato haciéndola funcionar sin carga Esto agilizará la lubricación Sin un calentamiento apropiado la operación de percusión resultará difícil de realizar 8 Asegúrese siempre de que pisa sobre suelo firme Asegúrese de que no haya nadie debajo cuando utilice la herramienta en lugares altos 9 Sujete la herramienta firmemente con ambas manos 10 Mantenga las manos alejadas ...

Page 25: ...tucho de batería a temperatura ambiente de 10 ゚ C 40 ゚ C 50 ゚ F 104 ゚ F Si un cartucho de batería está caliente déjelo enfriar antes de cargarlo 4 Recargue el cartucho de la batería una vez cada seis meses si no se va a usar por un periodo extenso DESCRIPCIÓN DEL FUNCIONAMIENTO PRECAUCIÓN Asegúrese siempre de que la herramienta esté apagada y el cartucho de batería extraído antes de realizar cualq...

Page 26: ...ue vuelve a la posición OFF apagado cuando lo suelta Para poner en marcha la herramienta simplemente apriete el gatillo interruptor La velocidad de la herramienta aumenta incrementando la presión en el gatillo Suelte el gatillo interruptor para parar Freno eléctrico Esta herramienta está equipada con un freno eléctrico Si la herramienta dejase de parar enseguida repetidamente después de soltar el ...

Page 27: ...Si desea demoler cortar o tallar gire la perilla que cambia el modo de acción al símbolo Utilice un cincel de punta cincel plano formón etc PRECAUCIÓN No gire la perilla que cambia el modo de acción cuando la herramienta está en ejecución ya que puede dañarse Para evitar el desgaste rápido del mecanismo de cambio modo asegúrese de que la perilla que cambia el modo de accionamento se encuentre siem...

Page 28: ... del cincel broca y aplíquele grasa antes de instalarlo 1 2 001296 Inserte la broca o el cincel en la herramienta Girelo y presiónelo hacia dentro hasta que quede encajado 2 1 012624 Si la broca no puede ser empujada hacia dentro extráigala Tire de la cubierta del mandril hacia abajo unas cuantas veces Después vuelva a insertar la broca Gire la broca y presiónela hacia dentro hasta que quede encaj...

Page 29: ...uerce la herramienta Con una presión menor obtiene mejores resultados Mantenga la herramienta en la posición adecuada y evite que se resbale del orificio No haga más presión cuando el orificio esté obstruido con partículas o virutas Por el contrario accione la herramienta en vacío y luego retire la broca parcialmente del orificio Si repite esta acción varias veces el orificio se limpiará y se rean...

Page 30: ...pido para SDS plus que se ha mencionado anteriormente 1 2 3 012720 Sostenga el mandril por la base y gire el anillo de ajuste en dirección contraria a las manecillas del reloj para abrir las mordazas Coloque la broca en el mandril tan a fondo como sea posible Sostenga la base firmemente y gire el anillo en dirección de las agujas del reloj para apretar el madril Para desinstalar la broca sostenga ...

Page 31: ...bón y cualquier otro mantenimiento o ajuste deberán ser realizados en Centros o Servicios de fábrica Autorizados por Makita empleando siempre piezas de repuesto de Makita ACCESORIOS OPCIONALES PRECAUCIÓN Estos accesorios o aditamentos incluidos o no están recomendados para utilizar con su herramienta Makita especificada en este manual El empleo de cualesquiera otros accesorios o acoplamientos conl...

Page 32: ...VENTA O USO DEL PRODUCTO ESTA RENUNCIA SERÁ APLICABLE TANTO DURANTE COMO DESPUÉS DEL TÉRMINO DE ESTA GARANTÍA MAKITA RENUNCIA LA RESPONSABILIDAD POR CUALQUIER GARANTÍA IMPLÍCITA INCLUYENDO GARANTÍAS IMPLÍCITAS DE COMERCIALIDAD E IDONEIDAD PARA UN FIN ESPECÍFICO DESPUÉS DEL TÉRMINO DE UN AÑO DE ESTA GARANTÍA Esta garantía le concede a usted derechos legales específicos y usted podrá tener también o...

Page 33: ...33 ...

Page 34: ...34 ...

Page 35: ...35 ...

Page 36: ...polvos creados por el lijado aserrado esmerilado taladrado y otras actividades de la construcción contienen sustancias químicas reconocidas por el Estado de California como causantes de cáncer defectos de nacimiento y otros peligros de reproducción Algunos ejemplos de estos productos químicos son plomo de pinturas a base de plomo sílice cristalino de ladrillos y cemento y otros productos de albañi...

Reviews: