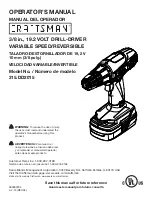
background image

INSTRUCTION MANUAL


Cordless Driver Drill

XFD01 

011360 

Summary of Contents for XFD01

Page 1: ...INSTRUCTION MANUAL Cordless Driver Drill XFD01 011360 ...

Page 2: ...ded power tools Unmodified plugs and matching outlets will reduce risk of electric shock 5 Avoid body contact with earthed or grounded surfaces such as pipes radiators ranges and refrigerators There is an increased risk of electric shock if your body is earthed or grounded 6 Do not expose power tools to rain or wet conditions Water entering a power tool will increase the risk of electric shock 7 D...

Page 3: ...ing into account the working conditions and the work to be performed Use of the power tool for operations different from those intended could result in a hazardous situation Battery tool use and care 24 Recharge only with the charger specified by the manufacturer A charger that is suitable for one type of battery pack may create a risk of fire when used with another battery pack 25 Use power tools...

Page 4: ...osion 4 If electrolyte gets into your eyes rinse them out with clear water and seek medical attention right away It may result in loss of your eyesight 5 Do not short the battery cartridge 1 Do not touch the terminals with any conductive material 2 Avoid storing battery cartridge in a container with other metal objects such as nails coins etc 3 Do not expose battery cartridge to water or rain A ba...

Page 5: ...is caused by the activation of protection system and does not show the tool trouble When the tool is overloaded At this time release the switch trigger and remove causes of overload and then pull the switch trigger again to restart When battery cells get hot If any operation of the switch trigger the motor will remain stopped At this time stop use of the tool and cool or charge the battery cartrid...

Page 6: ...n slide the speed change lever to the 2 side for high speed or 1 side for low speed Be sure that the speed change lever is set to the correct position before operation Use the right speed for your job Adjusting the fastening torque 1 2 3 011365 The fastening torque can be adjusted in 17 steps by turning the adjusting ring so that its graduations are aligned with the pointer on the tool body The fa...

Page 7: ...ssure to the tool Start the tool slowly and then increase the speed gradually Release the switch trigger as soon as the clutch cuts in CAUTION Make sure that the driver bit is inserted straight in the screw head or the screw and or bit may be damaged NOTE When driving wood screws predrill pilot holes to make driving easier and to prevent splitting of the workpiece See the chart 4 2 4 4 11 64 11 64...

Page 8: ...eep the carbon brushes clean and free to slip in the holders Both carbon brushes should be replaced at the same time Use only identical carbon brushes Use a screwdriver to remove two screws then remove the rear cover 1 2 011370 Raise the arm part of the spring and then place it in the recessed part of the housing with a slotted bit screwdriver of slender shaft or the like 1 2 3 011371 Use pliers t...

Page 9: ...use accessory or attachment for its stated purpose If you need any assistance for more details regarding these accessories ask your local Makita Service Center Drill bits Screw bits Bit holder Hook Various type of Makita genuine batteries and chargers Automatic refreshing adapter Plastic carrying case NOTE Some items in the list may be included in the tool package as standard accessories They may ...

Reviews: