


8
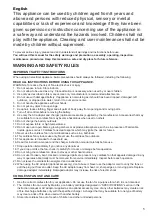
Symbols
The following are symbols used for the equipment. Be sure that you understand their meaning before use.
Read instruction manual.
Only for EU countries.
Do not dispose of electric equipment or battery pack together with household waste material!
In observance of the European Directives, on Waste Electric and Electronic Equipment and Batteries
and Accumulators and Waste Batteries and Accumulators and their implementation in accordance
with national laws, electric equipment and batteries and battery pack(s) that have reached the end of
their life must be collected separately and returned to an environmentally compatible recycling facility.
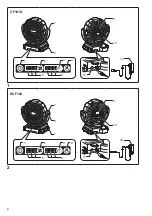
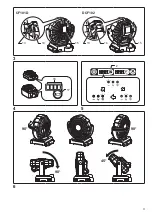
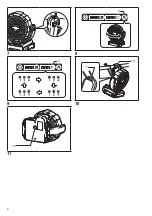
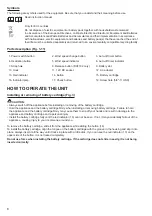
Parts description (Fig. 1-11)
1. Power switch button
2. Wind speed change button
3. Auto-off timer button
4. Oscillation button
5. Wind speed indicator
6. Auto-off timer indicator
7. Strap hole
8. Release button (DCF102 only)
9. Battery slot
10. Hook
11. 12V DC socket
12. AC adapter
13. Red indicator
14. Button
15. Battery cartridge
16. Indicator lamp
17. Check button
18. Screw hole (5/8″-11 UNC)
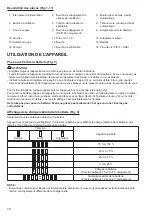
HOW TO OPERATE THE UNIT
Installing or removing of battery cartridge (Fig. 3)
CAUTION:
•
Always switch off the appliance before installing or removing of the battery cartridge.
•
Hold the appliance and the battery cartridge firmly when installing or removing battery cartridge. Failure to hold
the appliance and the battery cartridge firmly may cause them to slip off your hands and result in damage to the
appliance and battery cartridge and a personal injury.
•
Install the battery cartridge fully until the red indicator (13) can not be seen. If not, it may accidentally fall out of the
appliance, causing injury to you or someone around you.
To remove the battery cartridge, slide it from the appliance while sliding the button (14).
To install the battery cartridge, align the tongue on the battery cartridge with the groove in the housing and slip it into
place. Always insert it all the way until it locks in place with a little click. If you can see the red indicator (13) on the
upper side of the button, it is not locked completely.
Do not use force when installing the battery cartridge. If the cartridge does not slide in easily, it is not being
inserted correctly.