


CALIBRATION PG. 5
LAST UPDATE 06.07.19
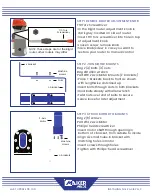
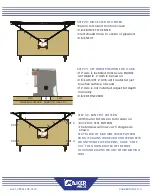
STEP 11: SCREEN 6: PICK CHAIN FEED
ARRANGEMENT
• If using default frame, Click CHAIN OFF
BOTTOM
SKIP- if you’ve done this before
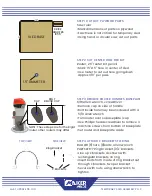
STEP 12: SCREEN 7- REVIEW THE
MEASUREMENTS
•
For future reference- jot down numbers,
screenshot, or take a picture
• If numbers look off, click back button to
go back and redo steps related to any
numbers that look off
• If numbers look good, click LOOKS GOOD
SOME BALLPARK PARAMETERS FOR NUMBERS:
Distance btwn motors
= <3048 MM if using 10’
top beam, <3568 MM for 12’ top beam
Vertical motor offset
= # entered in Step 3
Kinematic type
= Triangular
Chain feed type
= Bottom
Rotation radius
= 140 mm
Chain sag correction value
= varies
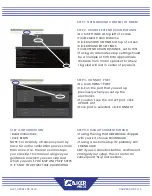
STEP 13: SCREEN 8- GENERATE CALIBRATION
PROCEDURE
• The machine is doing all the work here,
• Take a deep breath, relax for a minute
DON’T SKIP
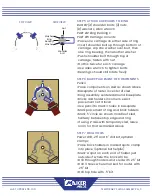
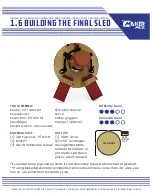
STEP 14: SCREEN 9- SET SPROCKETS VERTICAL
• Same procedure as Step 4
• This time it may work to hit AUTOMATIC
• If it doesn’t work, don’t panic
•
Re-adjust sprockets with buttons as before
• When sprockets are in place, click SET ZERO
SKIP only if chains are attached to sled
because you skipped other steps
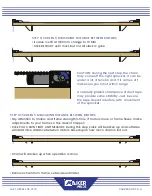
STEP 15: SCREEN 10- ENTER ROTATIONAL
RADIUS ESTIMATE
• Use numbers given on screen
• Click ENTER MEASUREMENT and enter
appropriate value for your kit
• Click NEXT
SKIP- if you’ve done this before
STEP 16: SCREEN 11- ADJUST CHAIN LENGTHS
• Place left chain on left sprocket as shown
• Click ADJUST LEFT CHAIN while holding on
to left chain to prevent wrapping
• Left sprocket will turn counter-clockwise
and extend chain to a determined length
• Repeat with right chain
SKIP only if chains are attached to sled
because you skipped other steps
NEXT YOU’LL ATTACH THE SLED TO THE CHAINS, LEAVE CHAINS EXACTLY WHERE THEY ARE
DO NOT CHANGE THEIR POSITION ON THE SPROCKETS!