background image

MAINTENANCE AND LUBRICATION 181

TURBOCHARGER

The engine turbocharger operates at very high speed, temperatures and
pressure. Turbo bearing lubrication is critical, particularly for a newly installed
turbo or one which has not been operated for a period of time and all oil has
drained from the bearing and shaft surfaces. To avoid turbocharger bearing
failure, the following instructions are recommended:

• Start the engine at least every 30 days to ensure turbo bearing lubrication.
Operate engine at low idle for at least three minutes before increasing RPM
or driving the vehicle.

• If the engine has not been run for more than 30 days, turbo pre-lube
procedure is necessary:

1. Remove turbo air intake duct and oil line connection at turbo.

2. Fill oil inlet fitting to overflow with clean engine oil.

3. Using fingers at compressor wheel, carefully spin and wiggle the turbo
shaft to distribute the oil over all bearing surfaces.

4. Reconnect air intake duct and again fill turbo oil port to overflow, connect oil
line and start engine.

5. Operate engine at low idle for at least three minutes before increasing
RPM or driving the vehicle.

Summary of Contents for TerraPro LEU 2010

Page 1: ...Mack LEU Series 21394654 21394654 21394654 April 2010 Mack Trucks Inc 2010 Printed in U S A Mack TerraProTM Series LEU Series Mack TerraProTM Series LEU Series...

Page 2: ......

Page 3: ...and Mack Trucks Inc should be informed immediately if you believe that the vehicle has a defect that could cause a crash injury or death Contact NHTSA by calling the Auto Safety Hotline at 1 888 327 4...

Page 4: ...EMISSION CONTROL SYSTEMS WARRANTY CALIFORNIA 14 Emissions Control System Warranty 16 SERVICE LITERATURE 20 MACK Class 8 Components Service Manual 20 MACK Class 8 Custom Collated Service Manual on CD 2...

Page 5: ...70 Combination Starter and Electrical Switch 70 MISCELLANEOUS CONTROLS 71 Dome Light 71 Air Horn 71 Fresh Air Vent 72 Accessory Power Outlets 72 PRE TRIP INSPECTION AND DAILY MAINTENANCE 73 PRE TRIP 7...

Page 6: ...20 On Slippery Road Surfaces 122 BRAKE OPERATION 124 Air Brake System 124 Automatic Slack Adjusters 125 Parking Brake System 125 Parking Brake Operation 126 Parking 126 Anti Lock Brake System ABS 127...

Page 7: ...Warnings and On Board Diagnostics OBD 172 On Board Diagnostics OBD 172 Instrument Cluster 173 Malfunction Indicator Lamp MIL 174 Aftertreatment DEF Tank Level Driver Warning Inducement 175 Aftertreatm...

Page 8: ...m 195 Protecting the Cooling System 196 Cooling System Maintenance 197 Accessory Drive Belt Routing 198 HEADLIGHTS 199 Bulb Replacement 199 WHEELS 199 Wheel Inspection 199 Tires 200 BATTERY 203 Jump S...

Page 9: ......

Page 10: ...n unsafe practice that could result in serious personal injury or death A danger advisory banner is in white type on a black background with a black border WARNING Warning indicates an unsafe practice...

Page 11: ......

Page 12: ...ons may differ from one model to another While every effort has been made to cover all current arrangements do not hesitate to consult your MACK distributor if a question arises Honest personal servic...

Page 13: ...ily operation of this vehicle Please read it thoroughly pay particular attention to advisory labels that have been included to draw attention to important issues of operator safety and overall perform...

Page 14: ...Max portion of V MAC monitors and stores a variety of information i e maintenance schedules overspeed logs fault tables trip summaries For a complete description of the V MAC IV system refer to the ap...

Page 15: ...tions The Vehicle Identification Number VIN is displayed in two locations a frame rail stamping and a label The 17 digit VIN must be identical in both locations The VIN frame stamping is located on th...

Page 16: ...INTRODUCTION 5 Engine Identification On the MACK MP engines the engine serial number is stamped on the left side of the engine block below the inlet manifold C0028943...

Page 17: ...information engine model serial number etc advertised horsepower at rated speed emissions regulations to which the engine conforms and inlet and exhaust valve lash settings Examples of the 49 state EP...

Page 18: ...at which the engine can idle at speeds above low idle 550 700 rpm At speeds above low idle and without a PTO engaged idle time will be limited to five minutes after which the engine will revert back...

Page 19: ...late is located on the rear right side of the main case near the lower end C0029555 The MACK carrier assembly serial number is located on the front right side of the housing C0028950 The Eaton Spicer...

Page 20: ...er and the top of the rear carrier C0028952 The MERITOR rear axle identification tag is located on the left or right rear of the rear axle housing next to the carrier C0028953 The MERITOR carrier asse...

Page 21: ...built to conform to all applicable federal motor vehicle safety standards in effect at the time of manufacture Tractor air systems are designed for operation as a tractor only and truck air systems a...

Page 22: ...hat such part s were returned to Mack Trucks Inc or its nearest authorized Dealer within a reasonable period of time Qualifications and Limitations Note Not covered by the Emissions Control Systems Wa...

Page 23: ...oid Engine Turbocharger Compressor Bypass Actuator Heat Mode Engine Turbocharger Compressor Bypass Actuator Solenoid Engine Exhaust Gas Temperature EGT Sensor Aftertreatment DPF Intake Temperature Sen...

Page 24: ...g from Turbocharger to Aftertreatment System 21 Data Link Connector DLC ENGINE GASEOUS EMISSIONS CONTROL SYSTEM WARRANTY The emission warranty for the diesel particulate filter DPF and SCR System cove...

Page 25: ...gines following its sale and delivery to the ultimate purchaser or 4 Any person who operates a fleet of motor vehicles following its sale and delivery to the ultimate purchaser Note For specifics of t...

Page 26: ...emissions regulations applicable at the time of manufacture of the engine and to be free from defects in material and workmanship under normal use and service up to 60 months or 100 000 miles or 3 000...

Page 27: ...t Manifold 11 Crankcase Breather 12 Crankcase Separator 13 Crankcase Tubing and Hoses before Separator 14 Aftertreatment Wiring Harness 15 After treatment Control Module ACM 16 Aftertreatment Diesel P...

Page 28: ...R Differential Pressure Ambient Air Temperature AAT 18 SCR Aftertreatment Selective Catalytic Reduction SCR Catalyst Aftertreatment Diesel Exhaust Fluid DEF Pump Aftertreatment DEF Dosing Absolute Pre...

Page 29: ...2 In an Emergency In an emergency where an authorized MACK facility is not available repairs may be performed at any available service establishment or by the owner using any replacement part within...

Page 30: ...he Emission Control Systems Warranty Malfunctions caused by misuse improper adjustments modification alteration tampering disconnection improper or inadequate maintenance and use of improper diesel fu...

Page 31: ...ce Manual This multi binder set contains service information covering all MACK components i e engines transmissions front and rear axles cabs fuel systems electrical systems Note If your vehicle conta...

Page 32: ...ou plan ahead to keep your operation running efficiently by scheduling routine maintenance and lubrication service or by locating the nearest MACK dealership Questions and Complaints Your satisfaction...

Page 33: ...6 0165 Australia Mack Trucks Australia Pty Ltd CNR Archerfield and Boundary Roads Mail P O Box 364 Richlands QLD 4077 Australia TEL 61 7 3853 3333 FAX 61 7 3853 3392 International 7900 National Servic...

Page 34: ...s and mileage of repair s Dealer that sold and or serviced the vehicle Description of unresolved service complaint or inquiry Summary of action taken to date by the dealer and the regional service of...

Page 35: ...ration 400 Seventh Street S W Washington DC 20590 You can also obtain other information about motor vehicle safety from the Vehicle Safety Hotline Canada Canadian customers who wish to report a safety...

Page 36: ...s The EDR on your MACK vehicle records vehicle speed engine rpm time and date plus a variety of pedal and switch positions both before and after an event Sudden vehicle deceleration or the occurrence...

Page 37: ...t fumes could leak into the cab area and death can result On a regular basis inspect the exhaust system for leaks and repair any leakage DANGER Driver attitude is the most important part of any effect...

Page 38: ...nd and use brushes and squeegees mounted on extension poles When better access is necessary for instance when washing the cab roof use sturdy ladders held in place by someone on the ground WARNING Sec...

Page 39: ...he driver side door In compliance with NHTSA regulations your Mack vehicle has a safety certification label affixed in one of the NHTSA locations listed above This label may be either an Incomplete Ve...

Page 40: ...by the body manufacturer is affixed in the same general location This label provides information pertaining to Gross Vehicle Weight Rating GVWR Gross Axle Weight Rating GAWR tire and rim information...

Page 41: ...jury or equipment damage The labels shown are applicable to the Mack TerraPro LEU model chassis at the time of publication and are representative of what can be typically found on a Mack TerraPro LEU...

Page 42: ...SAFETY INFORMATION 31 C0029557...

Page 43: ...32 SAFETY INFORMATION C0029558...

Page 44: ...SAFETY INFORMATION 33 C0029559...

Page 45: ...34 SAFETY INFORMATION Labels Found on Driver Side Sun Visor C0029560...

Page 46: ...SAFETY INFORMATION 35 Labels Found on Cowl Near Ashtray C0029561...

Page 47: ...36 SAFETY INFORMATION Labels Found on Instrument Panel C0029017 C0029562...

Page 48: ...SAFETY INFORMATION 37 Eaton Controlled Traction Differential Label C0029020 Labels Found on Fuel Tank C0029021...

Page 49: ...38 SAFETY INFORMATION Back Up Alarm Optional Your chassis may be equipped with an optional back up alarm If so the following label will appear inside the cab C0029022 C0029563...

Page 50: ...d be cleaned off to prevent slipping During cold wet conditions when ice slush or snow may accumulate on the cab doorstep and other external surfaces extra caution must be observed when entering or ex...

Page 51: ...emphasizing a safe method for hand foot placement and movement during cab entry exit Your vehicle may not look exactly like the one pictured Note The arrows in the illustrations are intended to show...

Page 52: ...steering wheel then raise your other foot to the cab floor See figure 2 3 Move hand 2 from the outside handhold to the steering wheel See figure 3 4 Bring the other foot inside the cab and sit down Se...

Page 53: ...42 SAFETY INFORMATION C0029564...

Page 54: ...her hand on the steering wheel Do not use the folding door as a handhold Raise one foot to the cab floor See figure 1 2 While still gripping the handhold and the steering wheel move the other foot int...

Page 55: ...el of blades Install new refills for any blades that are cracked brittle torn or coated with road oil along the wiping edge Windshield Washers Check operation of windshield washer Inspect system hoses...

Page 56: ...der these conditions it may be necessary to drill holes to penetrate the hollow core This allows entrapped air to escape thereby easing the opening closing of cab door s Be sure to keep the key locks...

Page 57: ...ecommended to prevent snow from clogging the air horn bell maintaining maximum sound output C0029133 Fire Extinguisher Optional Your vehicle may be equipped with a fire extinguisher which is located i...

Page 58: ...INSTRUMENTS AND CONTROLS 47 CAB INTERIOR LEFT C0029566 1 Turn Signal Hazard Switch and HI LO Beam 3 Foot Pedals 2 Instrument Panels...

Page 59: ...48 INSTRUMENTS AND CONTROLS CAB INTERIOR RIGHT C0029567 1 Instrument Panels 3 Foot Pedals 2 Work Brake 4 Turn Signal Hazard Switch and HI LO Beam...

Page 60: ...ns on the following pages Colors To promote visual recognition internationally specific colors for tell tales have been established Unless governmental regulations in the area where the vehicle is to...

Page 61: ...asy reach The instrument panel as shown in the following drawing is broken down into several main sections For easy identification we refer to them from left to right as Panels A B C D E and F where n...

Page 62: ...INSTRUMENTS AND CONTROLS 51 INSTRUMENT PANEL GAUGE LAYOUT W3056176...

Page 63: ...8 DEF Gauge Fuel Gauge 2 Tachometer 9 Air Pressure Gauge 3 Oil Pressure Gauge 10 Parking Brake Valve 4 Warning Indicator Lamp Panel 11 Transmission Oil Temperature Gauge 5 Speedometer Odometer 12 Vol...

Page 64: ...o Mirror Switch If Equipped 20 Automatic Traction Control Switch Heavy Mud Snow 30 Heated Mirror Switch If Equipped 21 Cab Climate Control Panel 31 Resume Set Switch 22 Power Take Off Control Switch I...

Page 65: ...emperature must NOT exceed 107 C 225 F 2 Tachometer Indicates engine speed in revolutions per minute RPM Tachometer readings should be used as a guide for shifting as well as to prevent engine damage...

Page 66: ...ngine be shut down i e low water level low oil pressure or high water temperature If the engine shutdown feature is enabled the operator has about 15 seconds after the light goes on to pull to the sid...

Page 67: ...s an ABS malfunction Also illuminates momentarily as a bulb check when the ignition is turned on If the light turns on and stays on a malfunction is indicated If the light does not turn on when the ig...

Page 68: ...in a inhibit position and a regeneration will not occur Forced Neutral Indicator Illuminates when PTO is engaged and the truck is not moving Fuel Filter Restriction If Equipped Air Filter Restriction...

Page 69: ...dicates that the transmission is in Reverse Optional Tell Tales Low Air Pressure Warning Indicator Indicates low air pressure in the air brake system s This feature may also come with a buzzer Parking...

Page 70: ...Icon Illuminates when the inhibit switch is turned on It will allow the driver to know that the switch is in a inhibit position and a regeneration will not occur Forced Neutral Indicator Illuminates w...

Page 71: ...ufficiently within two to three minutes If the temperature does not drop to operating range the condition must be investigated and corrected before continuing operation 12 Voltmeter Indicates the surf...

Page 72: ...ed as a guide for certain engine or PTO maintenance operations 15 CB Radio Auxiliary Hookup 16 DPF Smart Switch If Equipped This is a three position switch where the middle position is neutral C002959...

Page 73: ...with the DPF Smart Switch in the locked DOWN position the vehicle speed will decrease down to 16 kph 10 mph below the current speed until the driver releases the switch back to the neutral MIDDLE posi...

Page 74: ...4 18 Telma Rear Axle Mounted Retarder Indicator Lamp If Equipped The Telma does not have a disable switch It is always on and will operate at different levels depending on application of service brake...

Page 75: ...of the rocker switch the heavy mud snow function ATC indicator lamp blinks continuously The ATC lamp stops blinking when the ATC mode switch is pressed again or ignition key cycled CAUTION Be sure to...

Page 76: ...rn the key counterclockwise When the switch is turned ON in either direction a warning buzzer will sound if air pressure is below 448 34 kPa 65 5 psi the buzzer will turn off as soon as sufficient air...

Page 77: ...er to the applicable V MAC Operator s Guide C0029150 32 Speed Control Switch This is a V MAC switch for more information refer to the applicable V MAC Operator s Guide C0029211 33 Cigar Lighter Press...

Page 78: ...130 psi in both air brake systems If pressure drops below 75 psi 5 psi in either system the warning buzzer and warning light will go on Determine the cause of failure before proceeding Primary air pr...

Page 79: ...HIGH speed The middle positions are LOW and MEDIUM speeds 2 Mode Selection Lever Allows the operator to choose the air direction The CAB position delivers air to the floor outlets while the DEF positi...

Page 80: ...th the knob in the middle position the parking lights and interior panel lights will illuminate With the knob in the far right position the headlights will turn on To turn on the fog lights if equippe...

Page 81: ...The turn signal lever is located on the steering column It performs a number of functions including activating the high and low beams and the hazard switch see illustration on following page C0029601...

Page 82: ...0029602 Push the switch to the right to turn the dome light on Push the switch to the left to turn the dome light off Air Horn C0029603 The air horn s if equipped is activated by pulling down on the c...

Page 83: ...to the center to close the vent Accessory Power Outlets Additional 12 volt accessory power outlets are located next to the driver on the E panel These cigar light type outlets supply 12 volts of fuse...

Page 84: ...ficiencies discovered by the driver A pre trip inspection prepares for the end of work report Starting on the next page are suggested guidelines to be used in performing truck tractor and trailer pre...

Page 85: ...condition of wheel rim Especially look for cracks missing lockrings bent or broken studs missing clamps or lug nuts Check condition of tire properly inflated no serious cuts bulges tread wear or any s...

Page 86: ...r coolant oil and fuel leaks Check fuel separator sight glass and drain if necessary Check for leaks Check wiring harnesses for signs of damage Check air filter with brackets and hoses for loose conne...

Page 87: ...obvious leaking on outside or inside wheel Verify correct oil level in hub Right Front Suspension Check condition of spring spring hangers shackles U bolts no cracks breaks or shifting Shock absorber...

Page 88: ...5 Right Rear Vehicle Area Dual Wheels One or Two Axles Check condition of wheels and rims Especially look for cracks missing lockrings bent or broken spacers studs missing clamps or lug nuts Check co...

Page 89: ...g and electrical lines are properly secured to the frame with no damage or chafing Lights and Reflectors Tail lights brake lights and turn signal lights operating clean and proper color Step 7 Couplin...

Page 90: ...nsion Check condition of springs leaf or air spring hangers shackles and U bolts no cracks breaks or shifting Brakes Condition of brake drums With brakes released look for a noticeable gap between lin...

Page 91: ...f equipped check that exhaust rain cap opens when accelerating engine Check gauges and tell tale light function See the Instruments and Controls section Check function of low air warning Check clutch...

Page 92: ...is not so far forward that the tractor frame will strike the landing gear during turns Note Refer to the trailer manufacturer s manual for specific information on the trailer checks Step 9 Trailer Fr...

Page 93: ...s or lug nuts Check condition of tires properly inflated no serious cuts bulges tread wear or any signs of misalignment valve stems not touching wheels rims or brake drums valve caps in place and no o...

Page 94: ...End gates free from damage properly secured in stake pockets Canvas or tarp if required properly latched down to prevent water damage tearing billowing or blockage of either mirrors or tail lights Re...

Page 95: ...an not be made if dust covers are in place Condition of brake hoses check for any chafing Check brake chamber mounting bolts and brackets Check slack adjusters and chamber push rod travel With brakes...

Page 96: ...aving the Parking Area Remove chocks from the wheels Test trailer hook up by slowly pulling while applying the trailer brakes with the trailer brake hand control valve Test the service brakes before l...

Page 97: ...he vehicle must be parked on level ground and the units at normal operating temperature Components must be filled to the correct level DO NOT OVERFILL Note Oil and filter change intervals in this manu...

Page 98: ...the front axle U bolts at 24 000 kilometers 15 000 miles At the First A Inspection Interval Check front and rear axle alignment and adjust if the alignment is out of specifications Check steering knuc...

Page 99: ...88 OPERATION WINDSHIELD WASHER RESERVOIR As shown in the drawing below the windshield washer reservoir is located on the driver side back of the cab C0029606...

Page 100: ...ks This arrangement allows the cab to tilt forward to a maximum of 60 degrees exposing the engine compartment for easy accessibility The cab tilt system uses one hydraulic cylinder It incorporates int...

Page 101: ...in the cab must be secured 1 Take the cab tilt pump handle from its stored position Note The cab tilt pump handle is stored inside the cab on the right side cab back wall behind the folding seat 2 Ins...

Page 102: ...n the thumbscrew and swing the safety prop down onto the safety prop stud see arrow The slot in the safety prop should settle securely around the stud refer to the illustration above WARNING Be certai...

Page 103: ...pulating the pump control lever from the RAISE to LOWER position Lowering the Cab Note Before lowering the cab the cab safety prop must be in the stored position and the transmission must be in NEUTRA...

Page 104: ...ol lever to the LOWER position and pump until the LOWER lines are bled also tighten the corresponding connections 7 Shift the pump control lever to the RAISE position and pump until the RAISE lines ar...

Page 105: ...cked slide the button to unlock the door before pulling the inside paddle handle Locking the Cab Door To lock with the door open press the door handle inward and shut the door To lock with the door cl...

Page 106: ...st the top half to secure the folded door 4 In this position the door latch will act as a holding device to secure the bottom half of the door There is also a rubber ball and socket arrangement that w...

Page 107: ...support the door while unlatching the ball and socket which is holding up the lower half of the door Refer to the illustration 2 While supporting the folded door section with your right hand pull the...

Page 108: ...door position Bi Fold Doors The LEU model can be equipped with optional bi fold doors on both sides of the chassis Procedures for unfolding and folding the door are the same on both sides of the vehic...

Page 109: ...unlatch the bi fold door panels C0029623 3 Fold the two door panels until they latch together In this position the cab door latch acts as a holding device to secure the bi fold panels together 4 Open...

Page 110: ...OPERATION 99 C0029624...

Page 111: ...b to disengage the door panels from the cab C0029625 2 Pull the outside door handle to separate the two door panels C0029626 3 Unfold the door panels 4 Slide the bi fold door latch handle forward to l...

Page 112: ...OPERATION 101 5 Reinstall the door limiting strap...

Page 113: ...harsh bumps For the left side seat position this type of seat uses a combination lap and shoulder belt For the right side seat position there is an automatic locking retractor for the lap belt only wi...

Page 114: ...region and could cause serious internal injuries during a sudden stop DANGER Do NOT wear seat belt loosely Do NOT use one belt for more than one person 2 Make sure the clip is securely fastened into...

Page 115: ...d show no signs of wear fraying or holes and it should be reasonably free of dirt which could find its way into the retracting mechanism Retractors The retractors should function smoothly and maintain...

Page 116: ...C0029628 DANGER When the seat is in the standing drive position and the door is open pull out the orange colored retractable webbing and engage the end into the buckle in the instrument panel This wil...

Page 117: ...ible to operate this vehicle from either side but the person on the right must be seated to ride and must stand to drive C0029629 Stand facing the seat Reach behind the seat and pull on the latch Fold...

Page 118: ...Adjustment Button Upper and Lower 6 Fore Aft Adjustment Lever DANGER Do not make seat adjustments while the vehicle is in motion as this could cause a loss of vehicle control resulting in an accident...

Page 119: ...t push the air valve button 4 upwards 2 To lower the seat push the air valve button 4 downwards When adjusted properly and under normal driving conditions the seat should not top or bottom against the...

Page 120: ...Mirrors Note The operator must readjust the mirrors when changing between left and right operating positions There are 2 different styles of mirror mounting arrangements available On the first arrange...

Page 121: ...110 OPERATION C0029632 1 Forward 3 RH Driving Position 2 Wipers Must Park at the Inboard Position C0029633 1 Forward 3 LH Driving Position 2 Wipers Must Park at the Inboard Position...

Page 122: ...OPERATION 111 C0029634 1 Forward 3 RH Driving Position 2 Wipers Must Park at the Inboard Position...

Page 123: ...ng conditions above freezing The restriction of airflow can cause higher exhaust temperatures power loss excessive fan usage and reduced fuel economy CAUTION If a winterfront is used a MACK approved e...

Page 124: ...ication CAUTION The maximum allowable engine speed is listed on the warning label on the sun visor DO NOT exceed 2 300 rpm Engine Model Designations The MACK engine model designation system uses lette...

Page 125: ...he Resume Set switch also functions as the Accel Decel switch Usually the Resume position press the top corresponds to an increase in engine speed Accel and the Set position press the bottom correspon...

Page 126: ...e process of setting cruise control must be repeated in order to re activate cruise control unless the Initial Set Using Resume Switch feature is enabled To temporarily disengage cruise control diseng...

Page 127: ...ker If your vehicle is equipped with the MACK PowerLeash Engine Brake it is important that you take the time to become familiar with your engine brake before putting it into operation WARNING Operatio...

Page 128: ...e is Activated When the engine brake is enabled switch in either LOW or HIGH position your engine V MAC electronic control system commands engine brake power engine brake active only when the followin...

Page 129: ...he engine brake is activated as soon as cruise control commands fueling to zero vehicle has just reached cruise set point and fuel has been turned off The first option is the more popular choice for h...

Page 130: ...e there is no substitute for driver training by a qualified specialist The following information is intended as a guideline to safe and appropriate use of the MACK PowerLeash Engine Brake It is diffic...

Page 131: ...certain vehicle and load condition a control speed may be established for a given descent The control speed is the vehicle speed at which the retarding forces of air drag rolling resistance and engin...

Page 132: ...to the HIGH position and now it is possible to descend the same grade in sixth gear to maintain a steady 56 kph 35 mph at 2 000 engine rpm CAUTION The maximum allowable engine speed is listed on the w...

Page 133: ...s with many aspects of operating a heavy duty vehicle special care should be taken when using the MACK PowerLeash Engine Brake on slippery road surfaces The potential for unpredictable loss of vehicle...

Page 134: ...loss vehicle control Note Always monitor vehicle tractability in slippery road conditions and make adjustments to engine brake switch position and vehicle speed as necessary Always test the LOW power...

Page 135: ...ow air pressure occurs in either circuit In tractor applications the Trailer Supply Valve red octagonal knob will immediately pop out in the event of a trailer breakaway or sudden trailer air line fai...

Page 136: ...juster is indicated If brakes are found to be out of adjustment the vehicle must be taken to the nearest repair facility to have the problem investigated and corrected DANGER Automatic slack adjusters...

Page 137: ...springs Parking WARNING ALWAYS apply the parking brakes when parking and make sure the parking brakes are holding the vehicle from moving before leaving the driver s seat When parking on a grade use w...

Page 138: ...brake system uses the standard ABS components such as wheel speed sensors and modulator valves along with a Steering Angle Sensor SAS 60 and a Yaw Rate Lateral Acceleration Sensor YAS 60 package to pr...

Page 139: ...e disabled by having a qualified technician replace the Advanced EC 60 ECU with a Premium EC 60 ECU WARNING Failure to disable the RSA system on a vehicle that has been modified will result in serious...

Page 140: ...nician Precautions When Installing Electrical Equipment Connecting electrically powered or electrically controlled equipment to the vehicle may cause interference with other vehicle components e g the...

Page 141: ...drive wheels are spinning ATC limits engine torque which in turn reduces wheel spin to provide improved traction When ATC automatically becomes active the ATC indicator lamp turns on to alert the oper...

Page 142: ...foot brake to bring the vehicle to a complete stop before applying the work brake In normal operation when the work brake is applied the transmission will be shifted into neutral from a forward or re...

Page 143: ...work brake is released the transmission will remain in NEUTRAL but the shift selector will still flash 2 gear It is then necessary to manually move the shift selector into NEUTRAL then back into 2 gea...

Page 144: ...t the instruments frequently When problems develop take prompt steps to correct them Shutting Down the Engine After a hard run allow the engine to idle three minutes before shutdown to stabilize the t...

Page 145: ...he engine CAUTION If the engine does not start immediately limit cranking periods to 30 seconds to avoid overheating and damaging the starter CAUTION Do not rev the engine at start up Turbocharger dam...

Page 146: ...er may be damaged Wait at least five seconds before attempting to restart the engine If the engine does not start immediately limit cranking periods to 30 seconds to avoid overheating and damaging the...

Page 147: ...le smoking or in the presence of flames sparks or hot surfaces or when working on an operating engine Failure to follow these precautions can result in fire To guard against burns from direct contact...

Page 148: ...eeded to properly prime the system Note There are NO bleed nipples to be opened in order to prime the fuel system 3 Lock the hand primer pump by retracting it into the housing and turning it clockwise...

Page 149: ...e contaminated with combustion by products Cold weather operations place added demands on a diesel engine When operating in cold climates particularly in stop and go operations PTO operations or perio...

Page 150: ...air pressure for restarting the engine V MAC IV Shutdown Option Idle Cooldown This feature provides a means of cooling down the engine and turbocharger If the idle cooldown option is enabled using VCA...

Page 151: ...Override Switch on the instrument panel shortly after the vehicle sounds the engine shutdown alarm allows 30 additional seconds of operation This process can be repeated several times to safely park t...

Page 152: ...ld weather Use the correct grade of oil for the prevailing winter temperature Drain the fuel tanks and filters regularly to prevent water accumulation in the fuel system This accumulation can freeze i...

Page 153: ...The location of the engine heater power receptacle varies according to vehicle design C0029338 1 Engine Block Heaters Engine Heater Benefits Eliminates cold weather starting problems Increases engine...

Page 154: ...rmal operating range is between 77 C and 104 C 170 F and 220 F for stationary vehicles 1 To move the vehicle begin by starting the engine and waiting until it reaches normal operating range see Coolan...

Page 155: ...144 OPERATION Stop the vehicle Put the transmission in NEUTRAL Set the parking brake Go to the right side of the vehicle Flip the switch to the right...

Page 156: ...ith Allison Transmission Electronic Control WARNING Do NOT allow your vehicle to coast in NEUTRAL There is no engine braking and you could lose control Coasting can also cause severe transmission dama...

Page 157: ...d operation of the transmission while an ABS code is active can overheat the transmission oil Note TranSynd and the most current specification DEXRON fluids are recommended for all RDS transmission ap...

Page 158: ...drive 6 5 4 3 2 Occasionally road load or traffic conditions will make it desirable to restrict automatic shifting to a lower range When conditions improve the gear selector should be returned to the...

Page 159: ...the driver vehicle and transmission For 4500 RDS transmissions when the Electronic Control Unit ECU detects a problem condition the ECU will restrict shifting turn on the CHECK TRANS light on the inst...

Page 160: ...tment below the left side driver seat Note Shifting is restricted to second gear when the vehicle is being operated from the right hand driving position Note For body builders applicable connections h...

Page 161: ...arriers are available with the MACK inter axle power divider third differential with or without a power divider lockout MACK rear axles are designed so the entire load is carried by the axle housing t...

Page 162: ...o allow power to the axle with traction Feathering brakes should not be done with power divider lockout engaged Note For vendor axles see the vendor manual furnished with the vehicle Engaging the Powe...

Page 163: ...d can be accommodated with various state weight regulations CAUTION Do NOT overload the chassis Observe the Gross Vehicle Weight rating found on the Safety Certification Label WARNING Do NOT use the t...

Page 164: ...ccurate setting should be determined by weighing the axles and adjusting the air pressure accordingly Adjustable air regulators are located inside the cab to adjust tag and pusher axle air pressure Pr...

Page 165: ...stop automatically as needed The ATS conditioning is required to maintain normal exhaust aftertreatment system function and should not be stopped ATS conditioning will not occur onTRU DPF systems Dur...

Page 166: ...il and Ultra Low Sulfur Diesel ULSD fuel CAUTION Use of diesel fuel other than ULSD and engine oils other than EO O Premium Plus or VDS 4 will adversely affect performance efficiency and durability of...

Page 167: ...mine when regeneration is required Mack Trucks Inc uses two exhaust aftertreatment system conventional and TRU Conventional exhaust aftertreatment systems use passive active regeneration The passive r...

Page 168: ...aterials or gases the regeneration should be stopped by pushing the DPF switch to the Stop Regeneration position If an active regeneration is stopped by the vehicle operator it should be initiated at...

Page 169: ...158 Mack US10 Emissions Solution Exhaust Aftertreatment System LEU Standard System View W2031562...

Page 170: ...iring no fuel to be injected to clean the DPF In EPA2007 an active regeneration fuel was injected was required to clean out the DPF producing very high exhaust outlet temperatures Certain vocational d...

Page 171: ...ssions of another pollutant soot also known as particulate matter or PM SCR works by injecting Diesel Exhaust Fluid DEF into the exhaust DEF is a solution of ultra pure water and urea DEF works with t...

Page 172: ...ent By using DEF we avoid the disadvantages of increasing EGR to massive levels This results in better fuel economy from your Mack engine W2055490 Vertical SCR side inlet CAUTION Do not put diesel fue...

Page 173: ...meeting ISO 22241 standards and certified by the American Petroleum Institute The container must display the API certification seal Never use agricultural or industrial grade urea Use of fluids other...

Page 174: ...solution is exposed to high temperatures it breaks down into ammonia and carbon dioxide The DEF solution is highly corrosive to certain metals including copper and brass If the DEF solution is spille...

Page 175: ...164 Mack US10 Emissions Solution visit the website www Mackscr com or please contact Mack One Call at 1 800 866 1177...

Page 176: ...ondensation may be visible during a cold start If black exhaust smoke is visible during engine operation this indicates a problem with the exhaust aftertreatment system Take the vehicle to an authoriz...

Page 177: ...Valve The ACM also monitors the following values in the exhaust aftertreatment system Aftertreatment DEF Dosing Pressure Aftertreatment DEF Tank Temperature Aftertreatment DEF Tank Level Aftertreatmen...

Page 178: ...ch 1 Upper Position Regeneration Position 3 Down Position Inhibit Position if equipped 2 Middle Position Neutral Position CAUTION During the Aftertreatment DPF Regeneration the exhaust gas temperature...

Page 179: ...e vehicle operator The DPF Smart switch allows the vehicle operator to either stop or start regeneration Certain conditions must be met however before regeneration can be manually started Parked regen...

Page 180: ...iver has the option of stopping a regeneration if the vehicle is in an area where elevated exhaust temperatures will pose a hazard i e tunnel under trees in an area where there is flammable material e...

Page 181: ...temperature after regeneration has completed Be extremely careful around these hot components Contact with these components can result in serious personal injury CAUTION When the inhibit position is p...

Page 182: ...vehicle speed will be limited to 16 kph 10 mph until the driver releases the switch back to the neutral MIDDLE position Refer to the Exhaust Aftertreatment System Information sun visor label for addi...

Page 183: ...een required on passenger cars for many years On Board Diagnostics OBD is a system that monitors the functions of emissions related components and alerts the vehicle operator to any detected need for...

Page 184: ...uster per the following images LEU Instrument Cluster W3031622 A Left Side Indicator Set B Right Side Indicator Set 1 Malfunction Indicator Lamp MIL 2 CHECK Lamp 3 Aftertreatment DEF Low Lamp 4 High E...

Page 185: ...n illuminates when a parked Aftertreatment DPF Regeneration is initiated It also indicates high exhaust gas temperature during a moving regeneration When the HEST icon is illuminated do not park or op...

Page 186: ...gers Aftertreatment DEF Tank Low Level Indicator Amber Warning Lamp Inducement 12 Aftertreatment DEF Tank Level Gauge None None None 12 Aftertreatment DEF Tank Level Gauge W2029416 None None 0 Aftertr...

Page 187: ...Poor DEF Quality DTC Initial Detected None W3031623 None Poor DEF Quality DTC Initial Detected 10 hours None W3031623 25 torque reduction Poor DEF Quality DTC Initial Detected 20 hours Diesel Fuel Ref...

Page 188: ...rly labeled and filler necks and nozzles are different accidents can happen Contamination of fluids by misfilling of diesel or DEF in the wrong tank may result in vehicle malfunction Results of misfil...

Page 189: ...ensor Triggers Aftertreatment DEF Tank Low Level Indicator Warning Lamp Inducement No Tampering None None None Tampering DTC Pending None W3031623 None Tampering DTC Confirmed None W3031623 None Tampe...

Page 190: ...first Valve and Injector Lash adjustment MP7 and MP8 Initial Adjust 200 000 km 125 000 miles or 12 months whichever comes first Injector Lash Adjustment MP7 and MP8 Adjust Every 400 000 km 250 000 mil...

Page 191: ...g daily checks and observing the equipment while in operation minor defects can be caught and corrected before they become major problems Make sure any problems are corrected before putting the equipm...

Page 192: ...ing lubrication Operate engine at low idle for at least three minutes before increasing RPM or driving the vehicle If the engine has not been run for more than 30 days turbo pre lube procedure is nece...

Page 193: ...rk near factories with heavy smoke fallout for extended periods of time Bird droppings have high acid content and can damage freshly painted surfaces They should be cleaned off as soon as possible Do...

Page 194: ...oducts to clean concrete from the cab or frame surfaces Use of these types of products will damage the paint finish and void the vehicle warranty Mack Trucks Inc has approved EL ReadyMix Truck Wash Wa...

Page 195: ...cratches and water spotting CAUTION Do not clean the underside of the fenders cab chassis etc without protecting your hands and arms You may injure yourself on sharp edged parts Chassis Wash away exce...

Page 196: ...ht back with wax It is recommended to have a professional polish your truck to avoid swirl marks or damage to the painted surface Mequiar s has a complete line of waxes polishes and other cleaning and...

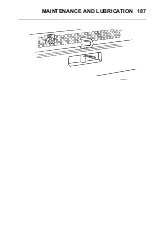
Page 197: ...f the vehicle is mired in heavy mud snow etc use a suitable sling type towing arrangement Note Tow pins hooks eyes etc are NOT intended for use as long term towing devices CAUTION Failure to disconnec...

Page 198: ...MAINTENANCE AND LUBRICATION 187 C0029644...

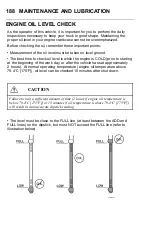
Page 199: ...e the engine is COLD prior to starting at the beginning of the work day or after the vehicle has sat approximately 2 hours At normal operating temperature engine oil temperature above 79 4 C 175 F oil...

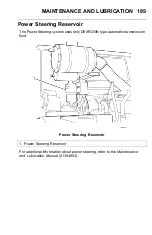
Page 200: ...ervoir The Power Steering system uses only DEXRON type automatic transmission fluid C0029645 Power Steering Reservoir 1 Power Steering Reservoir For additional information about power steering refer t...

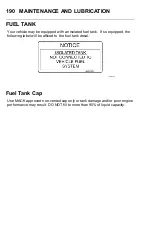
Page 201: ...ed with an isolated fuel tank If so equipped the following label will be affixed to the fuel tank decal C0029424 Fuel Tank Cap Use MACK approved non vented cap only or tank damage and or poor engine p...

Page 202: ...apors are combustible and can cause an explosion or fire resulting in severe personal injury or death CAUTION Diesel powered engines for heavy duty trucks built on or after January 1 2010 are designed...

Page 203: ...fuels commonly available in the United States and specified in this manual Use of alternative fuels including BioDiesel may affect engine emissions Mack Trucks Inc does not warrant and is not responsi...

Page 204: ...7 Failures of certain emissions aftertreatment components specifically SCR DPF and NOx sensors will not be warranted if the failure can be attributed to operation on biodiesel blends from 6 to 20 B6 t...

Page 205: ...gine is running Fan may start to rotate at high speed without warning WARNING Avoid injury when checking coolant in a hot engine Wait for the engine to cool prior to checking the level whenever possib...

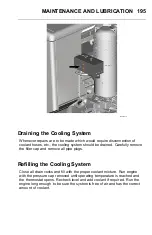
Page 206: ...efully remove the filler cap and remove all pipe plugs Refilling the Cooling System Close all drain cocks and fill with the proper coolant mixture Run engine with the pressure cap removed until operat...

Page 207: ...etimes referred to as heavy duty diesel coolants Passenger car coolants do NOT meet this specification Be sure to maintain the required level of antifreeze protection for anticipated winter temperatur...

Page 208: ...erations however place added demands on the cooling system Prevent potential cold weather problems by performing a quick check of the cooling system as outlined below Make a general check for cooling...

Page 209: ...sory drive belt and main belt routing with and without air conditioning This diagram is located in a clear area on the outside of the left frame between the radiator and center line of the front axle...

Page 210: ...LS Wheel Inspection Look at the wheels and cap nuts Inspect them for evidence of cap nut looseness Rust streaks from the cap nut ball seat are an indication of looseness Refer to the Maintenance and L...

Page 211: ...tires Inflation Pressure To ensure maximum mileage and overall performance from your tires it is essential that they operate at the correct inflation pressure for the load carried Inflation pressure...

Page 212: ...daily Look for bulges cracks cuts penetrations and or oil contamination If any such damage is found the tire must be thoroughly inspected by a qualified tire inspector and repaired or discarded immed...

Page 213: ...ed to contact tires will soften the rubber and destroy the tire Preventive maintenance is necessary to ensure that oil leakage does not occur The following areas should be inspected on a regular basis...

Page 214: ...p sparks flames cigarettes etc away from batteries at all times Protect your eyes by wearing safety goggles Be sure vehicles are NOT touching each other CAUTION To avoid damaging any electronic contro...

Page 215: ...vehicle Shut down the vehicle with the booster batteries and remove the cables in the reverse order of connection WARNING Do NOT connect the final negative connection to the frame of the stalled vehi...

Page 216: ...el may be located under the driver left side operating position behind the access panel You need to remove the panel in order to view this label C0029648 The cover panels are fastened with screws Most...

Page 217: ...206 MAINTENANCE AND LUBRICATION C0029649...

Page 218: ...MAINTENANCE AND LUBRICATION 207 C0029650 C0029651...

Page 219: ...t panel Do NOT install a standard relay into the daytime running light relay socket marked either DRL MOD or Running Lamps or a short circuit in the headlight high beam circuit will result The headlig...

Page 220: ...rosion of the lamp socket terminals particularly with the clearance and marker lamp apply a coating of electrical sealing grease such as Lubriplate DS ES or TEK 519 to the socket and terminal assembli...

Page 221: ...5 15A F16 10A F17 10A Aux Fan Cool Beacon Lamps VECU EMS Power VECU Ctrl Sw Input F18 10A F19 5A F20 10A CB21 20A DCL EMS Power Instrument Cluster Battery Moto Mirrors LH Windshield Wiper Washer CB22...

Page 222: ...1 10A Spare EMS ABS Ignition Head Lamp Left Head Lamp Right Low B F52 15A F54 20A F55 20A F56 10A Spare Brake Wear DPF Battery Heated Mirror Telma F57 15A F58 5A F60 15A F61 20A HVAC Roof Unit L R Rel...

Page 223: ...ay occur with certain metric thread inch thread fastener combinations and with fastener combinations involving incompatible metric fastener systems A given thread mismatch condition can result in thre...

Page 224: ...s 1 pound square inch 1 8 x degrees Celsius 32 degrees Fahrenheit 83267 Imperial gallon 1 gallon U S liquid U S to SI Conversions 03937 inch 1 millimeter 6214 mile 1 kilometer 2 1134 pints U S liquid...

Page 225: ......
Reviews: