background image

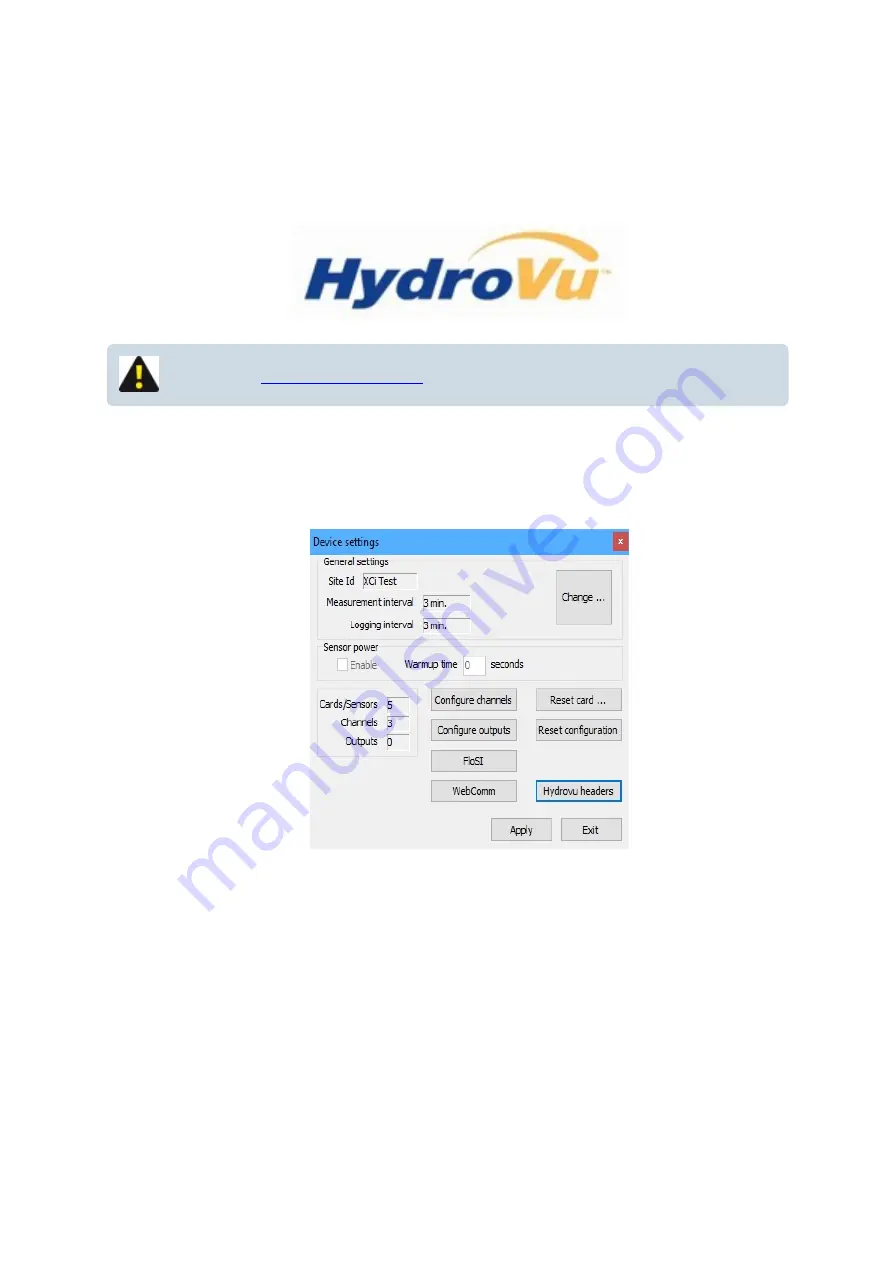
Edit HydroVu Headers

Get real-time, decision-quality data on your remote monitoring sites anywhere, anytime, with In-Situ 

HydroVu Data Services. HydroVu gives you up-to-date access to your data while simplifying the task of 

filtering the data for important results.

NOTE:  Visit 

HydroVu Data Services

 for further details.

After enabling 

FTP Upload  to In-Situ HydroVu Data Server

, the following procedure must be carried out to 

ensure that data is visible on the HydroVu platform:


1.  The "

HydroVu headers

" dialogue box will now be enabled on the "

Device settings dialog

"

MACE XCi User Manual - 62 -

Summary of Contents for HydroMace XCi

Page 1: ......

Page 2: ...pole 21 Sensor and power cables routed through conduit 24 Sensor and power cables routed through conduit 28 Installing XCi power options 29 Solar panel installation on a 2 pole 30 Installing a MACE m...

Page 3: ...ebComm card using FloCom 57 HTTP Upload 58 FTP Upload to In Situ HydroVu Data Server 60 FTP Upload 61 Edit HydroVu Headers 62 The WebComm Utility 66 Test an HTTP Upload 66 Test an FTP Upload 67 Error...

Page 4: ...hannel to use for this alarm 82 Send the alarm when the channel value is above below 82 Clear the alarm when the channel value is above below 82 Add this value to alarm set point each time the alarm o...

Page 5: ...he Pulse I O card 96 The SDI 12 Master Card 98 Introduction to FloCom 100 Installing FloCom Software 101 Connecting to an HydroMACE XCi device 104 Remote communications with an XCi device 107 Enable a...

Page 6: ...31 Download 132 Settings 133 Edit settings 133 View settings 133 Save settings to file 134 Load settings from file 134 Measure and display 136 SDI 12 Master utility 137 WebComm utility 137 Start Stop...

Page 7: ...el type 158 Add a new Frequency input type 159 Edit a Frequency input type 160 Add a new Voltage input type 162 Edit a Voltage input type 163 Add a new Event pulse status change channel type 165 Edit...

Page 8: ...184 Edit a Flowrate using velocity In an open channel 184 Using MACE FloCalc to calculate polynomial coefficients 185 Add a Flowrate using lookup table channel type 188 Edit a Flowrate using lookup ta...

Page 9: ...216 2 Point Calibration function 217 The SDI 12 Master Utility 219 Address query 220 Acknowledge active 221 Send ID 221 User defined 222 Calibrate Flowrate using pulse function 224 Calculate a K fact...

Page 10: ...Binary status output 241 Remove a Binary status output 242 XCi Display and Keypad Usage 243 Force a measurement 244 Reset a Total with the buttons 245 Test the LCD Display 246 Troubleshooting the XCi...

Page 11: ...After the upgrade 257 Battery maintenance 258 Solar panel maintenance 261 How to store the XCi when not in use 262 MACE USB cable driver installation 263 How to re initialise an XCi 266 MACE product...

Page 12: ...ction and weather stations The HydroMACE XCi continues the long heritage established by MACE over 40 years ago for remote data logging and telemetry The HydroMACE XCi device typically consists of the...

Page 13: ...MACE XCi User Manual 13...

Page 14: ...ing direct indirect special or consequential damages You must be careful to ensure that the use of this information complies with the laws rules and regulations of the jurisdictions with respect to wh...

Page 15: ...evelopment engineers who are focused on providing customer driven products that are both easy to use and withstand the test of time in often remote and harsh environmental conditions MACE is committed...

Page 16: ...ture After the HydroMACE XCi device has been installed and fully tested MACE recommends the use of expanding space filler foam down the first 5 to 10cm 2 to 4 of the conduit or mounting pole to preven...

Page 17: ...irements for PC are l Windows XP l 10Mb available hard drive space l USB port l For many of the functions described in this manual FloCom Version 3 X X X MACE Software End User License Agreement EULA...

Page 18: ...ws the user an on site readout of parameter values and status messages Pressing either membrane switch will turn on the LCD The membrane switches can be used to scroll the display between the various...

Page 19: ...MACE XCi User Manual 19...

Page 20: ...ACE uses a natural rubber seal and a solid latching system Sometimes particularly after little use the latch can be difficult to open Opening the enclosure is simpler using the following procedure 1 E...

Page 21: ...ards for details on re installation Place the XCi device on a work bench and using a hammer and screwdriver carefully knock out the plastic cable entry point from the rear of the enclosure It is only...

Page 22: ...l around the cable entry point This will stop water flowing down the pole and into the XCi device 3 4 Hold the XCi device up against the pole so that the oval cut away on the pole matches the cable en...

Page 23: ...electronics enclosure 6 Plug in both the sensor cable and solar panel cable into the sockets as shown in the picture below WARNING Ensure that the cable from the solar panel charger is terminated usi...

Page 24: ...nnected and fully functional in order to prevent insects and or moisture damaging the system the cable entry point should be sealed with an appropriate product Suitable sealants include l PanDuit DS1...

Page 25: ...c cable entry point at the base of the unit as shown below It is only thin plastic and is designed to break away Alternatively the round cable entry point may be removed using the hammer and screwdriv...

Page 26: ...and solar panel cable into the sockets as shown in the picture below WARNING Ensure that the cable from the solar panel charger is terminated using the three pin connector provided in the electronics...

Page 27: ...the cables are connected the system should be fully tested Assuming everything is connected and fully functional in order to prevent insects and or moisture damaging the system the conduit entry point...

Page 28: ...through conduit 2 Use four M8 screws bolts or coach screws to secure the box to the wall Use flat washers between the screw head and the box WARNING Do not overtighten the wall mounting bolts as perma...

Page 29: ...source of at least 16VDC is connected A source of less than 16VDC will not provide sufficient current to charge the 12V battery If unsure please do not hesitate to ask your local MACE representative W...

Page 30: ...s for their region for example those found using a Solar Radiation Map As a guideline for an HydroMACE XCi with three I O cards measuring every five minutes at least three hours sunlight is required p...

Page 31: ...e solar panel mounting bracket onto the u bolt Ensure that the arms of the bracket face out from the pole and that the mounting hole on each arm is towards the top of each arm 7 Slide the bracket to t...

Page 32: ...ing M6 fasteners attach the solar panel to the U bolt 10 Tilt the solar panel so that the active side faces towards the sun North in Southern hemisphere South in Northern hemisphere at an angle specif...

Page 33: ...MACE XCi User Manual 33...

Page 34: ...ise exposure to the elements The cable should be either routed through conduit or through the solar panel mounting pole You will need a hole drilled in the mounting pole at the top near the solar pane...

Page 35: ...ity is correct The polarity is labelled on the circuit board near the connector NOTE The XCi device should be installed before connecting the solar panel NOTE MACE highly recommends the use of Tri spi...

Page 36: ...MACE XCi User Manual 36...

Page 37: ...be removed to avoid permanent damage to the battery The XCi device should be powered by an external power source 1 The charger available from MACE Part No 850 323 comes complete with a circular barrel...

Page 38: ...some redundancy in the system but also provides a power source when the external battery is removed during servicing 1 The HydroMACE XCi devicecan be powered by an external 12V battery through the de...

Page 39: ...rs can install any combination of the six MACE FloSeries3 cards shown into the five available card slots within an XCi device Choose the right card s for your application to tailor the XCi device to y...

Page 40: ...u MUST Connect with FloCom Stop the device Save the device settings Download the logged data Disconnect from the device 1 Open the XCi enclosure and ground yourself by touching the screw labelled Grou...

Page 41: ...he mating connector on the backplane PCB 5 Ground yourself again Your finger must remain grounded on the screw whilst carefully inserting the card into any spare slot Take care to align the pins of th...

Page 42: ...re aligned with the tops of all the cards Fix the bracket into place with the three screws WARNING DO NOT over tighten the screws as the bracket may be damaged or broken 7 Connect to the HydroMACE XCi...

Page 43: ...listed and or not in the correct slot Disconnect from the device in FloCom 10 REMOVE the offending card s and WAIT for at least one minute This allows the microprocessor on the card to reset Follow s...

Page 44: ...n control and record data from the sensor NOTE See Connecting sensors to the I O card The input and output terminals available on each I O card are shown in the diagram below NOTE MACE recommends the...

Page 45: ...NOTE Should insufficient I O be available on a single I O card another card Part No 850 329 should be purchased MACE XCi User Manual 45...

Page 46: ...ters The frequency input terminals available on each I O card are shown in the diagram below NOTE If a frequency input is wired a shaft encoder input is not available After completing the wiring confi...

Page 47: ...terminals available on each I O card are shown in the diagram NOTE If a shaft encoder input is wired only a single digital counter input is available NO frequency input is available After completing...

Page 48: ...ing configure the sensor using FloCom see Add a new 4 20mA input type Three wire 4 20mA input Each I O card provides up to two 4 20mA inputs for connecting devices such as ultrasonic depth sensors and...

Page 49: ...put Each I O card provides up to two digital outputs for sending pulses to devices such as water samplers and or data loggers The digital output terminals available on each I O card are shown in the d...

Page 50: ...20mA outputs for sending signals to devices such as SCADA systems and or PLC s The 4 20mA output terminals available on each I O card are shown in the diagram below After completing the wiring configu...

Page 51: ...ventional data services MACE provides this data server free of charge to its customers subject to MACE SLA Alternatively the WebComm card may be configured to upload via FTP directly to HydroVu Data S...

Page 52: ...age to cables especially that caused by vehicles digging implements animals or debris in the pipe or channel 1 Ensure the antenna cable is appropriately routed through conduit and entering the XCi enc...

Page 53: ...ten antenna Finger tighten only 5 The WebComm card is now ready to be installed into the XCi device 6 Follow Installing FloSeries3 Cards to install the WebComm card into the XCi device NOTE The WebCom...

Page 54: ...entered in this field will be overwritten by the Site ID of the XCi device in the field if it is different NOTE MACE recommends that the user does not use daylight savings time Users should set to st...

Page 55: ...7 From within the Site details area of the page click on Site keys tab 8 If this is the first time you have added a WebComm site you must create a new Username Click on the profile hyperlink and you...

Page 56: ...you will require to configure your MACE WebComm card in the field are located in the Device upload configuration field Click on the Save upload details to a text file hyperlink and the details will b...

Page 57: ...Bearer information supplied by your cell provider for the SIM card data plan 1 From the Device settings dialogue box click WebComm and the WebComm card configuration will appear 2 Enter the appropriat...

Page 58: ...server as well as the MACE HTTP Data Server HTTP Upload NOTE Unless using a different data server leave the HTTP Upload Enabled and Use MACE Server check boxes ticked 1 The Server URL should remain a...

Page 59: ...i device 4 Checking the Correct clock using host time check box will ensure that your XCi device time will always be correct The WebComm card will talk to the MACE data server and correct the device t...

Page 60: ...erver contact your local MACE or In Situ representative for the authentication details required 1 Leave the Use HydroVu Server box checked 2 Enter the authentication details as supplied by MACE or In...

Page 61: ...required 1 Enter the Server URL 2 Enter the file Directory 3 Enter the authentication details as required 3 Select the appropriate Upload interval for your application from the drop down list 4 Click...

Page 62: ...while simplifying the task of filtering the data for important results NOTE Visit HydroVu Data Services for further details After enabling FTP Upload to In Situ HydroVu Data Server the following proc...

Page 63: ...Velocity m s ft s Depth m ft Flow rate L s L h kL day ML day m3 s m3 h gal s gal min gal h Mgal day Flow Total Net permanent L kL m3 ML gal Mgal acre in acre ft Flow Total Net resettable L kL m3 ML ga...

Page 64: ...header information box The Location can be re named by left clicking on the current location name and entering a new name The Location should be something meaningful to the user In the example below L...

Page 65: ...have a single instance of a particular Channel type 6 Click Apply and then Exit to return to the Device settings dialog NOTE Empty Locations will be removed from the Header information upon Applying...

Page 66: ...d the WebComm utility dialogue box will appear NOTE The Set FTP Start will only appear if FTP uploads have been enabled Test an HTTP Upload NOTE If this is your first Upload you may need to run the In...

Page 67: ...op HydroMACE XCi deviceafter the device has been fully configured Your data will now be uploaded regularly to the data server for storage and available for retrieval at www macemeters com 3 If the upl...

Page 68: ...figured Your data will now be uploaded regularly to the FTPserver for storage 4 If the upload was not successful refer to the Error messages table to troubleshoot the WebComm card Error messages table...

Page 69: ...key Check username and upload key and correct if neccessary CMEE error Probable modem not initialised error Wait try again Data limit reached WebComm will only upload 100Kb at a single upload Force a...

Page 70: ...try again Using AT commands to troubleshoot a WebComm card This WebComm utility has a Command field where AT Commands can be input to troubleshoot various parameters of the WebComm card These AT Comm...

Page 71: ...command mode box wait until you see CREG 1 CGREG 1 QSS 3 NOTE The modem may take up to 2 minutes to register in a network for the first time This is initialising the SIM card and is normal Future regi...

Page 72: ...ifier In the example above the modem is connected on the Telstra Mobile network in Australia In the USA a network may identify with T Mobile or AT T 3 The SIM has been initialised and a normal Upload...

Page 73: ...lick Send The format of the returned response is as follows CREG mode stat with mode unsolicited registration message configuration stat registration state Verify the state of registration according t...

Page 74: ...d with the network identifier to which it is currently connected Eg COPS 0 0 Telstra Mobile 2 AT AUTOBND Used to enable or disable the automatic band selection at power on AT AUTOBND value Set AT AUTO...

Page 75: ...data per Site ID When this quota is reached uploads are no longer accepted Ensure data that you wish to keep is downloaded Download site data 1 Enter a Start date and an End date in the required forma...

Page 76: ...ed will be displayed Show latest record 1 Click on the Show latest record tab to view the latest timestamped data record uploaded to the data server from this SiteID Delete site data 1 Click on the De...

Page 77: ...o 500Mb of data per Site ID When this quota is reached uploads are no longer accepted Ensure data that you wish to keep is downloaded NOTE The MACE data server will store data for each Site ID for 12...

Page 78: ...arms Site users Under certain circumstances you may wish to share your data with other users For example a farm manager may wish his irrigation superintendent to also access site data NOTE ONLY Site O...

Page 79: ...ck on Remove site from the Remove site tab sheet WARNING Ensure that you have downloaded all the data that you wish to retain PRIOR to site removal Alarm history See Alarm history MACE XCi User Manual...

Page 80: ...be configured to notify the user that their WebComm card has stopped uploading Really the options for alarm configurations are only limited by the sensor s that the user has connected to their XCi dev...

Page 81: ...o credit See section on Alarm history for further details 4 Enable Auto credit renewal if desired Auto credit renewal ensures that alarms can always be sent from your account 5 Navigate to the WebComm...

Page 82: ...to be notified when the velocity of a stream reaches 1m s then this is the value to enter here Clear the alarm when the channel value is above below This is the value of the channel for which the ala...

Page 83: ...sent as SMS messages to mobile phones An unlimited number of phone number recipients can be added to an alarm FULL phone numbers including international country code must be entered in the field prov...

Page 84: ...Enter in the field provided the message that you wish to be sent via SMS or email when the alarm occurs The default message is Alarm from siteid at timestamp The channelname is channelvalue channeluni...

Page 85: ...METERS in your cell phone so that you are aware of the SMS origin and do not reply STOP by mistake If SMS alarms have been blocked the user can send a message SUBSCRIBE to the phone number 18324604711...

Page 86: ...nction see After the alarm has been sent disable it for Disabled The Disabled alarm state occurs when an alarm has been permanently disabled via the Disable this alarm function available when an alarm...

Page 87: ...o the full details of the alarm The Alarm history information relates the date time at which the alarm was set and the date time it was reset The recipient information tells where the alarm was sent S...

Page 88: ...he last measurement from The XCi device without the complexity of communicating via the host communications port The FloSI cannot be used to download or configure a XCi device and only one serial prot...

Page 89: ...ce If RTS is active when a scheduled sample is made then the string is transmitted immediately on completion of the measurement The transmitted ASCII text string starts with the character asterisk end...

Page 90: ...9 a0000 CR LF Additional Measurements and Request CRC aMC1 to aMC9 a0000 CRC CR LF Start Verification aV a0000 CR LF Start Concurrent Measurement aC a000n CR LF Start Concurrent Measurement and Reques...

Page 91: ...priate Address selecting the correct Baudrate from the drop down list and checking the required radio buttons WARNING The user must ensure that there are no two devices with the same address on the sa...

Page 92: ...ger 30103 30104 System battery Volts 4 byte big endian IEEE 754 float value 30105 30106 External voltage Volts 4 byte big endian IEEE 754 float value Configuring a FloSI card in FloCom 1 Ensure at lea...

Page 93: ...in the Available channels table and clicking the Right arrow If a channel in the Output channels table is no longer required highlighting it and clicking the Left arrow will remove it from the Output...

Page 94: ...configuration see Add XCi channels 2 Check the Custom register assignment box to enable custom assignment of register pairs 3 Left click on one of the register pairs and a new Register dialogue box wi...

Page 95: ...own in the diagram below NOTE MACE recommends the user studies the relevant documentation supplied with each third party sensor prior to connection WARNING The maximum XCi system current available for...

Page 96: ...or sensors powered by 12V cable lengths 100m are recommended Power guidlelines Because pulse rate sensors are often left running continuously their power consumption in an important consideration l A...

Page 97: ...connection to ancilliary devices such as water samplers and or data loggers The pulse output terminals available on each Pulse I O card are shown in the diagram below After completing the wiring confi...

Page 98: ...Ci device can control and record data from the sensor see Add a new SDI 12 input type NOTE MACE recommends the user studies the relevant documentation supplied with each third party sensor prior to co...

Page 99: ...rminal program such as Microsoft HyperTerminal Connect the PC running the terminal program using a serial cable or USB to serial adapter The port settings in the terminal program should be set to the...

Page 100: ...irements for PC are l Windows XP l 10Mb available hard drive space l USB port l For many of the functions described in this manual FloCom Version 3 X X X MACE Software End User License Agreement EULA...

Page 101: ...ill setup a folder in your program files called MACE MACE FlocomPlus This is the default option Click the Next button to continue 4 Select an Installation Folder MACE FloComPlus is the default 5 Start...

Page 102: ...port Windows Vista 7 Windows 8 WARNING After plugging the MACE comms lead into a USB port Windows will search for the drivers and automatically download and install on your PC A connection to the inte...

Page 103: ...will be used to communicate with the XCi device when a local connection will be made WARNING If using a USB to Serial adapter please refer to the product documentation supplied with the adapter to ens...

Page 104: ...ter and the communications port of the HydroMACE XCi device located on the left underside of the enclosure 3 With FloCom running click Connect to Flo3 device and the Connect to Device dialogue will op...

Page 105: ...onfigured in the HydroMACE XCi device a remote communications session may be initiated 1 With FloCom running click Connect to remote site and the MACE Remote Access application will open 2 For further...

Page 106: ...nter code for your device 6 From the MACE FloCom Plus main screen click Connect and the Connect to device dialogue box will appear NOTE This counter code has a time limit on its validity typically thr...

Page 107: ...able a Remote Connection in the WebComm card After ensuring that the correct firmware versions are uploaded into the XCi device the user must ensure that the WebComm card has been enabled for a Remote...

Page 108: ...d period That is it will take the server nominally the time of one upload period to be able to initiate a remote access session For example if an XCi device is uploading to the MDS every hour the user...

Page 109: ...h the sites that can be accessed remotely The Next Wakeup column tells the user how long it is until the WebComm card at the Site name is scheduled to send an upload When remotely accessing the XCi de...

Page 110: ...emote Host Comms Session with Notifications NOTE You will only be notified by SMS Email if you have enabled Alarms and have sufficient alarm credits 6 The Status will change to Requesting and the Next...

Page 111: ...mmunications are being established Normal communications can now be undertaken using FloCom as usual The majority of functionality that can be accessed when using a local connection with FloCom may al...

Page 112: ...will prompt for the session to also be closed with the MDS If you answer No the remote session will return to the Ready state Right click on the Site name to Enter a new session or Close the session T...

Page 113: ...e Parshall Flume must be measured l Flowrate using weir channel The flow rate of the stream is calculated from the measured depth by multiplying by the appropriate equation selected using FloCom l Tot...

Page 114: ...3 Type in a Site ID Site ID The Site Id is a text field used to identify the location of the device When data is retrieved from the device it will be identified by this name For example the Site Id m...

Page 115: ...rvals NOTE The logging interval can only be a multiple of the measuring interval 5 Click Apply and the main Device Settings dialogue box will re appear Sensor power When enabled via the check box this...

Page 116: ...easure is essential to the successful configuration of the HydroMACE XCi device 1 From the main Device Settings dialogue box click Configure channels and the Configure channels dialogue box will open...

Page 117: ...ears select the FloSeries3 card and physical input see XCi Input Types from which the named channel will receive its value WARNING Each MACE card available is referenced in the list by its type and sl...

Page 118: ...el specific Edit channel dialogue box will appear 3 Edit the settings in the Edit channel dialogue box to suit your application as per the recommendations in XCi Channel Types In all cases the Edit Ch...

Page 119: ...uit the users needs 1 Highlight the Channel in the list you wish to move and click either the up or down arrows where available NOTE The order is hierarchical and certain limitations apply A Channel t...

Page 120: ...ion If a channel is given the same name as an existing channel FloCom will give an error message WARNING Renaming a Total Channel Type will necessitate the totaliser being reset FloCom will give a mes...

Page 121: ...l name that is to have the logging attribute set to yes or no right click on the highlighted channel and select Do not log or Log channel Once the attribute has been set it will appear in the Configur...

Page 122: ...igure channels dialogue box Removing configured channels 1 Highlight the Channel in the list you wish to remove and click Remove NOTE The removal is hierarchical and certain limitations apply A Channe...

Page 123: ...remove a configured card and all its associated channels WARNING Use Reset card with care Reset configuration Clicking Reset configuration causes all configured modules channels and outputs to be remo...

Page 124: ...via the File menu from the FloCom Home screen and then selecting the related option NOTE The File menu is only available when not connected to the HydroMACE XCi device View download file View MDCF fi...

Page 125: ...ng the local File function and repeating the file selection procedure Viewing a file Time stamp tree view This pane enables the user to quickly navigate the data file by date and time Expand the tree...

Page 126: ...28 52 Note Unit started Table of Status messages Status message Description Unit Started Device was started Unit stopped Device was stopped No external power No external power was detected If a solar...

Page 127: ...ad was aborted by the user Incompatible session s skipped The download includes only data since the last channel re structure NOTE These messages are NOT symptomatic of a unit failure Rather they are...

Page 128: ...saved MDCF file appears as the default selection On selecting Open the selected file is loaded and the MDCF file is displayed showing a tree view of all configured cards and their respective sensors a...

Page 129: ...l automatically find and use the appropriate settings 2 Click Apply to return to the FloCom Home screen where the Connect menu item is located See Installing FloCom Software and Connecting to an Hydro...

Page 130: ...of the main battery when connected to the device External power Provides a value in V olts of the external power source when connected to the device Device time on connection The date and time on the...

Page 131: ...FloCom WARNING If FloCom is not disconnected from the HydroMACE XCi device excess current will be drawn from the main battery NOTE It is highly recommended that once the XCi has been Started and FloC...

Page 132: ...rliest available record If the download end time is left unchanged or set to a time earlier than the earliest record all stored records will be downloaded Otherwise only those data stored after the ch...

Page 133: ...box will appear The procedure for configuring an XCi device is structured in a logical sequence so that the device is configured in the correct order WARNING For further details see FloCom The essent...

Page 134: ...on File MDCF for later viewing and or loading into another XCi device Load settings from file A previously saved MDCF file can be loaded into an HydroMACE XCi device by clicking on Load settings from...

Page 135: ...From the Load configuration dialogue note any Configuration discrepancies and assess whether or not they are to be expected If not a particular card may need to be re installed see Installing FloSerie...

Page 136: ...o XCi CANNOT be loaded into an AgriFlo XCi and vice versa A warning will be displayed Measure and display The Measure and Display function provides a quick utility to check that all connected and conf...

Page 137: ...bserve the current channel values Click Stop then Close to return to the main menu NOTE See Measure and Display function for further details SDI 12 Master utility When enabled provides the ability to...

Page 138: ...nu NOTE It is highly recommended that once the XCi has been Started and FloCom has been Disconnected that you press the button on the front of the enclosure to ensure that the LCD does NOT read Stoppe...

Page 139: ...that data can be accurately matched to known time intervals l The date and time can be set by manual entry or by synchronizing with the computer time l The time is held in 24 hour time l Allowance ca...

Page 140: ...r entry to the device channel totals may be viewed and data can be downloaded Many irrigation districts give this password to irrigators to allow them to use the data for water management operations C...

Page 141: ...s Depth can be measured in ft or in Velocity is always measured in ft s For Metric units Depth is always measured in metres and Velocity in m s NOTE If the units system is changed the configuration wi...

Page 142: ...f identifying the FloSeries3 cards that are currently installed in the device It also includes the various card firmware versions and serial numbers This information is important as functionality may...

Page 143: ...een started the Set Reset button will be active and the totalised reading can be changed NOTE Only total channels that have been configured as Resettable can have their value reset WARNING It is stron...

Page 144: ...Flow volume totals dialogue box WARNING Double check that this value is CORRECT 4 If the HydroMACE XCi device has not been stopped the Set Reset button will be greyed out and the total s will not be r...

Page 145: ...e channels have values directly received from the XCi system Full list of XCi channel types and brief description XCi Channel Types Description Velocity This channel type MUST be used whenever the res...

Page 146: ...re configured flow rate channels Total flow Used to calculate an accumulated positive or negative total based on the results obtained from a configured flow rate channel Net flow total Used to calcula...

Page 147: ...rd party sensor with digital analogue output is to be configured It should NOT be used for velocity or depth sensors where the results are required for a flow rate calculation Device battery voltage U...

Page 148: ...hannel type MUST be used whenever the resultant velocity measurement will be used in a flow rate calculation Other 3rd party velocity sensors can also be interfaced to the XCi device These sensors mus...

Page 149: ...hannel type MUST be used whenever the resultant velocity measurement will be used in a flow rate calculation Other 3rd party velocity sensors can also be interfaced to the XCi device These sensors mus...

Page 150: ...x Sensor output Offset Where l Depth measured value l Slope Sensor measuring range Span difference between the sensor output at the top of the measured range and the sensor output at zero l x Sensor r...

Page 151: ...with a frequency output Manually calculating Slope Slope Fill Height Sensor Span Fill Height The maximum depth measured by the EchoFlo Refer to the EchoFlo Quick Start Guide for further details Sensor...

Page 152: ...for an EchoFlo that has been configured with a Fill Height of 30 The following calculations will provide the sensor s slope and offset Slope 30 2000 976 30 1024 0 02929 Offset 0 02929 x 976 28 59375...

Page 153: ...lated 2 Perform either an Offset adjust or 2 point calibration to ensure accurate measuring results are recorded NOTE See either Offset adjust function or 2 Point Calibration function for full details...

Page 154: ...rds input s becomes fully utilised the card will no longer appear on the Select card list 2 Click Continue and a new dialogue box will appear with the available input types listed 3 Select the 4 20mA...

Page 155: ...on the Input list 4 Click Continue to complete the new channel The Configure channels dialogue box will re appear with the new channel listed Edit a 4 20mA input type Units This sets the units on the...

Page 156: ...provided Value at 4mA Enter the value that corresponds to an input of 4mA Value at 20mA Enter the value that corresponds to an input of 20mA Offset adjust Perform an Offset adjust to fine tune the se...

Page 157: ...becomes fully utilised the card will no longer appear on the Select card list 2 Click Continue and a new dialogue box will appear with the available Digital inputs listed 3 Select the appropriate phys...

Page 158: ...text This sets the units on the logged value This is a text field and is user defined In this example the Binary channel is being used to monitor the on off condition of a pump In the data the word ON...

Page 159: ...ards input s becomes fully utilised the card will no longer appear on the Select card list 2 Click Continue and a new dialogue box will appear with the available input types listed 3 Select the Freque...

Page 160: ...n the Input list 4 Click Continue to complete the new channel The Configure channels dialogue box will re appear with the new channel listed Edit a Frequency input type Units This sets the units on th...

Page 161: ...down of both Units and Timebase will be provided Slope and Offset See So what are Slope and Offset Offset adjust Perform an Offset adjust to fine tune the sensor readings See Offset adjust function 2...

Page 162: ...nput s becomes fully utilised the card will no longer appear on the Select card list 2 Click Continue and a new dialogue box will appear with the available input types listed 3 Select the Voltage inpu...

Page 163: ...on the Input list 4 Click Continue to complete the new channel The Configure channels dialogue box will re appear with the new channel listed Edit a Voltage input type Units This sets the units on the...

Page 164: ...down of both Units and Timebase will be provided Slope and Offset See So what are Slope and Offset Offset adjust Perform an Offset adjust to fine tune the sensor readings See Offset adjust function 2...

Page 165: ...ticular Cards input s becomes fully utilised the card will no longer appear on the Select card list 2 Click Continue and a new dialogue box will appear with the available input types listed 3 Select e...

Page 166: ...s change event channel type Units text This sets the units on the logged value This is a text field and is user defined In this example the Event channel is being used to monitor the on off condition...

Page 167: ...NOTE None of these parameters can be edited MACE XCi User Manual 167...

Page 168: ...icular Cards input s becomes fully utilised the card will no longer appear on the Select card list 2 Click Continue and a new dialogue box will appear with the available input types listed 3 Select th...

Page 169: ...nput will no longer appear on the Input list 3 Click Continue to complete the new channel The Configure channels dialogue box will re appear with the new channel listed Edit Shaft encoder input See So...

Page 170: ...fully utilised the card will no longer appear on the Select card list 2 Click Continue and a new dialogue box will appear with the available input types listed NOTE Only Digital input 3 can be used f...

Page 171: ...d scales the pulse to match the units being used For example if 1 kilolitre pulses and megalitre units are used the factor would be 0 001 where as if 1 kilolitre pulses and kilolitre units are used th...

Page 172: ...x select the Pulse Card from which the named channel will receive its value NOTE As a particular Cards input s becomes fully utilised the card will no longer appear on the Select card list 2 Click Con...

Page 173: ...time over which the pulses will be counted and averaged This average is then used to calculate a rolling average which may help in applications with unstable flow rate pulsing Non Continuous measurem...

Page 174: ...units and the timebase from the drop down list boxes This sets the units on the logged value k factor The k factor scales the input pulses to the selected flow rate units The k factor maybe entered d...

Page 175: ...to run The SDI 12 Master Utility PRIOR to adding new SDI 12 channels Add a new SDI 12 input type 1 In the New channel dialogue box select the SDI 12 Master card from which the named channel will recei...

Page 176: ...Address This shows the sensor address on the SDI 12 bus Command This shows the current SDI 12 command that will be sent to the sensor when starting a measuring sequence By default this will be a C co...

Page 177: ...field or the bus may behave erratically Edit an SDI 12 input type Units This sets the units on the logged value This is a text field and is user defined NOTE If a Velocity or Depth channel type is co...

Page 178: ...te using velocity channel will receive its value 2 Click Continue and the Flowrate measurement type dialogue box will appear 3 Select either Full circular pipe or Circular pipe using depth depending u...

Page 179: ...diameter or Cross sectional area when configuring a Flowrate using velocity channel is preset when the Velocity channel is added to the configuration Siltation depth This parameter can be used to corr...

Page 180: ...ing the polynomial coefficient method the user must set the Depth limit at which the polynomial reaches a maximum For example if a channel has a maximum depth of 1 0m the Depth limit should be set at...

Page 181: ...nd the MACE FloCalc Coefficients dialogue box will appear 4 Click Copy to Clipboard then click Close and exit from FloCalc 5 The FloCalc parameters dialogue box will appear containing the calculated p...

Page 182: ...MACE XCi User Manual 182...

Page 183: ...x will appear 3 Select either Full circular pipe or Circular pipe using depth depending upon your application 4 If you select Full circular pipe click Continue to complete the new channel If you selec...

Page 184: ...channel is added to the configuration Siltation depth This parameter can be used to correct the calculated flow rate if a known amount of silt is inside the pipe The depth of silt will be subtracted...

Page 185: ...ing the polynomial coefficient method the user must set the Depth limit at which the polynomial reaches a maximum For example if a channel has a maximum depth of 1 0m the Depth limit should be set at...

Page 186: ...nd the MACE FloCalc Coefficients dialogue box will appear 4 Click Copy to Clipboard then click Close and exit from FloCalc 5 The FloCalc parameters dialogue box will appear containing the calculated p...

Page 187: ...MACE XCi User Manual 187...

Page 188: ...okup table of a rated structure Add a Flowrate using lookup table channel type 1 When adding the New channel select the related Depth channel from the drop down list 2 Click Continue and the Configure...

Page 189: ...kup table has a maximum of 35 lines available for use This maximum is memory dynamic and may be reduced depending upon other channel configurations Edit import 1 From the Flowrate Using lookup table d...

Page 190: ...ick Open and the values will be imported NOTE The CSV table should be in the format of two columns one for Depth and the other Flowrate Any text in the data will cause a parsing error and should be re...

Page 191: ...ion Hydraulics Laboratory in Denver Colorado USA The equations used by the XCi device s and reproduced here are used with permission of U S Dept of the Interior Bureau of Reclamation Hydraulic Investi...

Page 192: ...owrate units Select the units and the timebase from the drop down list boxes This sets the units on the logged value Flowrate Weir Rectangular and Cipoletti weirs Flume width Enter the width of the we...

Page 193: ...lus flumes Flume factors Long throated flumes are custom designed The values of K1 K2 and U are determined by the designer using software such as WinFlume available from WinFlume Flowrate Weir Parshal...

Page 194: ...XCi implementation of the Mannings equation into a Flowrate using trickle flow channel uses the derived Velocity measurement used in conjunction with the Depth measurement ONLY from a MACE A V Dopple...

Page 195: ...Mannings equation This equation is limited to a depth of half full circular pipe When the pipe is more than half full the Flowrate using trickle flow channel will revert to using the standard continui...

Page 196: ...measured by the MACE Area Velocity Doppler sensor NOTE Crossover depth is limited to half the diameter of the pipe Mannings coeff Enter the surface roughness of the pipe Alternatively click on and se...

Page 197: ...Pipe gradient Enter the Pipe gradient of the measuring site This is calculated and entered as a decimal percentage For example a Pipe gradient of 1 should be entered as 0 01 MACE XCi User Manual 197...

Page 198: ...Flowrate of any type channels NOTE Only Flowrate channels with the same flowrate units can be included NOTE Before proceeding decide the order in which the Net flowrate channel will be calculated This...

Page 199: ...uent Flowrate channel will be added to its value Filter Check the radio button for the Flowrate channel values that you wish to include in the Net flowrate channel In the example the channel named Flo...

Page 200: ...NOTE In the example the Net flowrate will be the sum of Flow Rate 1 Flow Rate 2 Flow Rate 3 MACE XCi User Manual 200...

Page 201: ...mum of five flowrate channels can be totalised together 2 Select either Totalise positive flow or Totalise negative flow depending upon your application WARNING The Totalise positive flow type will on...

Page 202: ...settable using the Set reset procedure from the View totals main menu item NOTE If the Non resettable checkbox is ticked this total flow channel will not be re settable using the front panel button pr...

Page 203: ...of any type channels and accumulate a totalised value NOTE Only Flowrate channels with the same flowrate units can be included NOTE Before proceeding decide the order in which the Net flow total chan...

Page 204: ...ent Flowrate channel will be added to its value Filter Check the radio button for the Flowrate channel values that you wish to include in the Net flow total channel In the example the channel named Fl...

Page 205: ...ices ON OFF based on various measured parameter values WARNING The Binary Status Output is provided as is without any guarantees or warranty MACE makes no warranties of any kind either express or impl...

Page 206: ...OFF when above level The related Binary status output will be turned ON when the input channel value is greater than the Level value and OFF when the input channel value is less than the Level value...

Page 207: ...atus output will be turned ON when the input channel value is less than the Upper limit and greater than the Lower limit The related Binary status output will be turned OFF if the input channel value...

Page 208: ...y sensor is measuring 1 0m s then the velocity ratio will be 0 95 1 0 or 0 95 In the example below a stream is measured at four depth regimes and four ratios have been determined Situations such as a...

Page 209: ...s here For example Factor ratio for Zone 4 will be applied for stream depths between zero 0 and 0 3m Factor ratio for Zone 3 will be applied for stream depths between 0 3m and 0 7m Factor ratio for Zo...

Page 210: ...onfigured lookup table of the storage geometry Add a Volume using lookup table channel type 1 When adding the New channel select the related Depth channel from the drop down list 2 Click Continue and...

Page 211: ...s a maximum of 50 lines available for use This maximum is memory dynamic and may be reduced depending upon other channel configurations Edit import 1 From the Volume Using lookup table dialogue box cl...

Page 212: ...Click Open and the values will be imported NOTE The CSV table should be in the format of two columns one for Depth and the other Volume Any text in the data will cause a parsing error and should be re...

Page 213: ...Device battery voltage channel type This channel is used to monitor the XCi device internal battery voltage MACE XCi User Manual 213...

Page 214: ...Device external voltage channel type This channel is used to monitor the XCi device external voltage from a solar panel or mains charger MACE XCi User Manual 214...

Page 215: ...channel requires 30 seconds to calculate a velocity the the values will be updated every 30 seconds and so on 1 From the Edit configuration settings dialogue click Measure and Display and the View me...

Page 216: ...case a depth sensor with frequency output is displayed at the top of the window and is updated approximately once per second 2 To adjust the Current value enter your current measured value in the Cor...

Page 217: ...n prepare the measurement set up for the first calibration point either the sensors upper or lower range limit 3 When the Current value has stabilised click on the Set button in the 1st point box The...

Page 218: ...d 8 Click on the Accept button to calculate the new slope and offset parameter values for the associated channel Clicking on the Cancel button terminates the procedure without altering the parameter v...

Page 219: ...ors The user can send all defined SDI 12 commands as implemented in Version 1 3 of the SDI 12 Protocol specification Download from http www sdi 12 org 1 From the Device settings dialogue box click SDI...

Page 220: ...than one sensor is connected to the bus all sensors will respond causing a bus contention If multiple sensors are connected to the bus the user must ensure that they have an alternative means of ident...

Page 221: ...ple the sensor on Address 1 has responded to an Acknowledge active Send ID WARNING It is imperative that the correct sensor address be entered into the Address field prior to sending this command Ente...

Page 222: ...sponse field Example 1 The C command In the example the sensor on Address 1 of the SDI 12 bus has responded to a C command with the Response 101504 The 1st digit is the Address identifier 1 The 2nd 3r...

Page 223: ...0 4 0 The 1st digit is the Address identifier 1 The four measurement values with a polarity sign follow WARNING The user MUST ensure the position of the measurement values in the string are noted BEFO...

Page 224: ...ay output say 5 36 pulses litre in a DN150 pipe These pulses do not constitute a Flow rate since all we know is how many pulses are sent for a litre of liquid that passes through the pipe 5 36 To make...

Page 225: ...K factor to give volume per unit time The known meter pulses unit volume must be converted to the required flow rate units and timebase for use by the FloSeries3 Pulse card using the following method...

Page 226: ...curate and preferably calibrated flow meter as your primary source of known flow rate 1 Click Calibrate from the Edit channel dialogue box and the Calibrate channel dialogue box will appear Current pu...

Page 227: ...ow in the pipe should be obtained Over a number of minutes the Current pulse rate should stabilise 3 Once the Current pulse rate has stabilised enter the actual flow rate value in the Flowrate units c...

Page 228: ...ncillary devices that can be proportional to a 4 20mA current For example velocity or flow rate data may be sent to a SCADA system From the Device settings dialogue box click Configure outputs and the...

Page 229: ...he output will send its 4 20mA current and click Continue 4 Select the Source channel from the drop down list that you wish to output and click Continue NOTE Only channels that are suitable for output...

Page 230: ...ter than the logging interval then the 4 20mA output will be the average of those values calculated per measurement interval Click Apply to save the settings then click Exit to return to the Configure...

Page 231: ...Click Send and the set Output value will be sent Remove a 4 20mA output 1 From the Configure outputs dialogue box highlight the output you wish to remove and then click Remove 2 You will be prompted...

Page 232: ...ncillary devices that can be proportional to a 4 20mA current For example velocity or flow rate data may be sent to a SCADA system From the Device settings dialogue box click Configure outputs and the...

Page 233: ...he output will send its 4 20mA current and click Continue 4 Select the Source channel from the drop down list that you wish to output and click Continue NOTE Only channels that are suitable for output...

Page 234: ...ter than the logging interval then the 4 20mA output will be the average of those values calculated per measurement interval Click Apply to save the settings then click Exit to return to the Configure...

Page 235: ...Click Send and the set Output value will be sent Remove a 4 20mA output 1 From the Configure outputs dialogue box highlight the output you wish to remove and then click Remove 2 You will be prompted...

Page 236: ...d totaliser pulses to ancillary devices For example a pulse may be sent whenever one 1 MegaLitre of water passes through a pipe From the Device settings dialogue box click Configure outputs and the Co...

Page 237: ...d its pulse and click Continue 4 Select the Source channel from the drop down list that you wish to output and click Continue NOTE Only channels that are suitable for Pulse outputting will be availabl...

Page 238: ...e box Test a Pulse output From the Edit Total pulse output dialogue box click Test 1 Enter the Number of pulses that you wish to send to the connected pulse counting device 2 Click Send and the pulses...

Page 239: ...put is provided as is without any guarantees or warranty MACE makes no warranties of any kind either express or implied including but not limited to warranties of merchantability or fitness for a part...

Page 240: ...ate physically wired outputfrom which the output will set its status ON OFF and click Continue 4 Select the Source channel from the drop down list that you wish to output and click Continue NOTE Only...

Page 241: ...alogue box highlight the output you wish to test and then click Edit The Test Binary status output dialogue will appear 2 Click Test and the Binary status will be set to ON 3 Click Exit to return to t...

Page 242: ...output 1 From the Configure outputs dialogue box highlight the output you wish to remove and then click Remove 2 You will be prompted to confirm the removal Click Yes and the output will be removed MA...

Page 243: ...parameters that have been configured to be displayed The display has a backlight that switches off after a 30 second period of inactivity The LCD can be switched on and illuminated simply by pressing...

Page 244: ...ump is being adjusted it may be necessary to force a measurement to see that adjustment take effect 1 Momentarily press either of the Up Down buttons on the front of the HydroMACE XCi device to wake u...

Page 245: ...device to wake up the LCD 2 Continue to toggle through the channel parameters set up in the device by using the arrow key until the resettable total you are interested in is displayed 3 Press and hold...

Page 246: ...key until Test display is displayed 3 Press and hold both the Up and Down buttons simultaneously for three 3 seconds After three seconds the display will commence scrolling through all possible alpha...

Page 247: ...MACE representative for site related issues with an XCi device the following files WILL be needed 1 Download device and save data file 2 Save the Settings of the device 3 If a Doppler card sensor is p...

Page 248: ...ry replace if necessary Sensor SM Bus error Re initialise XCi device Faulty controller card Return to MACE for service MACE USB comms cable not connected to the USB port Plug cable into USB port of PC...

Page 249: ...f present unchecked Check Always use MACE cable if present Incorrect pass word has been used to Connect Check the password or follow the pro cedure What to do if the password is lost forgotten No inco...

Page 250: ...heck solar panel for dirt and clean if necessary Check solar panel is plugged in Check wiring of solar panel is correct polarity Check XCi charging circuit No external power Check trickle charger is p...

Page 251: ...sys tem Electromagnetic interference EMI causing false flow Find source of EMI and rectify if possible My total is not increasing Total channel set up as Neg ative only Check Total in FloCom My total...

Page 252: ...sired ft or in Slope offset incorrectly entered Check slope offset entered cor rectly Slope offset units wrong Check that slope offset units are correct off the tag Slope offset calculated incor rectl...

Page 253: ...ss one of the front buttons XCi has no power Check power and rectify LCD ribbon cable loose inside XCi Check ribbon cable LCD board faulty Return to MACE for service on the LCD Keypad button s are cor...

Page 254: ...Update XCi firmware Card is physically installed in a different Slot than FloCom thinks Error on microprocessor bus 1 Disconnect from XCi remove all power inc battery and solar panel 2 Wait 1 min 3 C...

Page 255: ...ill be informed of this requirement in the email notification WARNING If your device is still running V1 X X X firmware please contact your local MACE representative You CANNOT run this simple firmwar...

Page 256: ...r includes update apps for all field upgradeable FloSeries3 cards Your system may or may not have applicable cards installed The updater will only load firmware into cards in your device 1 Click Updat...

Page 257: ...ram will confirm that the update is complete 5 You will be returned to the Flo Series3 Updater dialogue box Click Finished to exit from the program After the upgrade 1 Connect to the HydroMACE XCi dev...

Page 258: ...your vendor for a replacement battery NOTE MACE recommends the main battery is replaced every 5 7 years regardless of perceived battery status to ensure system longevity Removing the old battery 1 Di...

Page 259: ...ry cable to the new battery with the red lead to the positive terminal of the battery and the black lead to the negative terminal 2 Place the battery in the main enclosure and hold it in place 3 Secur...

Page 260: ...5 Tighten all three screws 6 Reconnect the battery cable assembly to the backplane board MACE XCi User Manual 260...

Page 261: ...ese type of build ups can affect the performance of the solar panel and result in a decrease of the charge that is received by the internal battery The solar panel should be cleaned with a wet brush o...

Page 262: ...stopped and the main battery will last at least 6 months NOTE If the XCi is not going to be used for more than 6 months the XCi device should be put on a 16 30VDC charger periodically to keep the bat...

Page 263: ...ws 8 1 will ensure that the MACE driver is installed 3 Navigate to the Device manager in your version of Windows 4 You will see a tree item called Other devices where the uninstalled marked with an ma...

Page 264: ...6 Navigate to the MACE Website and Run the driver setup file 7 Upon completion the USB Serial port properties will show that the device is now installed MACE XCi User Manual 264...

Page 265: ...MACE XCi User Manual 265...

Page 266: ...0 363 l Phillips screwdriver 2 1 Connect to device with FloCom and Download data Stop device then Save settings to file Disconnect and shut FloCom 2 Disconnect the battery by un clipping the white con...

Page 267: ...ich they were removed This should be done one card at a time with at least a 30 second delay between each card 8 When all cards have been replaced re install the bracket that holds in the cards WARNIN...

Page 268: ...onvenient 3 Complete the Cleaning Certificate download here Make a copy of the certificate and tape it to the outside of the box The original certificate should be packed with the goods If cleaning is...

Page 269: ...als and workmanship under normal use and service for a period of one year from date of shipment to the end user or two years from the date of manufacture whichever comes first 5 Goods that are returne...

Page 270: ...within the warranty period 16 This warranty is to the benefit of the original purchaser only and is not transferable on the re sale of the Product without the expressed written approval of MACE 17 Su...

Reviews: