IO-390-D Series Engine Maintenance Manual
74-20
© 2020 Avco Corporation. All Rights Reserved
Page 276
March 2020
IO-390-D Series Engine Maintenance Manual
C.
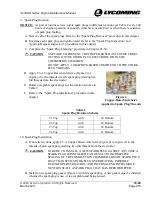
Install the spark plug in the cylinder top and bottom (Figure 2).
D.
Torque the spark plug per instructions in the latest revision of Service Instruction No. SI-
1042.
E.
Connect the spark plug to the applicable ignition lead per the “Ignition Harness Installation”
procedure in this chapter.
F.
Torque the spark plug lead nut per instructions in the latest revision of Service Instruction
No. SI-1042.
11.
Ignition Harness Removal
A.
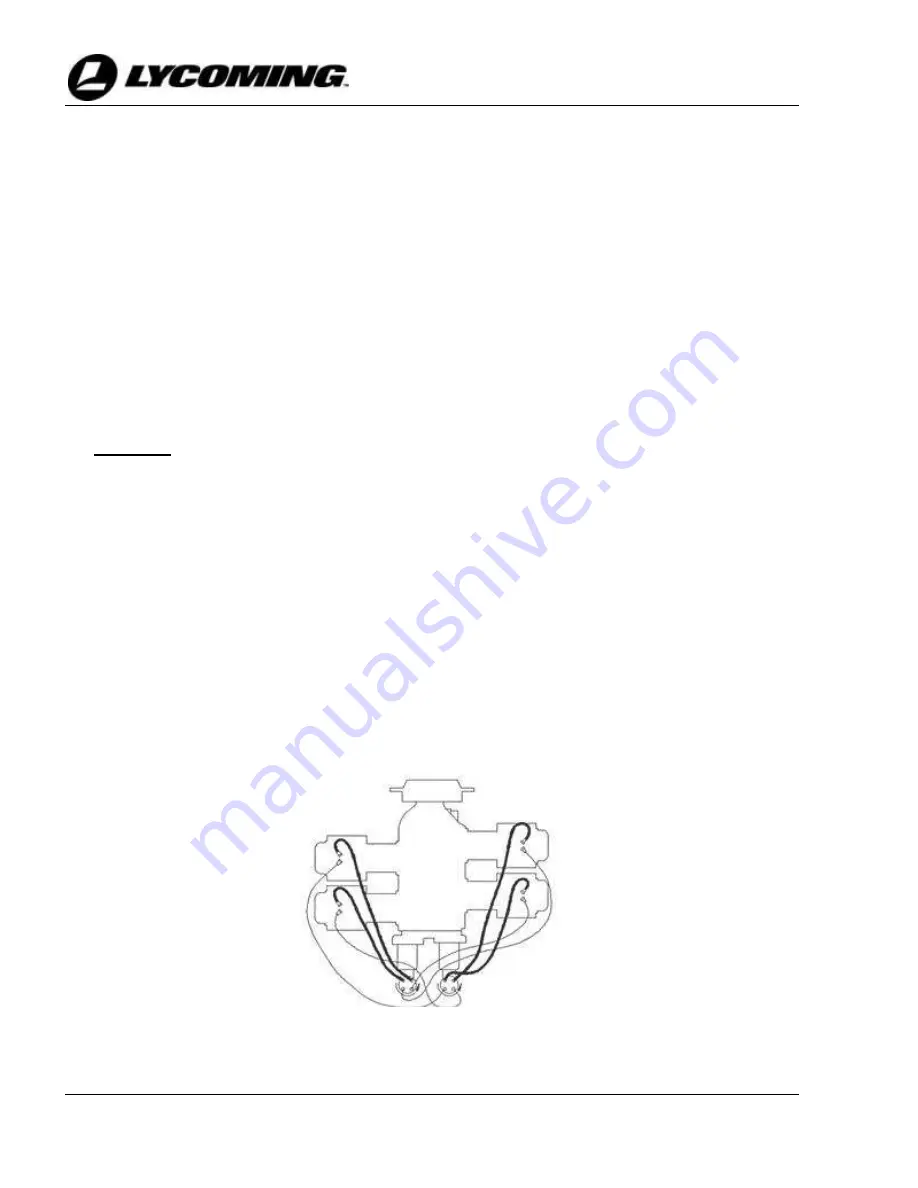
Remove the ignition harness (Figure 5) from the engine harness.
B.
Disconnect the clamps that attach the ignition harness to the engine.
C.
Remove the screws which attach the harness cap to the magneto or EIS.
D.
Disconnect the ignition leads from the spark plugs.
E.
Remove the ignition harness.
NOTICE:
The left ignition harness is marked "left." The right ignition harness is marked
"right."
12.
Ignition Harness Inspection
A.
Examine the ignition harness (Figure 5) for broken, frayed, chafed, abraded, degraded,
overheated or damaged wiring and connections. Replace the ignition harness if a wire is
broken, frayed, chafed, abraded, degraded, overheated, or damaged. Wiring degradation
includes:
(1)
Degraded wire repairs or slices
(4)
Cracked insulation
(2)
Heat damaged or burnt wire
(5)
Arcing
(3)
Vibration damage or chafing
(6)
Insulation delamination
B.
Examine the ignition harness, cables, and clamps for wear or damage. Replace any worn or
damaged cable or clamp per the aircraft manufacturer's instructions.
C.
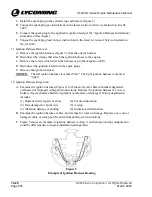
Figure 5 shows an example of ignition harness routing. Your harness routing configuration
could be different due to engine installation arrangement.
Figure 5
Example of Ignition Harness Routing


