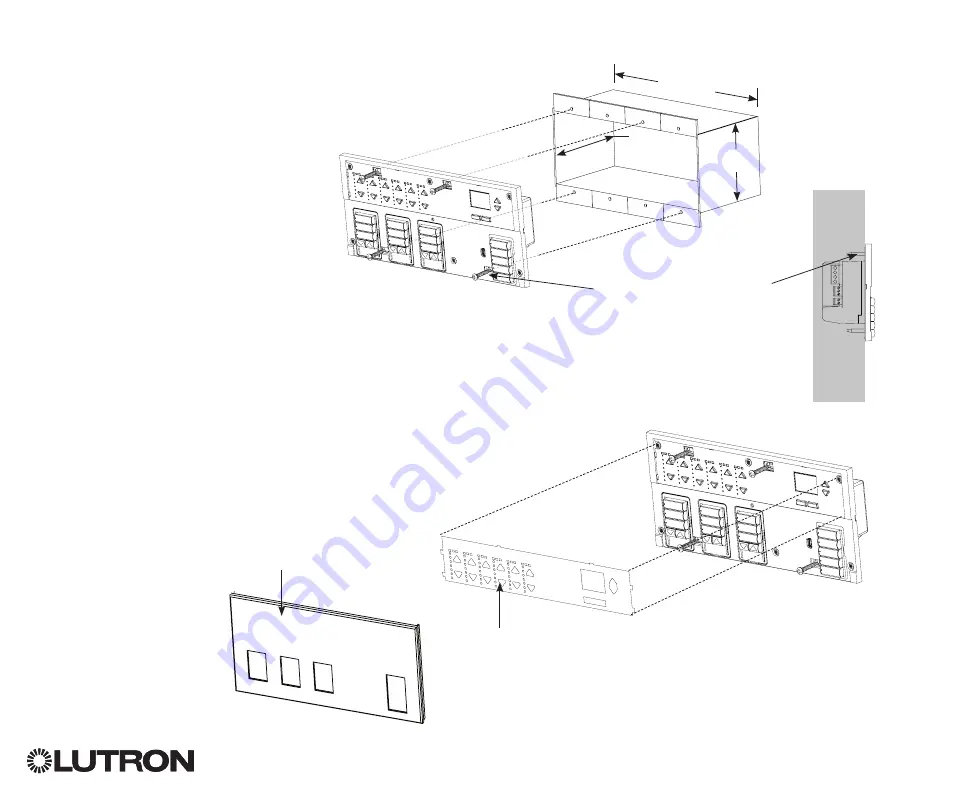
Completing Installation
1. Mount the QS Timeclock in the wallbox
as shown using the four screws pro vid ed.
Note:
Follow all local and national
electrical codes when installing IEC PELV/
NEC
®
Class 2 wiring with line voltage/
mains wiring.
2. Verify installation.
3. Restore power.
4. Apply the protective overlay to the QS
Timeclock.
QS Timeclock Installation and Operation Guide 8
Note:
When tightening mounting
screws, make sure that the hinged
cover and faceplate will open fully,
as shown.
Wall
7.9 in
(200 mm)
3.5 in
(87 mm)
3.75 in
(95 mm)
Protective overlay
(apply after installation)
Faceplate
(apply after installation)
®


